For my final project, I decided to work with natural dyes.
I have always been interested in using natural dyes, so when we did a lab with natural dyes this year, I wanted to expand upon that work. I decided to create an entire outfit using naturally dyed materials and pieces. I like to sew, so a lot of this would also be a sewing challenge for myself. I also tried to use thrifted and up-cycled materials for this project.
MATERIALS & PIECES

From left to right:
1. Converse: This was an old, beat up pair of converse I found at home. I decided to try to dye them because they have a canvas upper, and I thought they dye would hold well. I also thought a new color could give them some life.
2. Muslin: I used two types of muslin, both 100% cotton. One was a little bit thicker and heavier than the other, which made it a bit more expensive, so I bought some more muslin of a lighter, more inexpensive kind.
3. Jacket: This denim jacket I found at the thrift store, it isn't perfectly white but it is light enough to where I don't have to bleach it. Because it is a thrift find, I can't be sure of the material makeup, but it's denim so it's most likely a majority cotton.
4. Linen: I originally wanted to do an 100% linen piece, but a pure linen fabric was very pricy, so I used a 55% linen/45% cotton blend.
5. Mystery knit: This white knit I found in my shed at home. A lot of my family sews, and so I think this fabric probably came from my grandma's house, but it was up for grabs. It's a very stretchy, thick knit but I'm not sure of the material makeup, so this one will be a bit of a mystery.

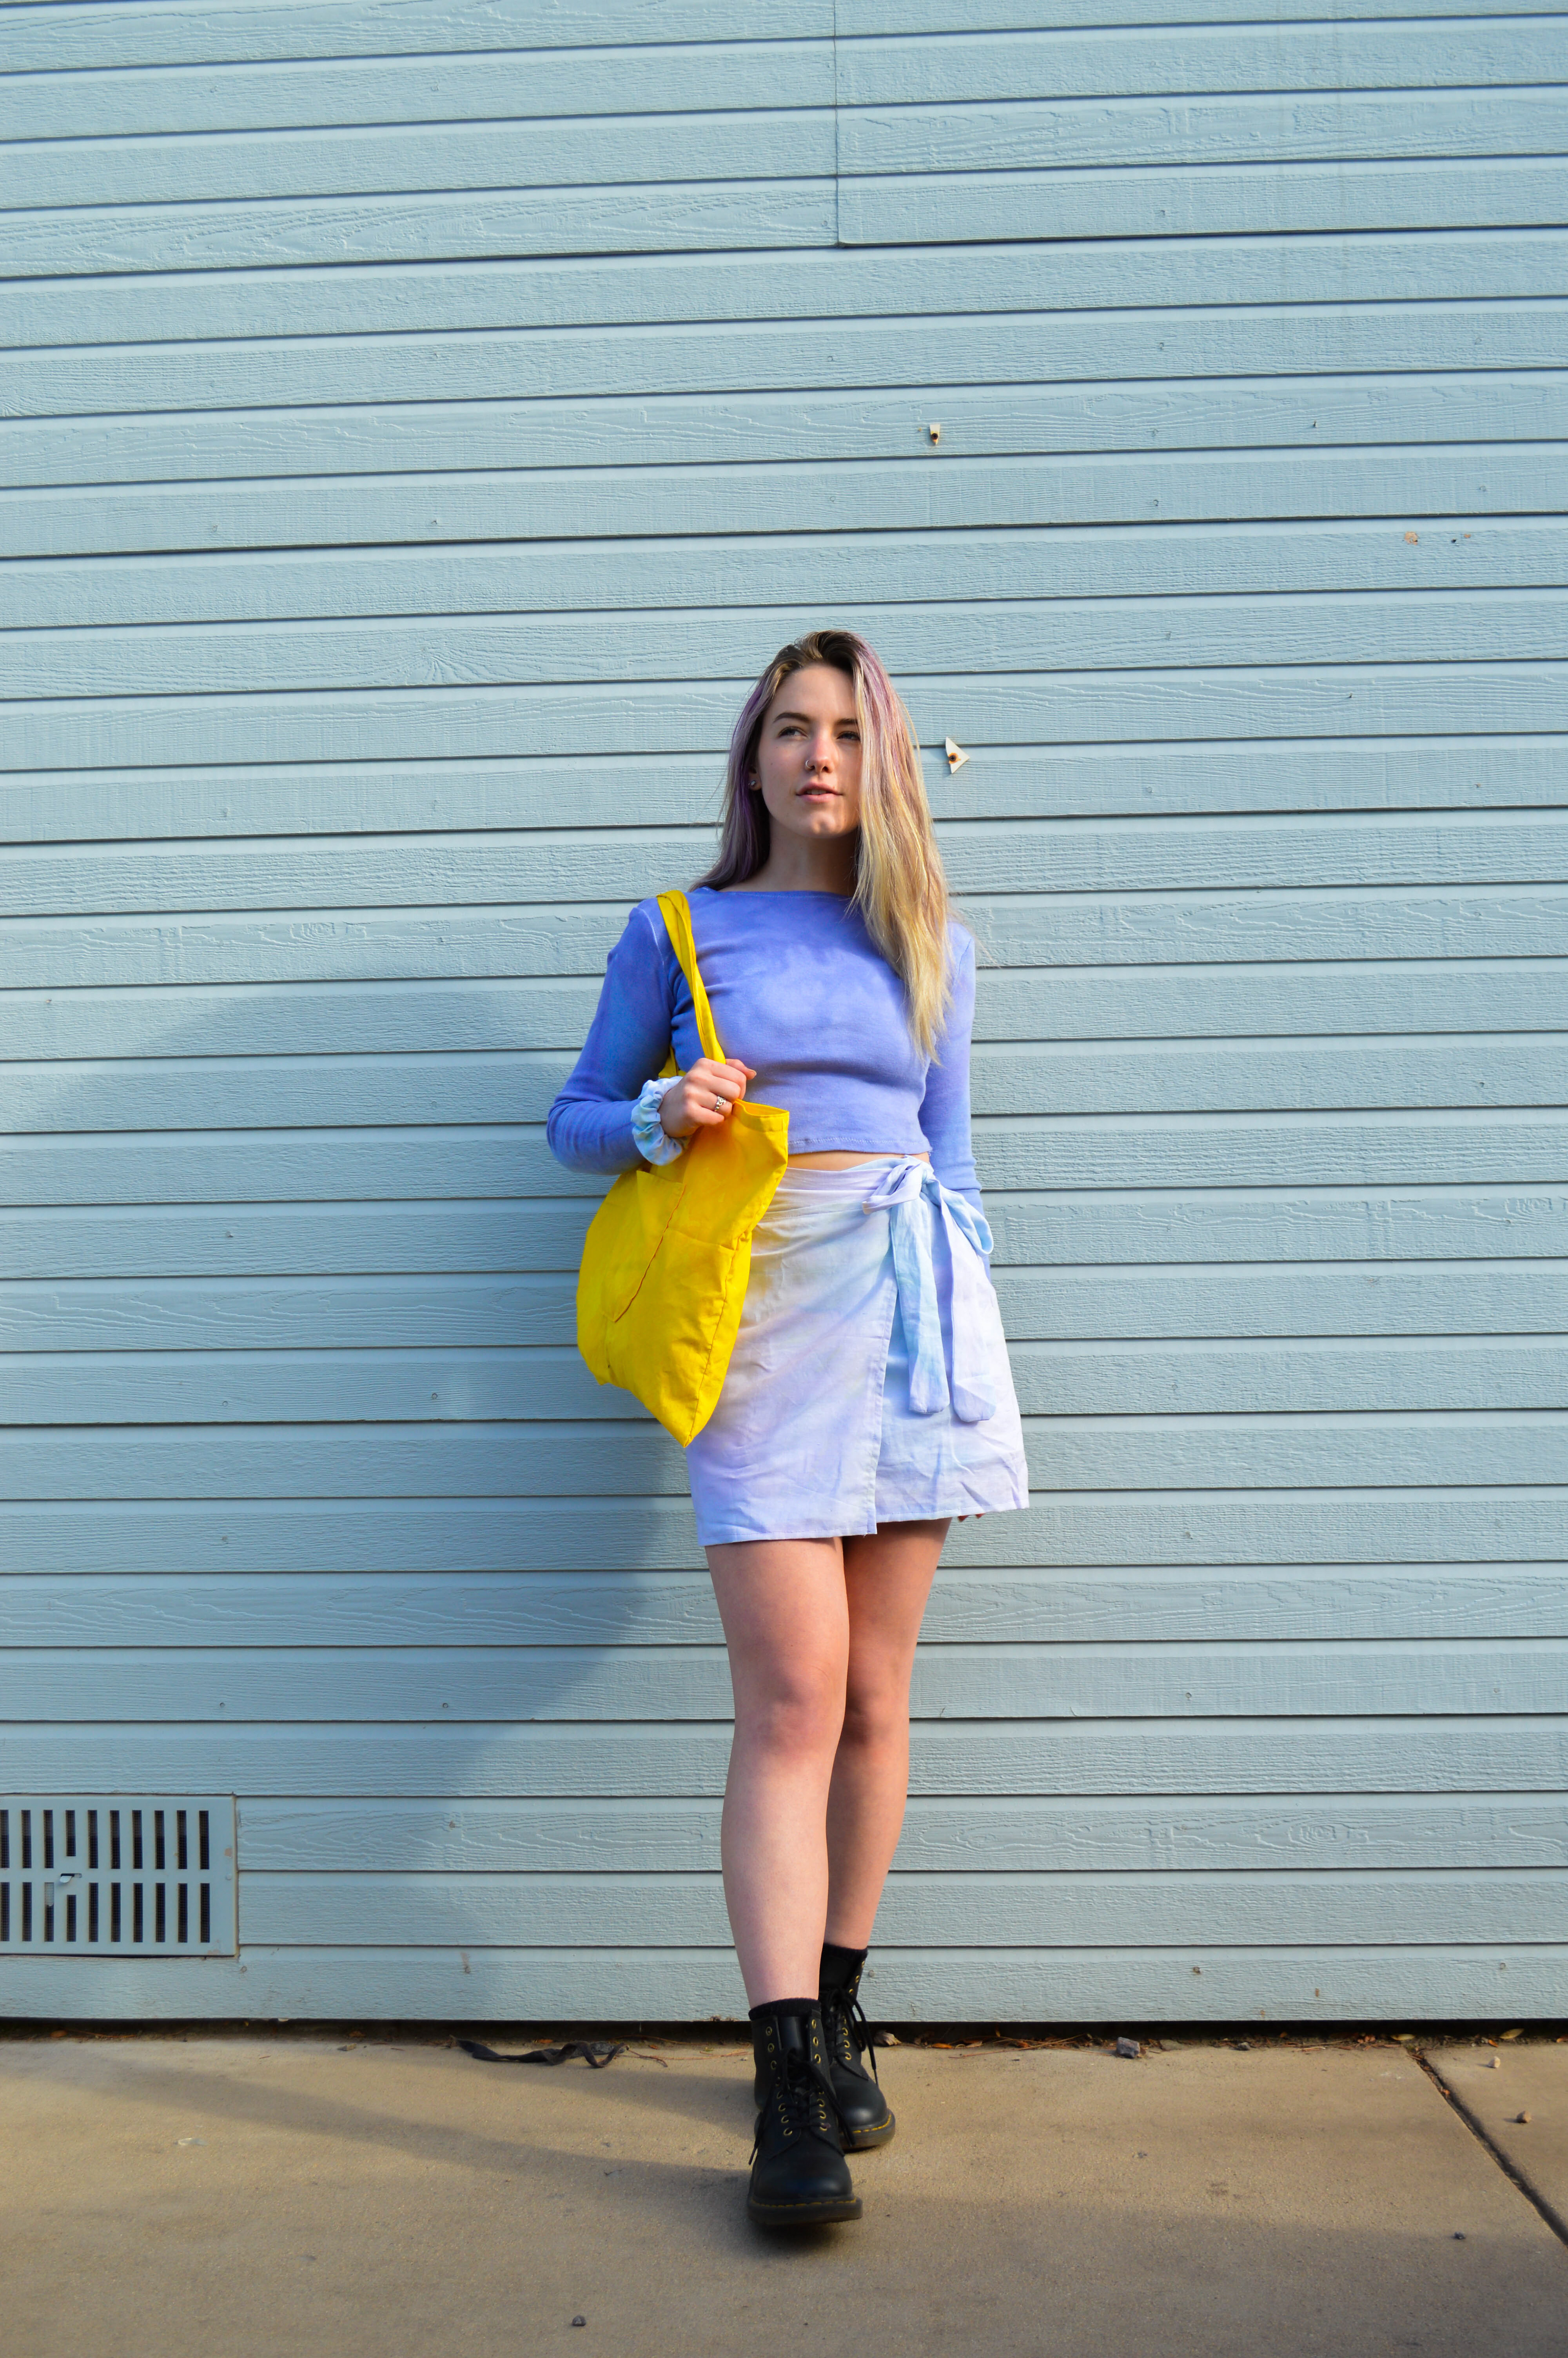
I decided to turn the mystery knit into a long-sleeve top, and the linen blend into a wrap skirt. I sewed the shirt prior to dyeing, but I dyed the linen fabric before I made it into a skirt. The heavier muslin would be used for a tote bag, and the light muslin would be used to sample each color of dye and create fabric swatches. I wanted to be able to see the results of each dye independent of material, so I dyed the same fabric for each. I also tied up some of the muslin with rubber bands to try to create a tie-dye effect for some of the dyes.
For the colors, I chose 4 dyestuffs to assign to different materials and pieces, all that would hopefully create a wide array of colors.
Red/Pink - Beets: I chose the jacket to be dyed red, because I definitely didn't want to dye it blue, or anything too similar to classic denim.
Yellow - Turmeric: I used turmeric for the in-class lab, and it worked really well, so I decided to use it again for a bright, sunshine yellow to complement my cooler toned dyes. I decided to dye the tote bag with turmeric, because the rest of the outfit would have an analogous palette, so I decided to use a complementary accessory. I'm also dyeing the shoes with this, mostly out of curiosity, but this color is the strongest so I think it would work the best on shoes of any.
Blue - Black beans: I wanted the outfit to be an analogous palette, so I chose to dye the top with black beans to make blue. I think blue complements my complexion and eye color well, so I like to wear it on tops.
Purple - Red cabbage: I chose to dye the skirt purple, to complete my analogous palette outfit. I also wanted to play around with the red cabbage, because I read online that you can change the dye color by changing pH, so I may get more than purple from this dye.

PREP
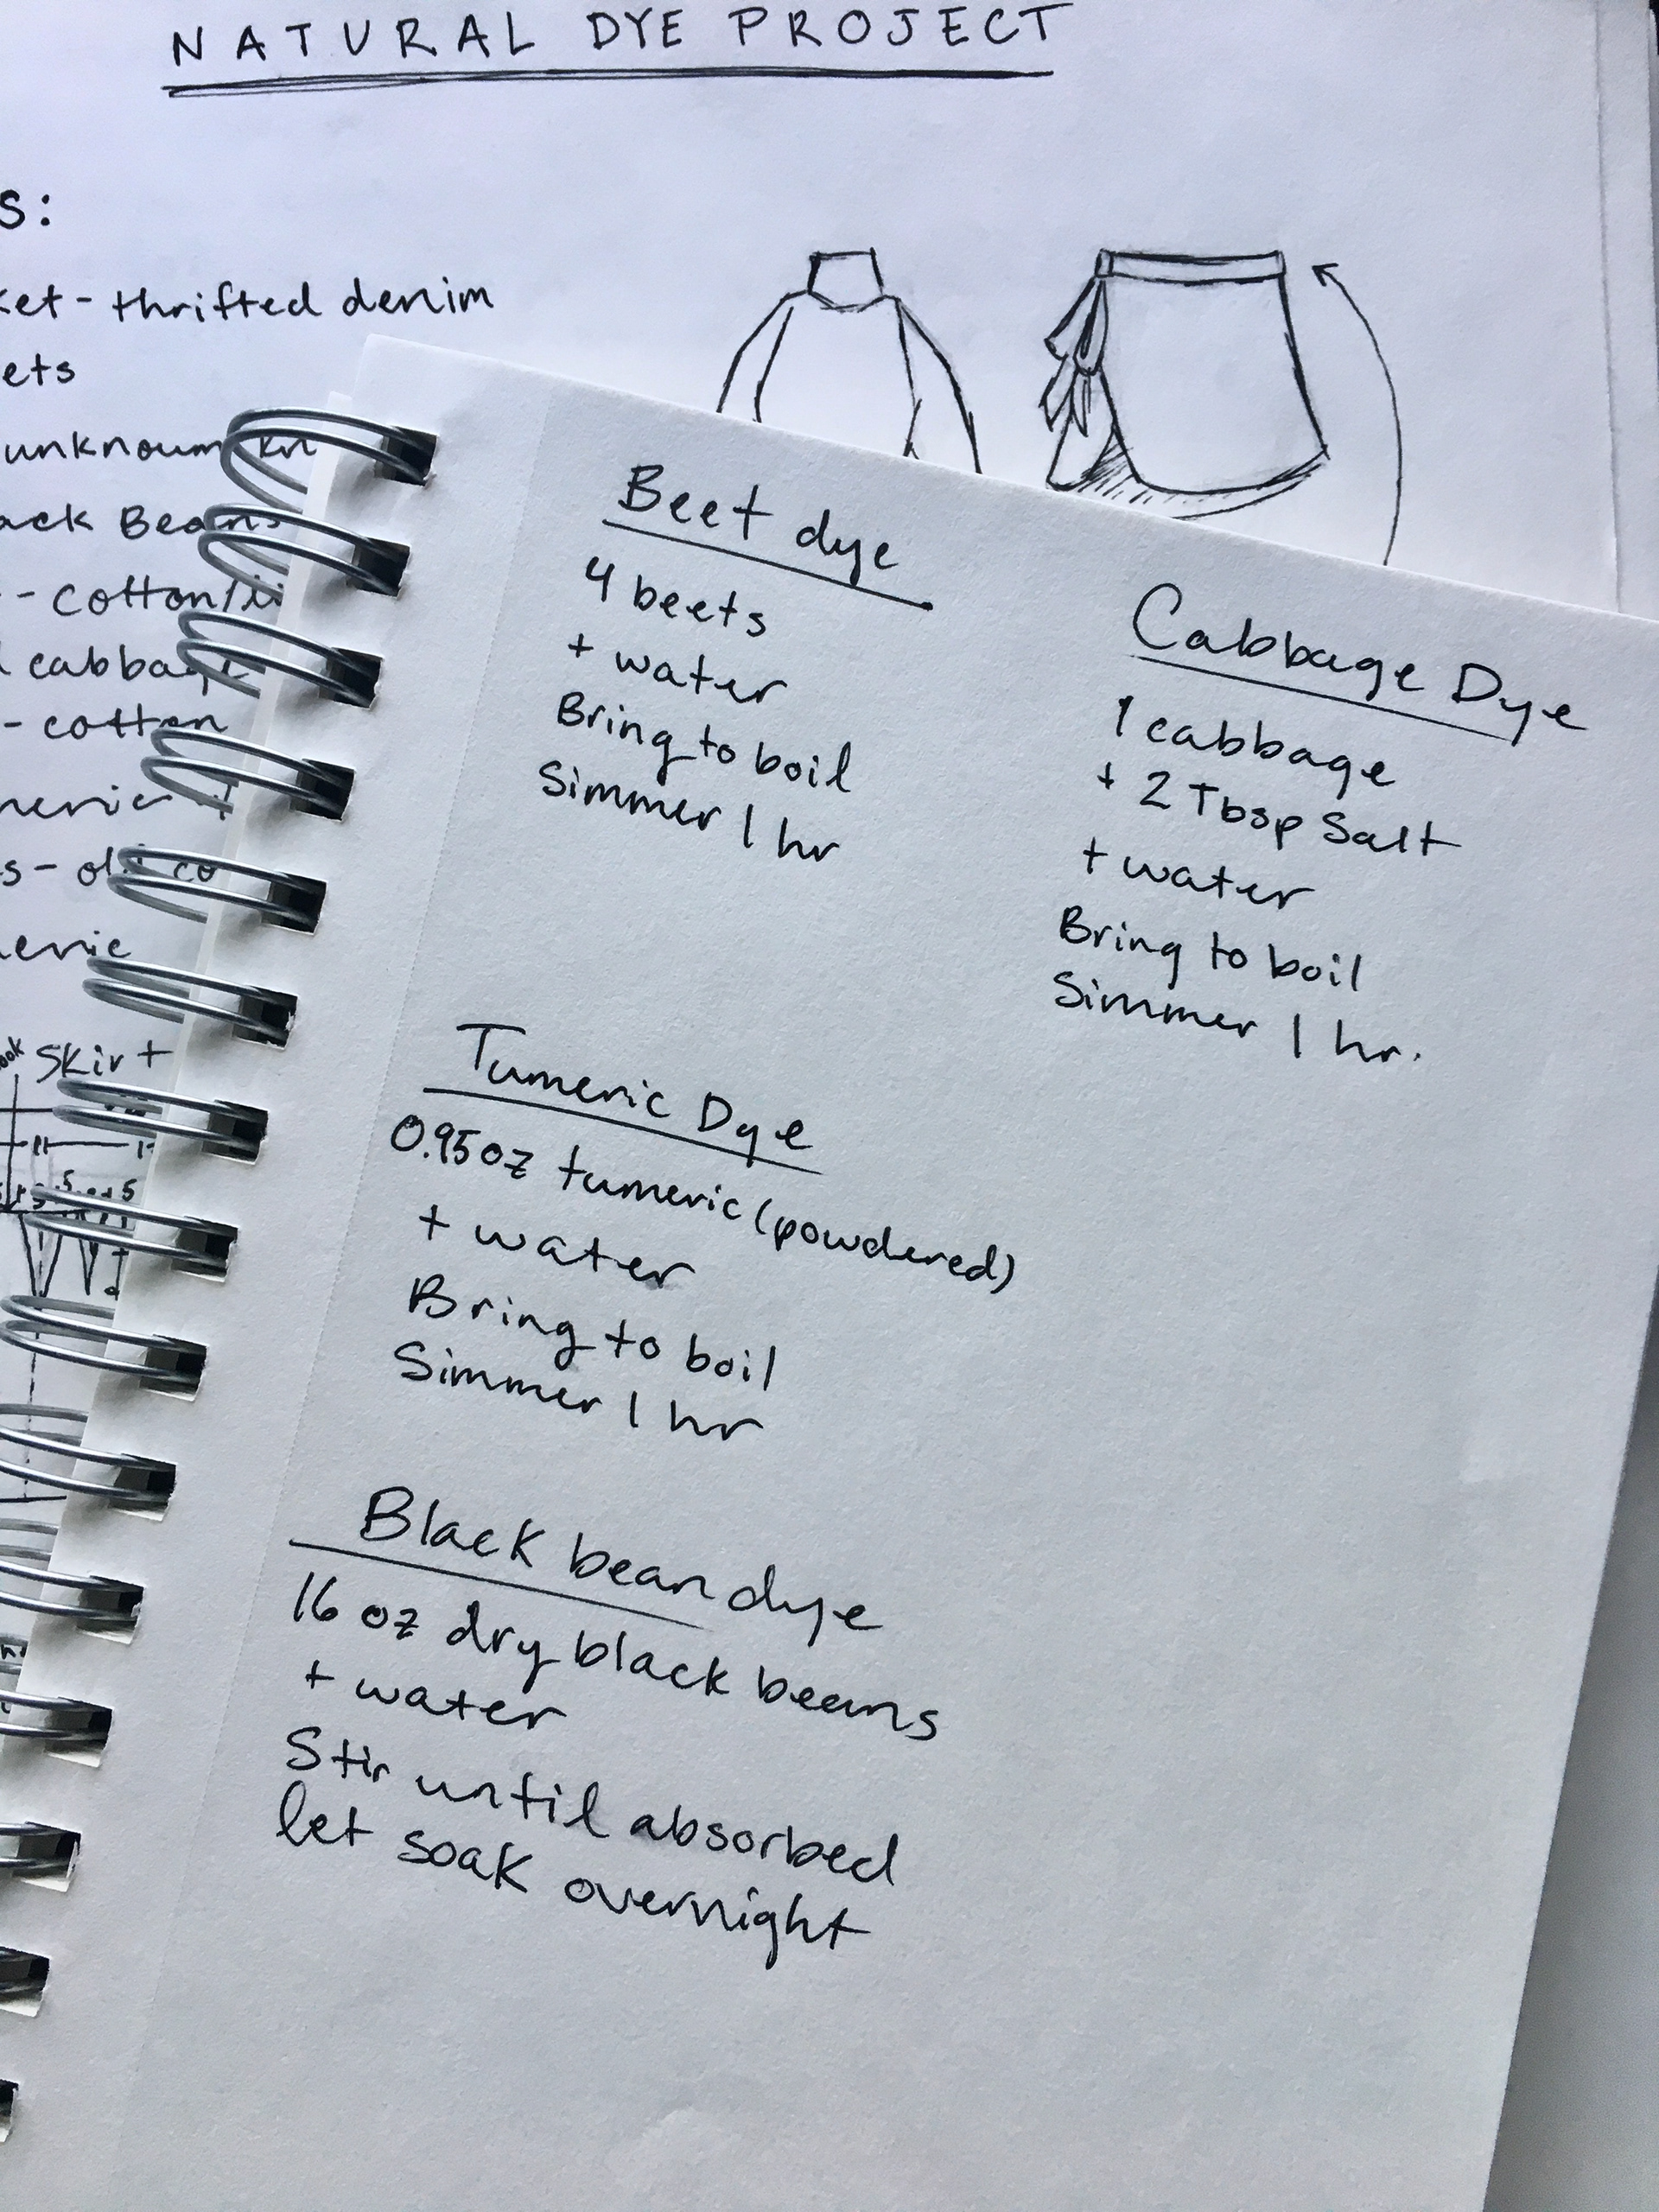
Before dyeing with natural dyes, you need to mordant the materials. The mordant is a chemical that acts as a fixative to for the dye to the materials, kind of line a chemical glue. There are lots of chemicals that can be used, but I decided to use Alum, which I found at my local grocery store. I mixed 2 containers of alum (1.9 oz each, 3.8 oz total) with about a quart of boiling water in a large bucket. I continued to add warm water while the alum dissolved, and once it dissolved, I added the fabrics into the bucket, and then topped it off until covered with more warm water. I let these soak for a little over a day.


MAKING THE DYE
For my dye stuffs, I decided to use beets for red, turmeric for yellow, black beans for blue, and red cabbage for purple. Each of them had a bit of a different process, but for most I used a boiling process to create the dye.
The red cabbage, beets, and turmeric were all prepped and put on the stove, brought to a boil, and then left to simmer on a low heat for roughly 1-2 hours. I also added some salt to my red cabbage dye, based on an article I followed online. The black beans were put in water to soak, and then left overnight. As they soaked, I stirred them and made sure they were covered in water. I wasn't sure about this method for making the dye, but I was following another online article.


After the hot dyes simmered for a little over an hour, I strained out the dye stuffs in the beet and red cabbage dye. I did not strain the turmeric dye because I used powdered turmeric, so I just left it in the liquid.


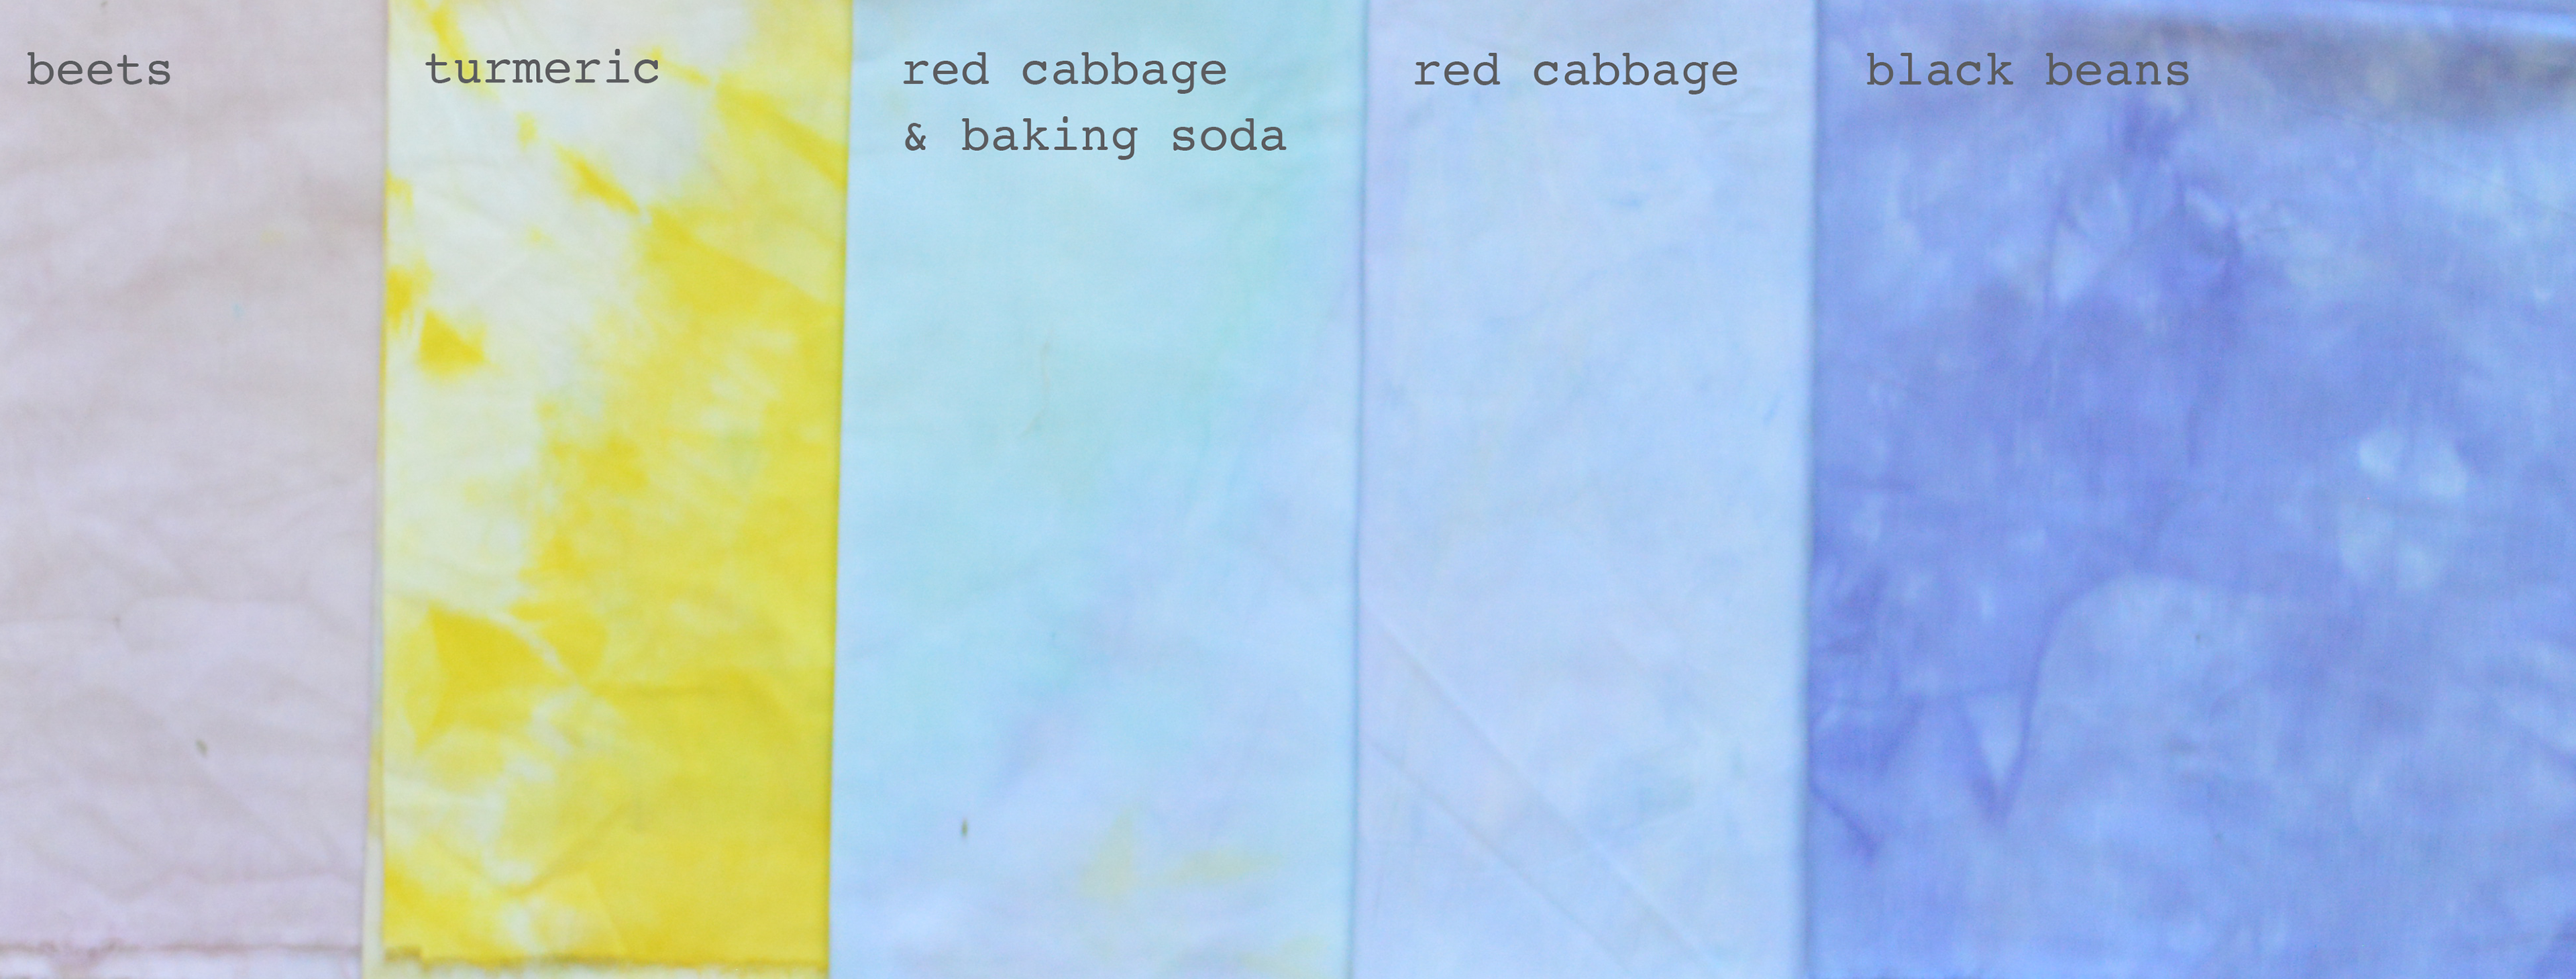
From left to right: Beet dye, red cabbage dye, turmeric dye
To create some contrast, I also created another dye color just by adding backing soda to my red cabbage dye. By adding the baking soda, which is a base, the change in the pH of the cabbage dye and also the color. The dye turned from a light purple to a bright teal.

For fun, I boiled the cabbage again to create a bit more dye, and mixed both acids and bases with it to show off the color array you can create from changing the pH. Adding baking soda changed the dye to teal, while adding acidic vinegar changed to a magenta.

THE DYE PROCESS
After straining the dyestuffs from the dye, I added them each in to buckets while they were still hot and covered in more water so that the fabrics were completely submerged. I then left the fabrics in the dye buckets overnight to completely soak up the color.

Top left: Beets, Top right: Turmeric, Bottom left: Red cabbage with baking soda, Bottom right: Red cabbage
The black beans had to soak overnight, so the dye took a lot longer than the others. I was a bit worried about this color, as it looked really dark even after I strained it. Once I got some fabric in the bowl (after doing a test sample), I felt more confident about the color, although it looked a lot more purple than I was expecting. I left the fabric in the bean dye to soak for a few hours.

After I had let the fabrics soak, I took them outside to pour out the extra dye and rinse the fabric with cold water. Unfortunately, because I was using a hose and working with a lot of wet dyed materials, some of the dyes got a bit stained by touching each other by the dying, washing and drying process. On the bright side, I think it made some materials look even cooler than before, but the colors were not as perfect anymore.
RESULTS
With natural dyes, it can be hard to predict exactly what color you will get, and I was definitely surprised by these results, even after following instructions online.


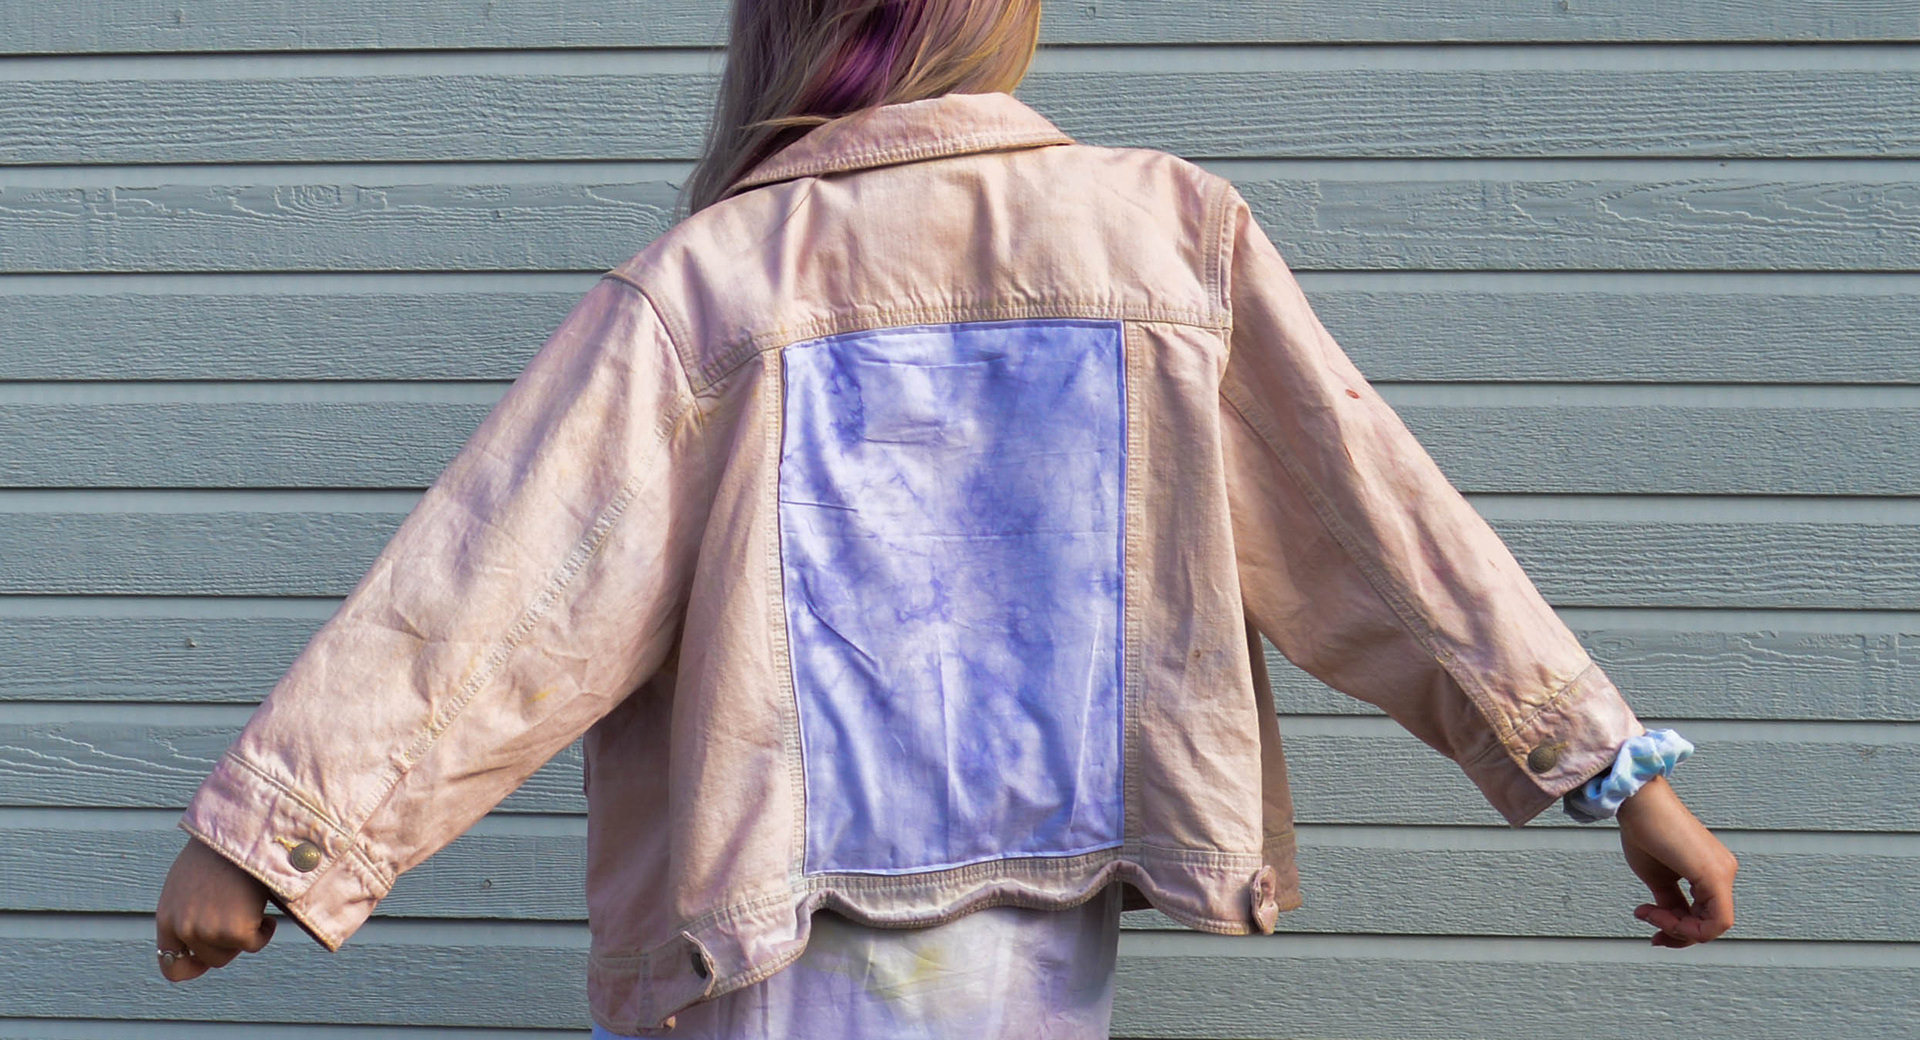
The beet dye definitely faded the most after being rinsed, so instead of a red like I was hoping for, it turned out to be more of a pastel pink. The jacket was also stained quite a bit in the back, so I decided to add a piece of the muslin I dyed with the black beans to the back panel to add some flair and cover up the stain on the back.


The turmeric turned out extremely bright, just as I expected. I love the natural pattern that was created by the dye, with darker and lighter patches probably resulting from the turmeric I left in the dye. These also smelled (and still smell) very distinctly like turmeric.
For my complementary accessory, I made a tote bag from my turmeric fabric, as a fun pop of color against the rest of my cool-toned pieces. (I ended up not including the shoes because the turmeric stained the rubber a lot and I couldn't remove it.)


The linen blend I dyed with red cabbage got the most stained, probably from the red cabbage/baking soda dye as well as the turmeric. I really like the effect it created, it looks very watercolor and I loved the look almost more than the intended lilac.


The black bean dye ended up being my favorite color. I thought it was going to be a blue color, but it ended up being a very cool violet, almost periwinkle color. The mystery knit absorbed the material really well, it actually soaked up so much liquid and took a really long time to dry.


THE FINAL OUTFIT
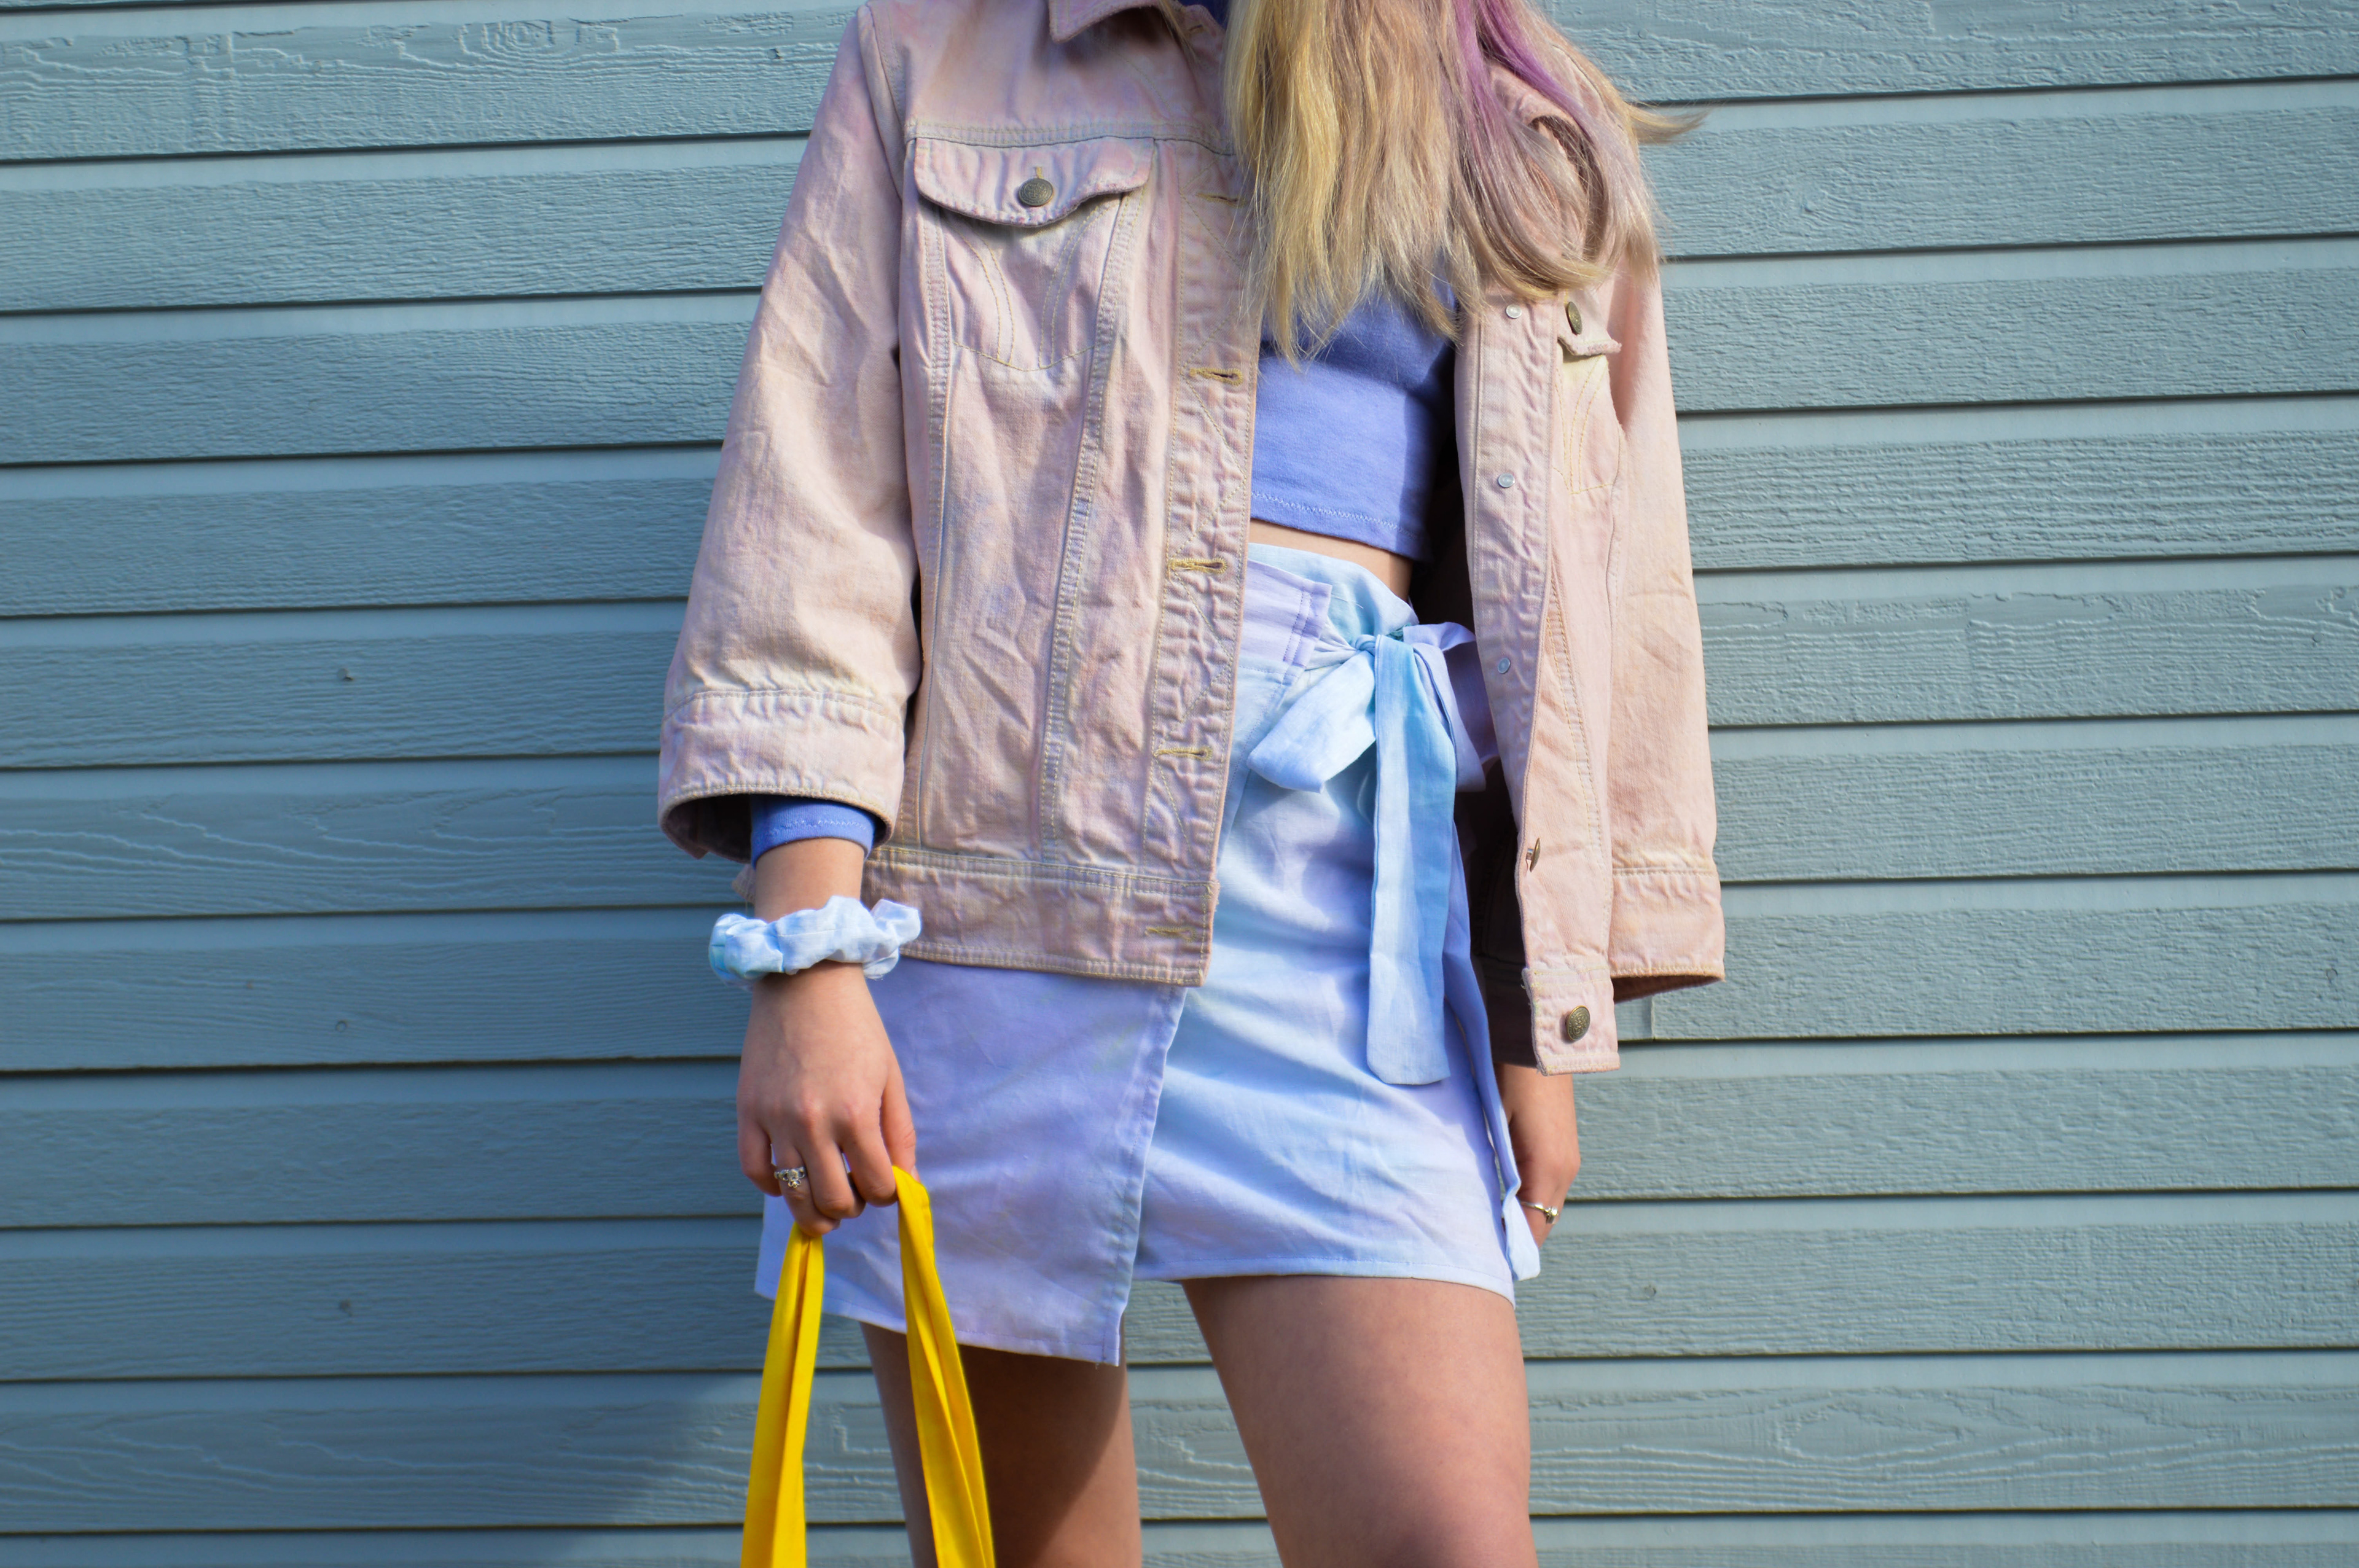
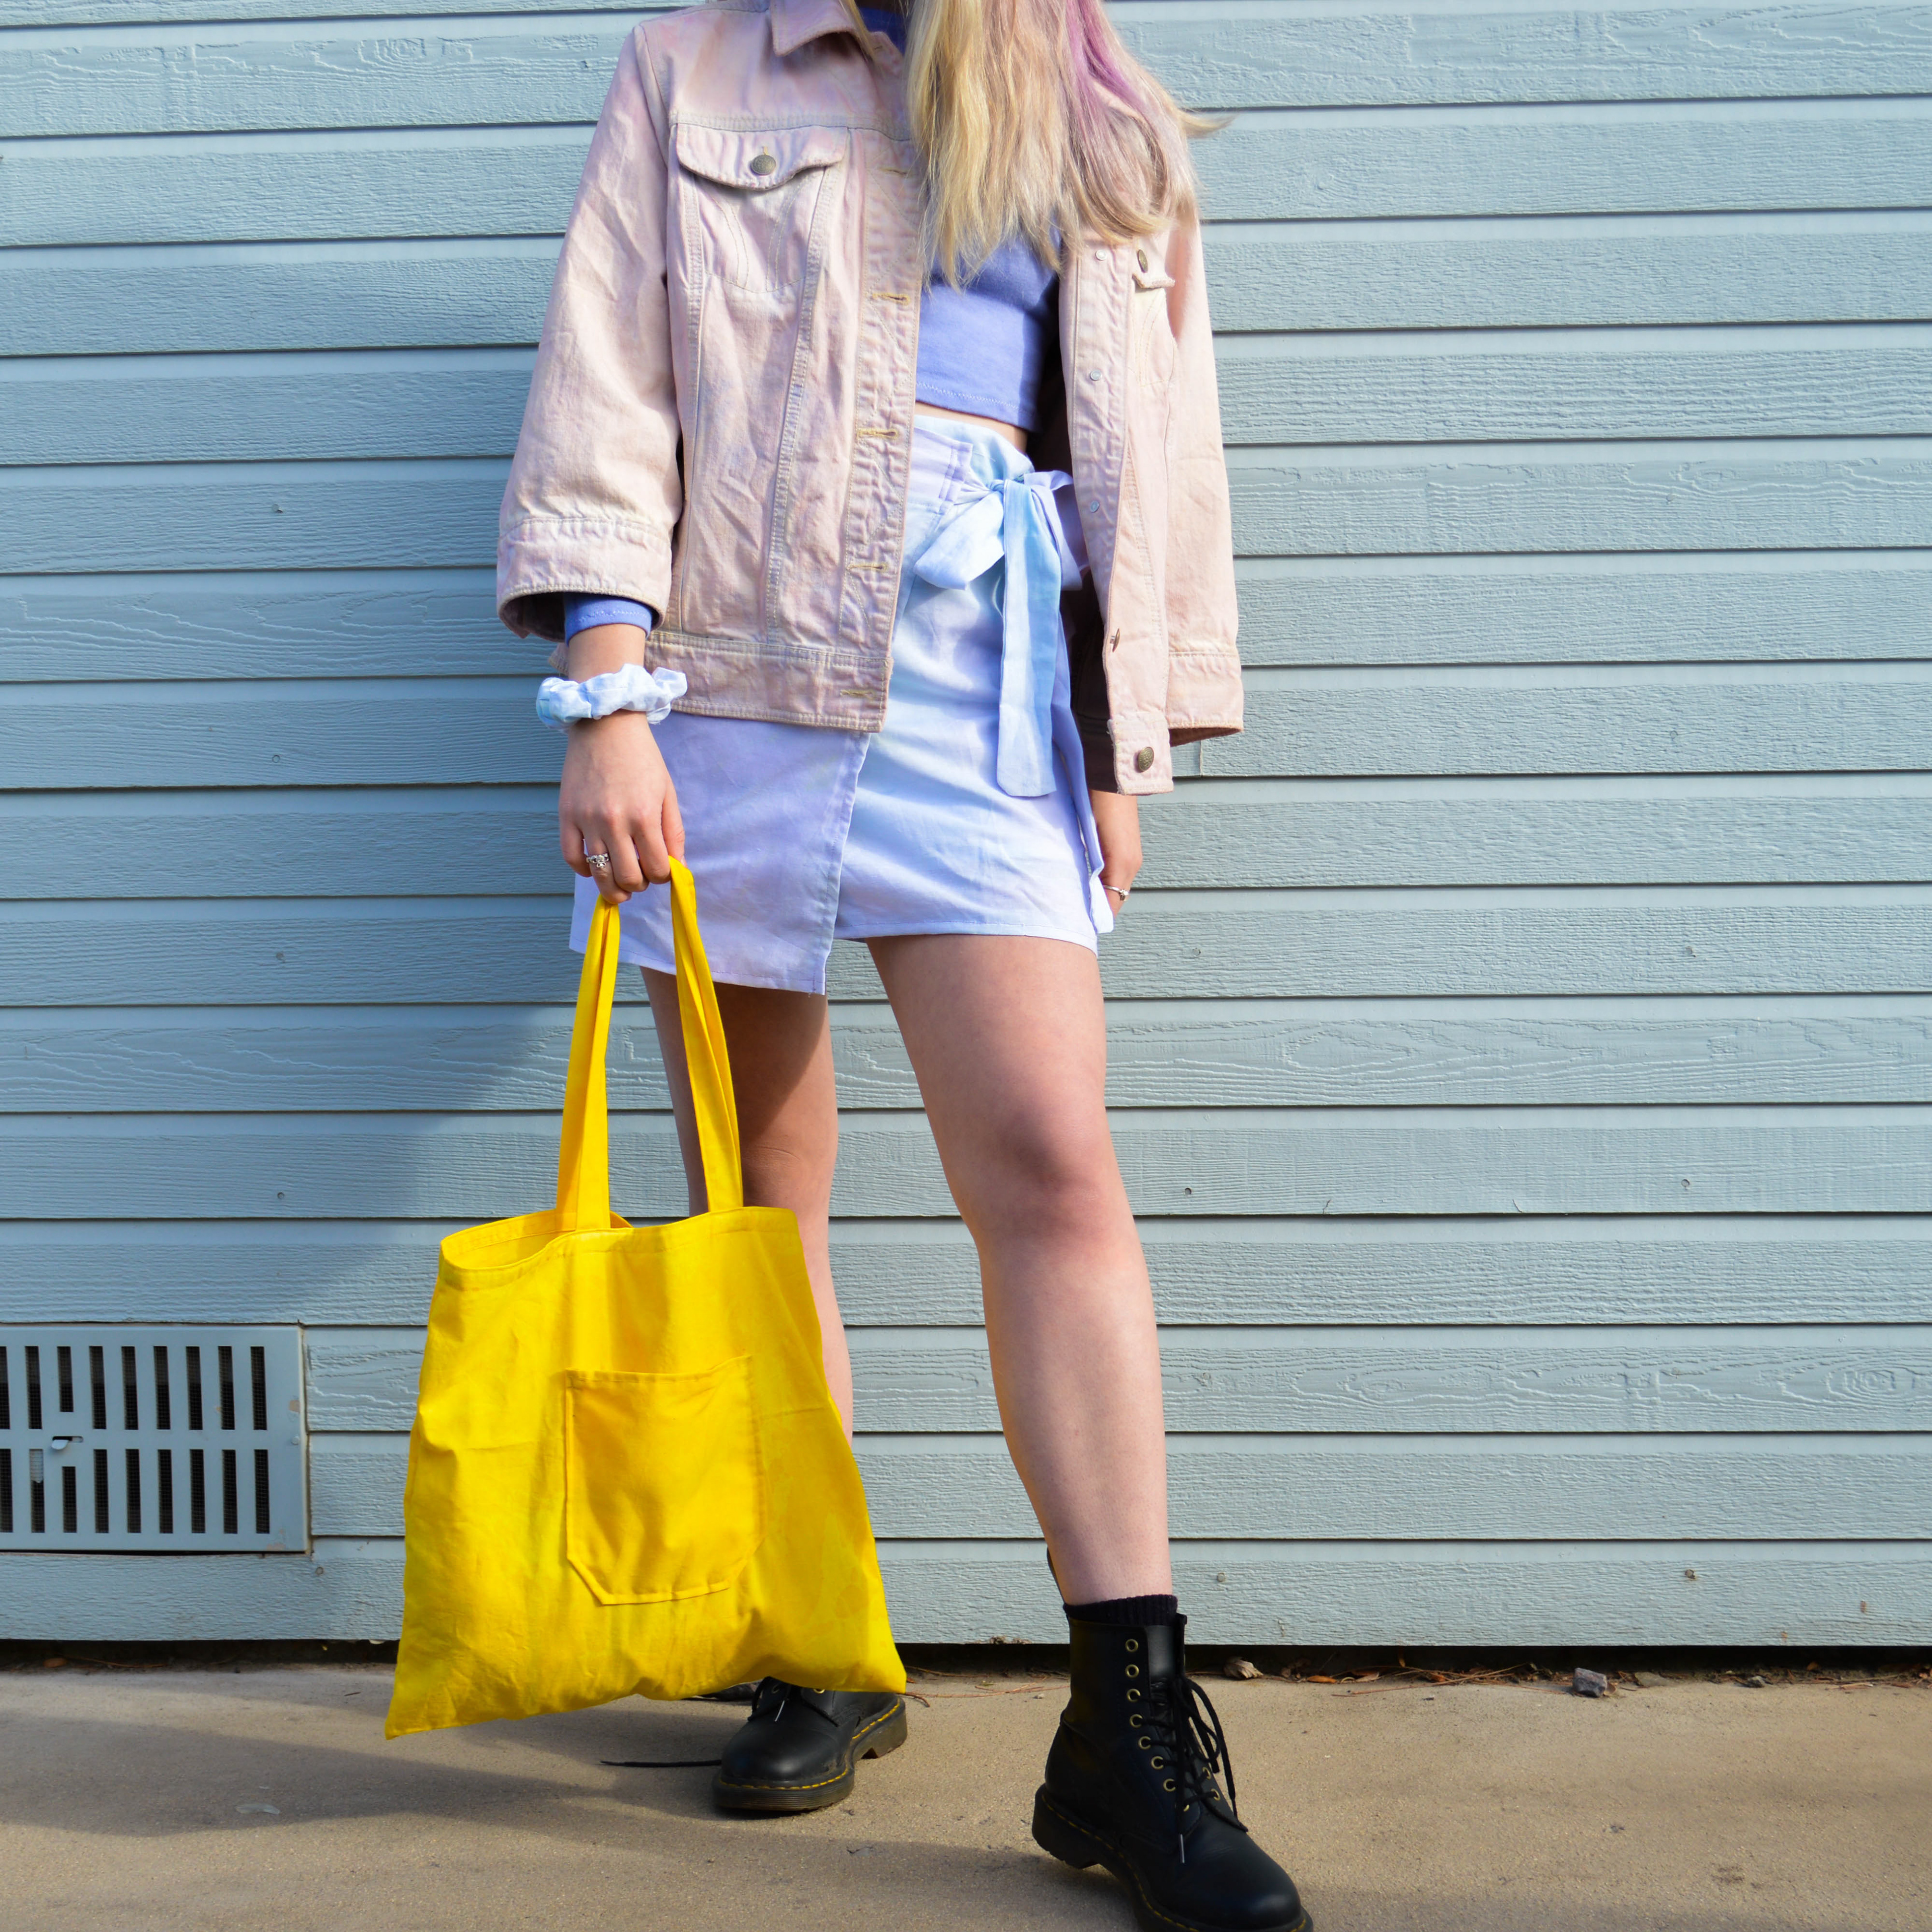
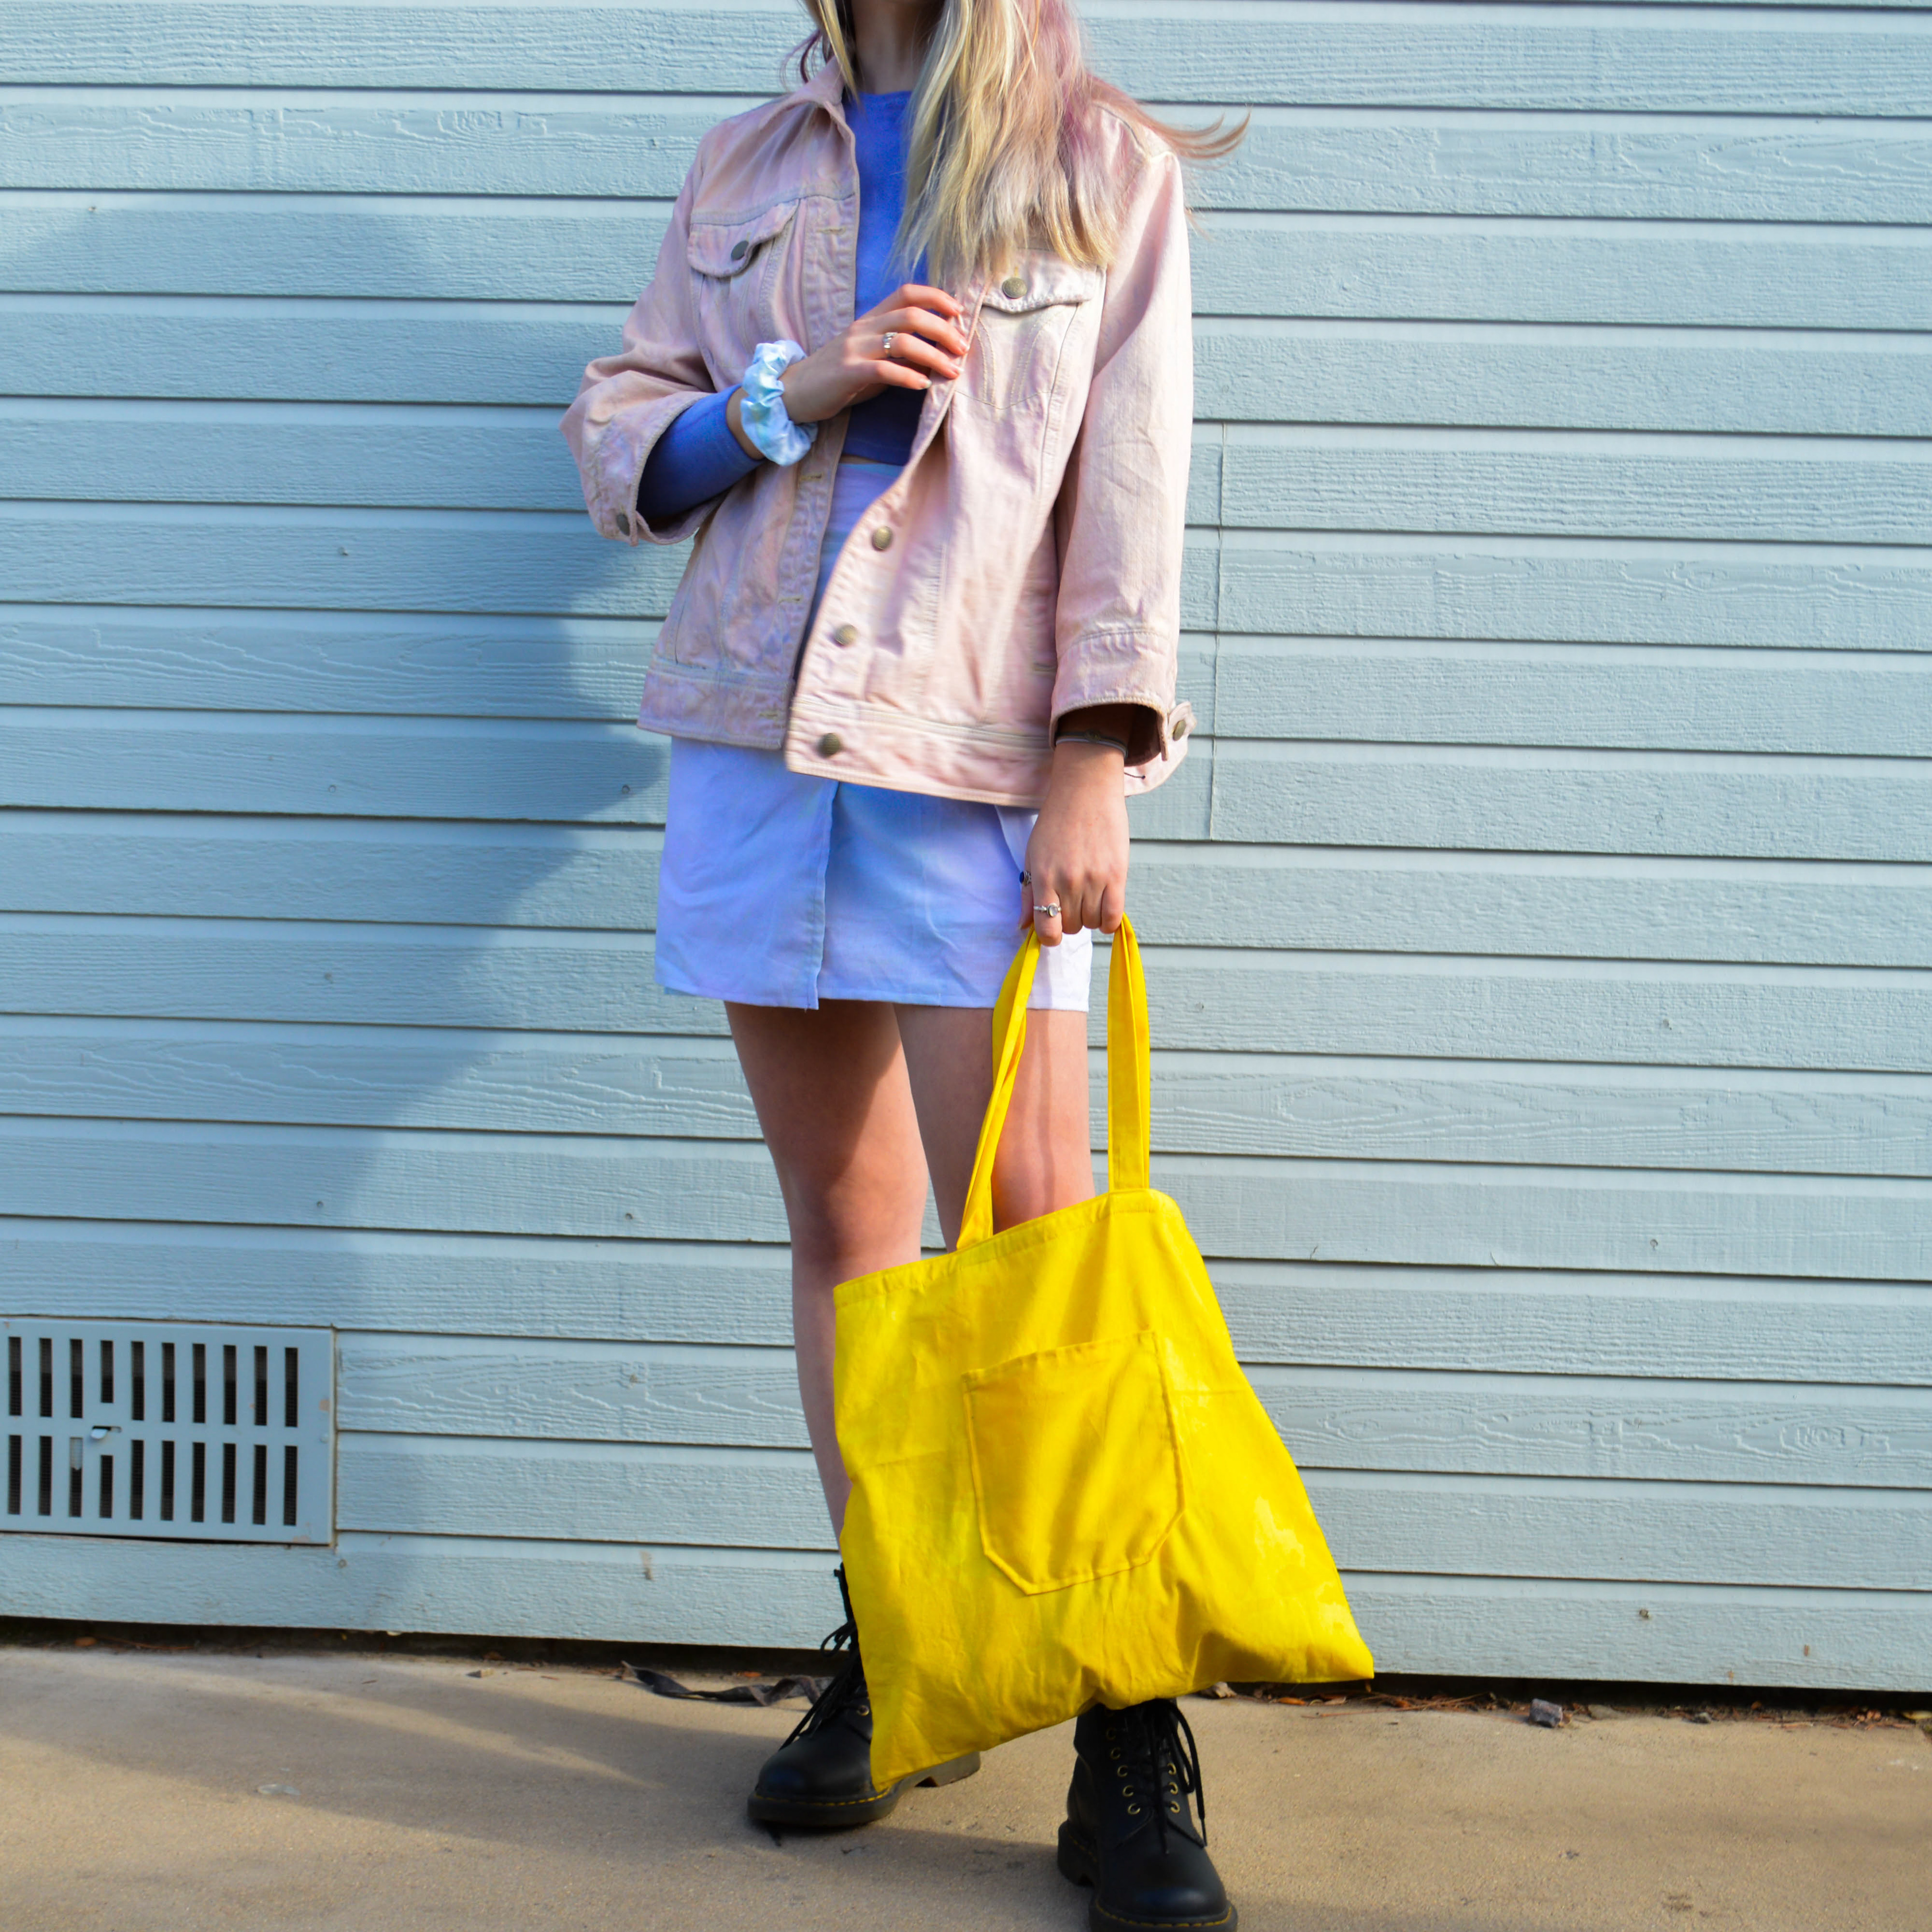
Overall, these pieces did not turn out as I had imagined, but I am still so happy with the final outfit. Although the colors didn't turn out how I predicted, I think they still turned out really well, and the outfit still has the analogous color scheme I was going for. The unpredictability of natural dyeing made this a really fun experiment, and something I definitely want to try again.