PART A
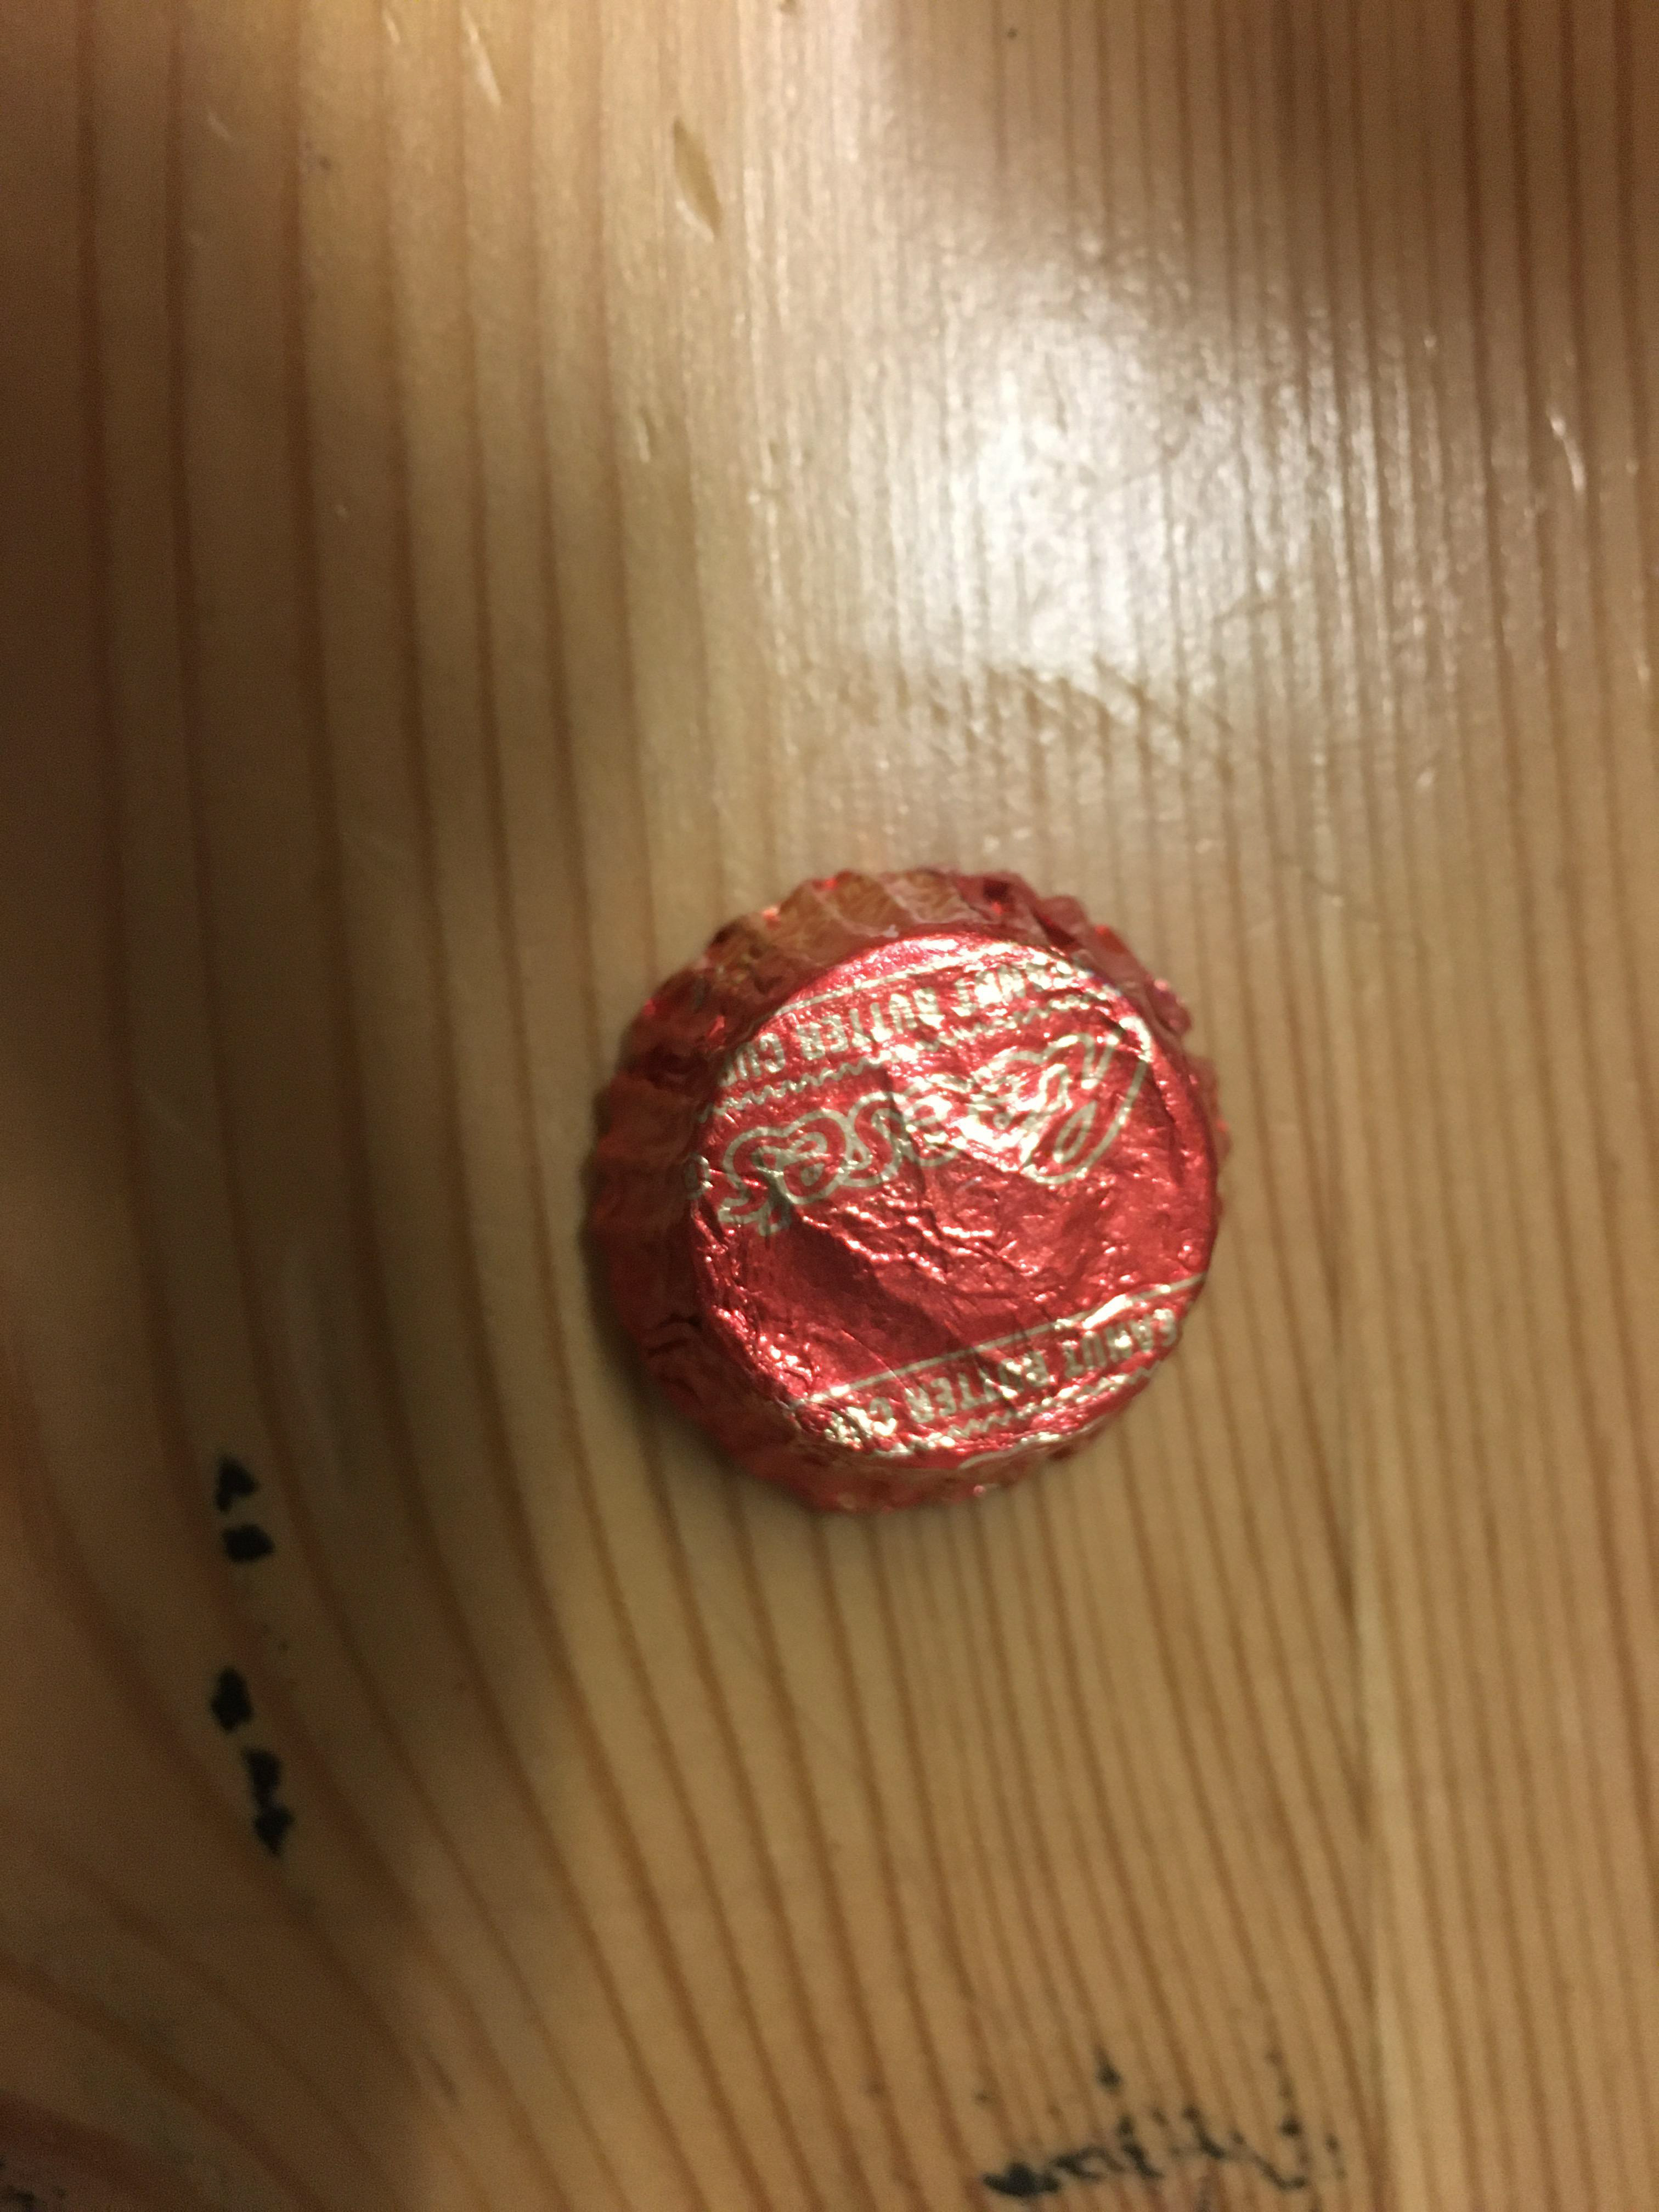
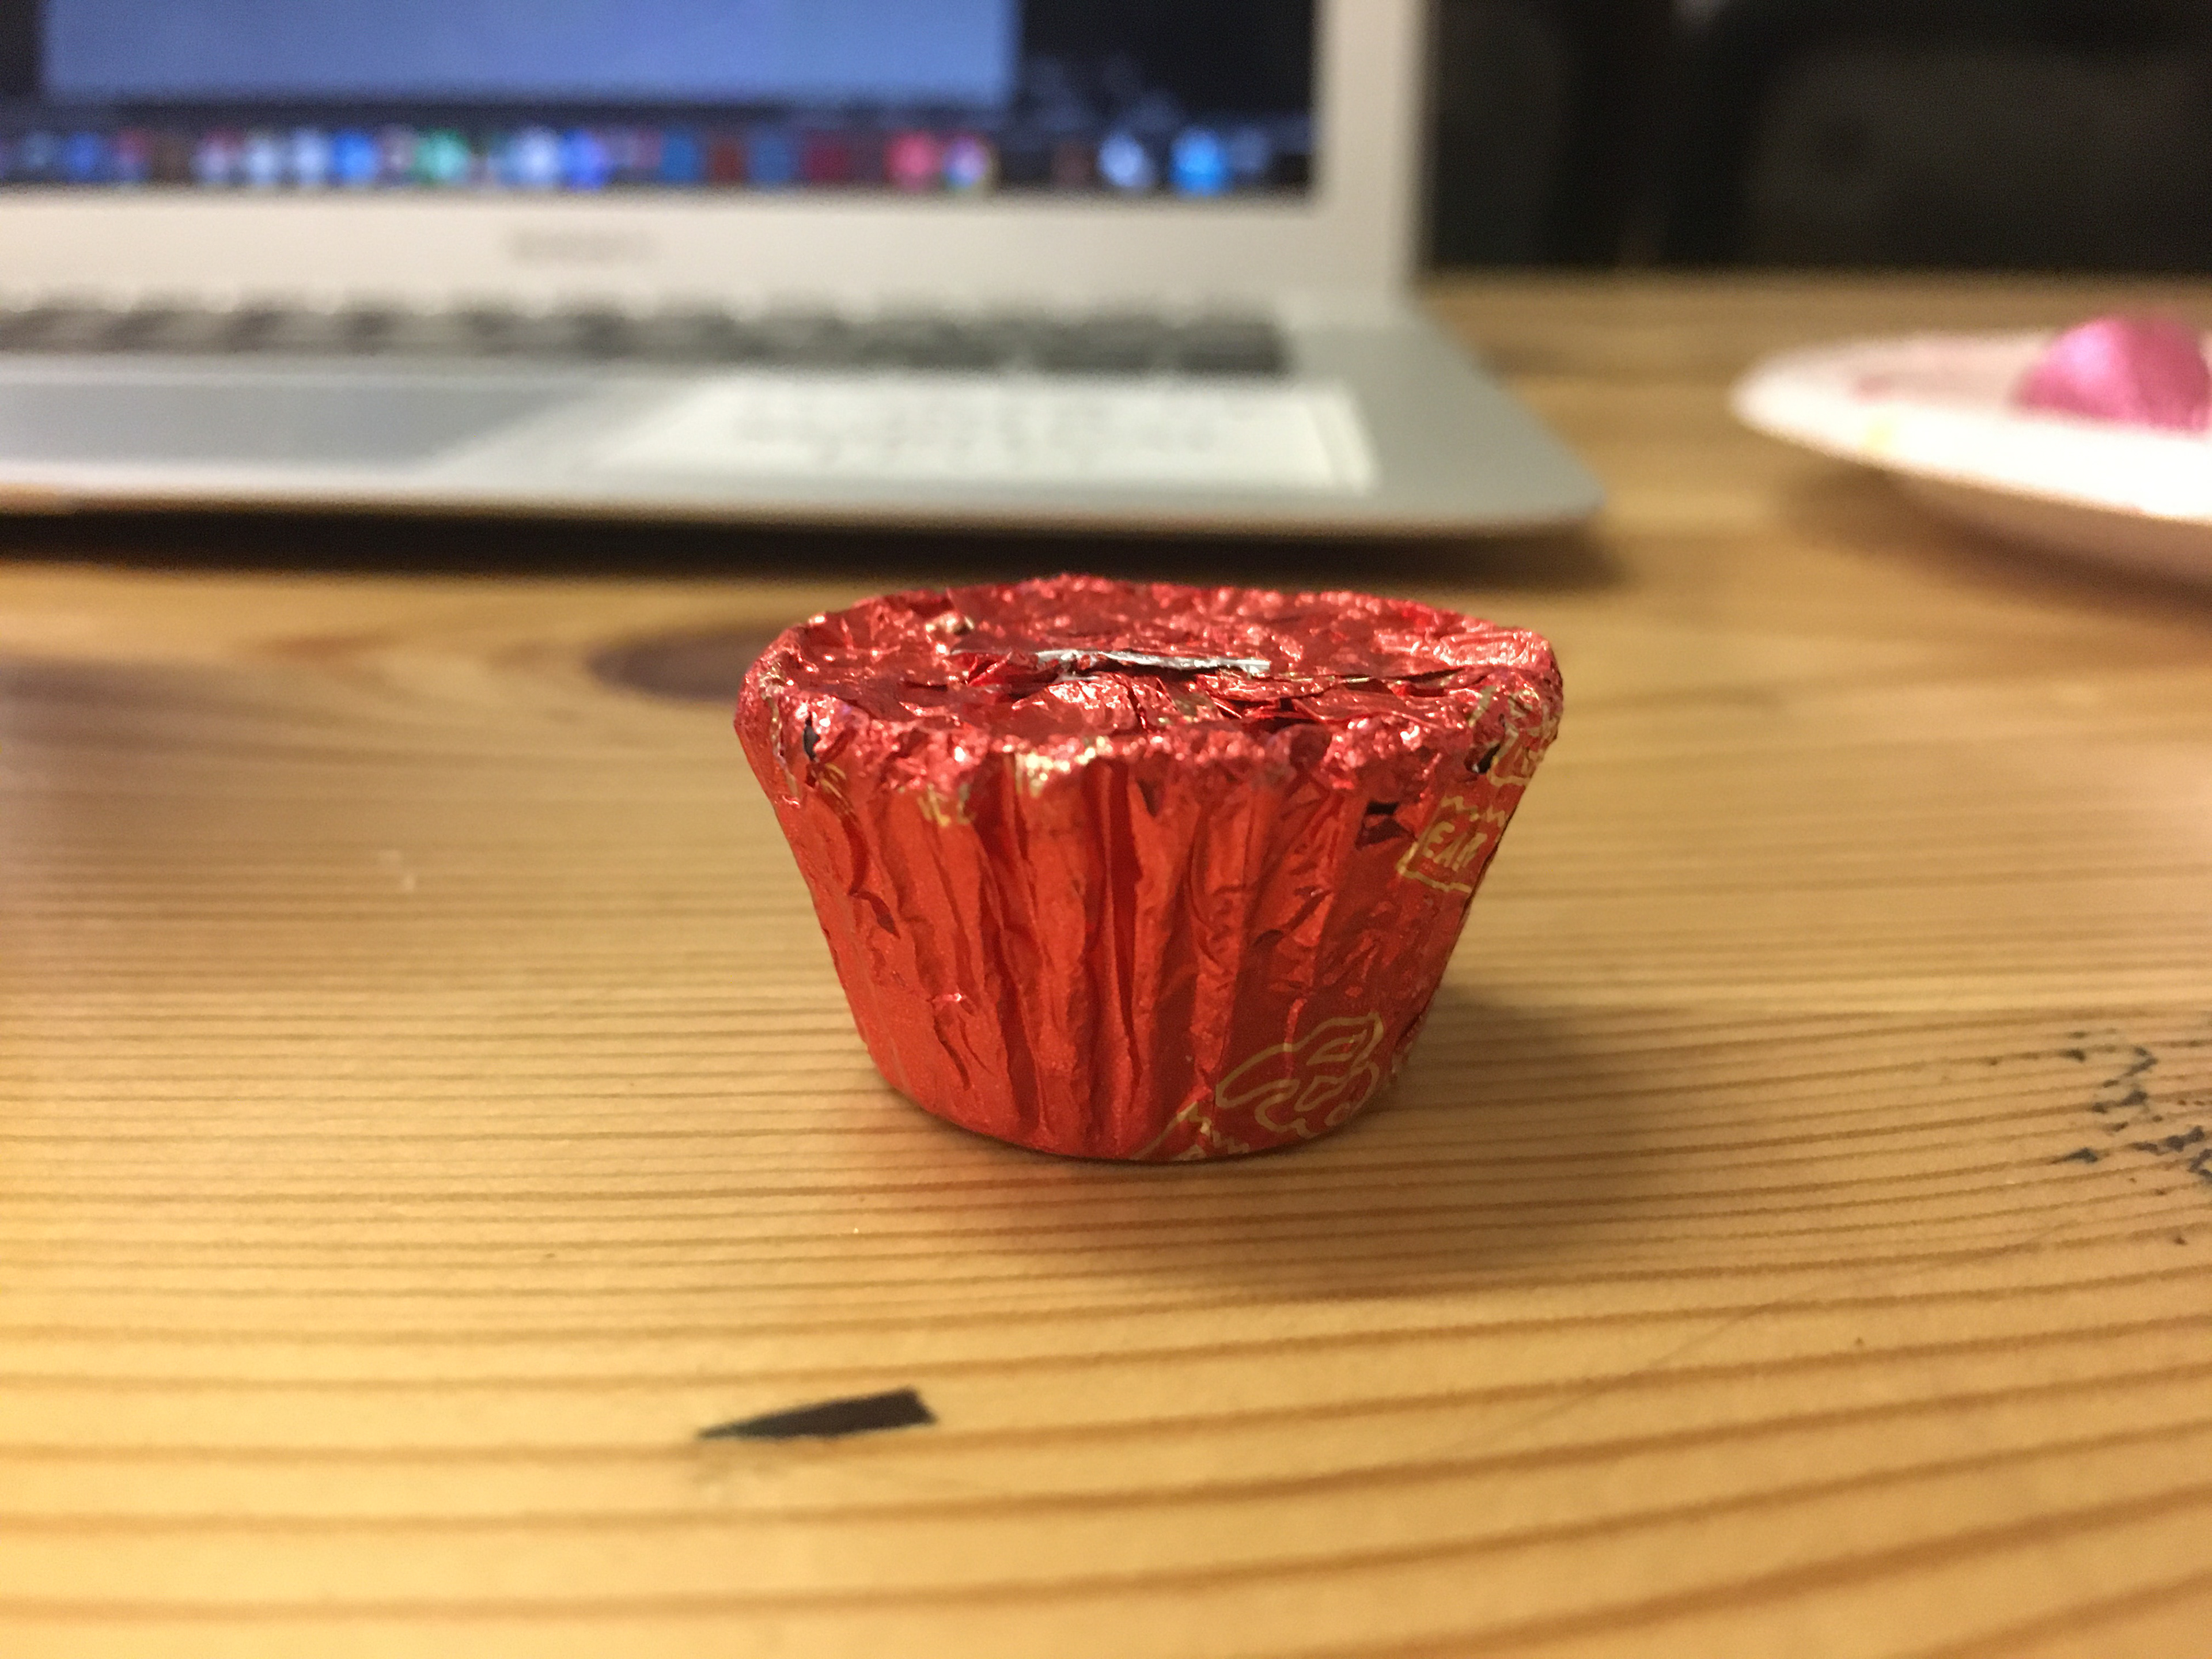
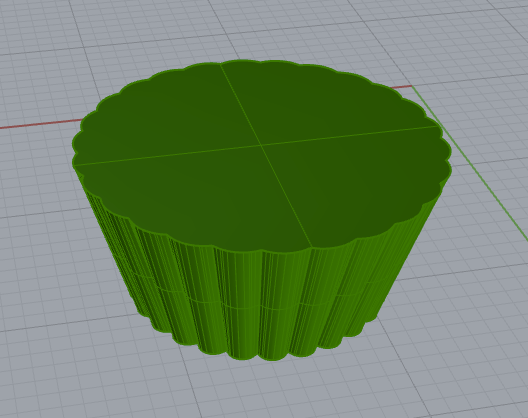
For this part, we had to model a real-life object in Rhino. I chose to model a mini Reese's candy, because I think the shape would work well for slicing, but isn't just a plain solid shape. The mini versions are a little more stout than the original, co I can make a nice stack. I also really like to eat this candy (a lot).


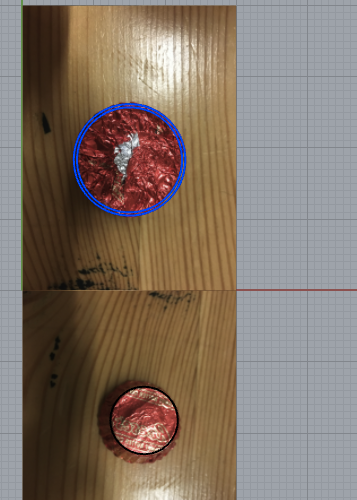
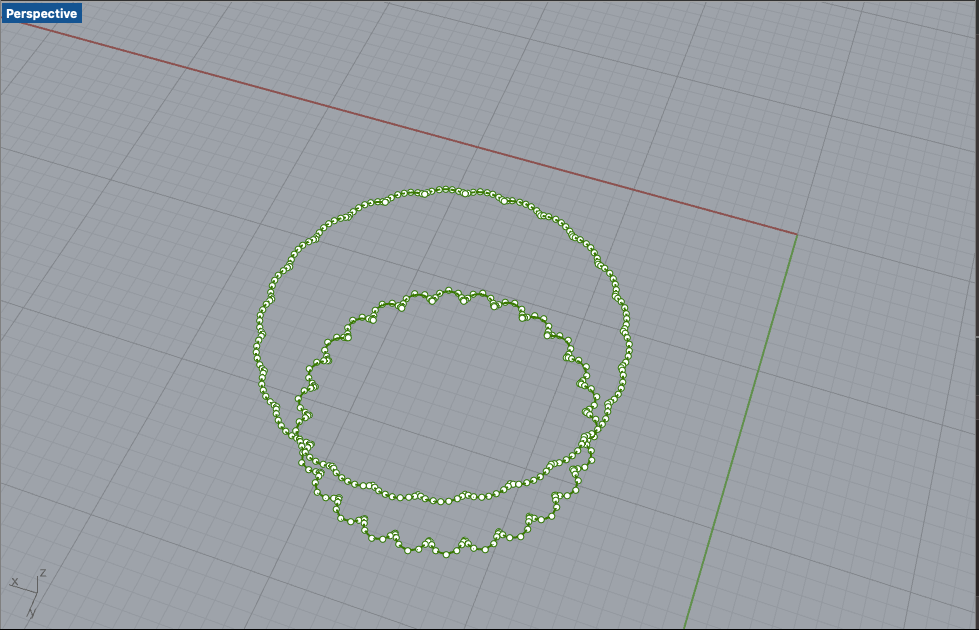
I started by importing photos showing different sides of the candy. I used circles to trace the top and bottom for size purposes. For the top, I made 2 concentric circles as a guide for the ridge I would make. Then I created a single "ridge" and used Array Polar to repeat my "ridge" around the entire circle. To make the other piece for the base, I used Offset to reverse the ridges. Then, I spaced my top and base pieces out to form the height of the shape.
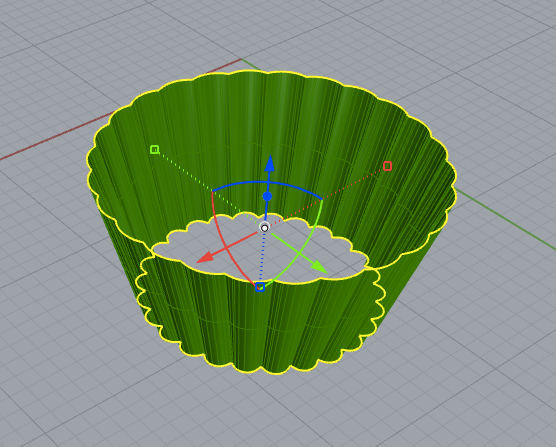
Then, I used Loft to create a ridged surface between my two base curves. Then, I used Cap to turn the surface into a solid shape.
PART B
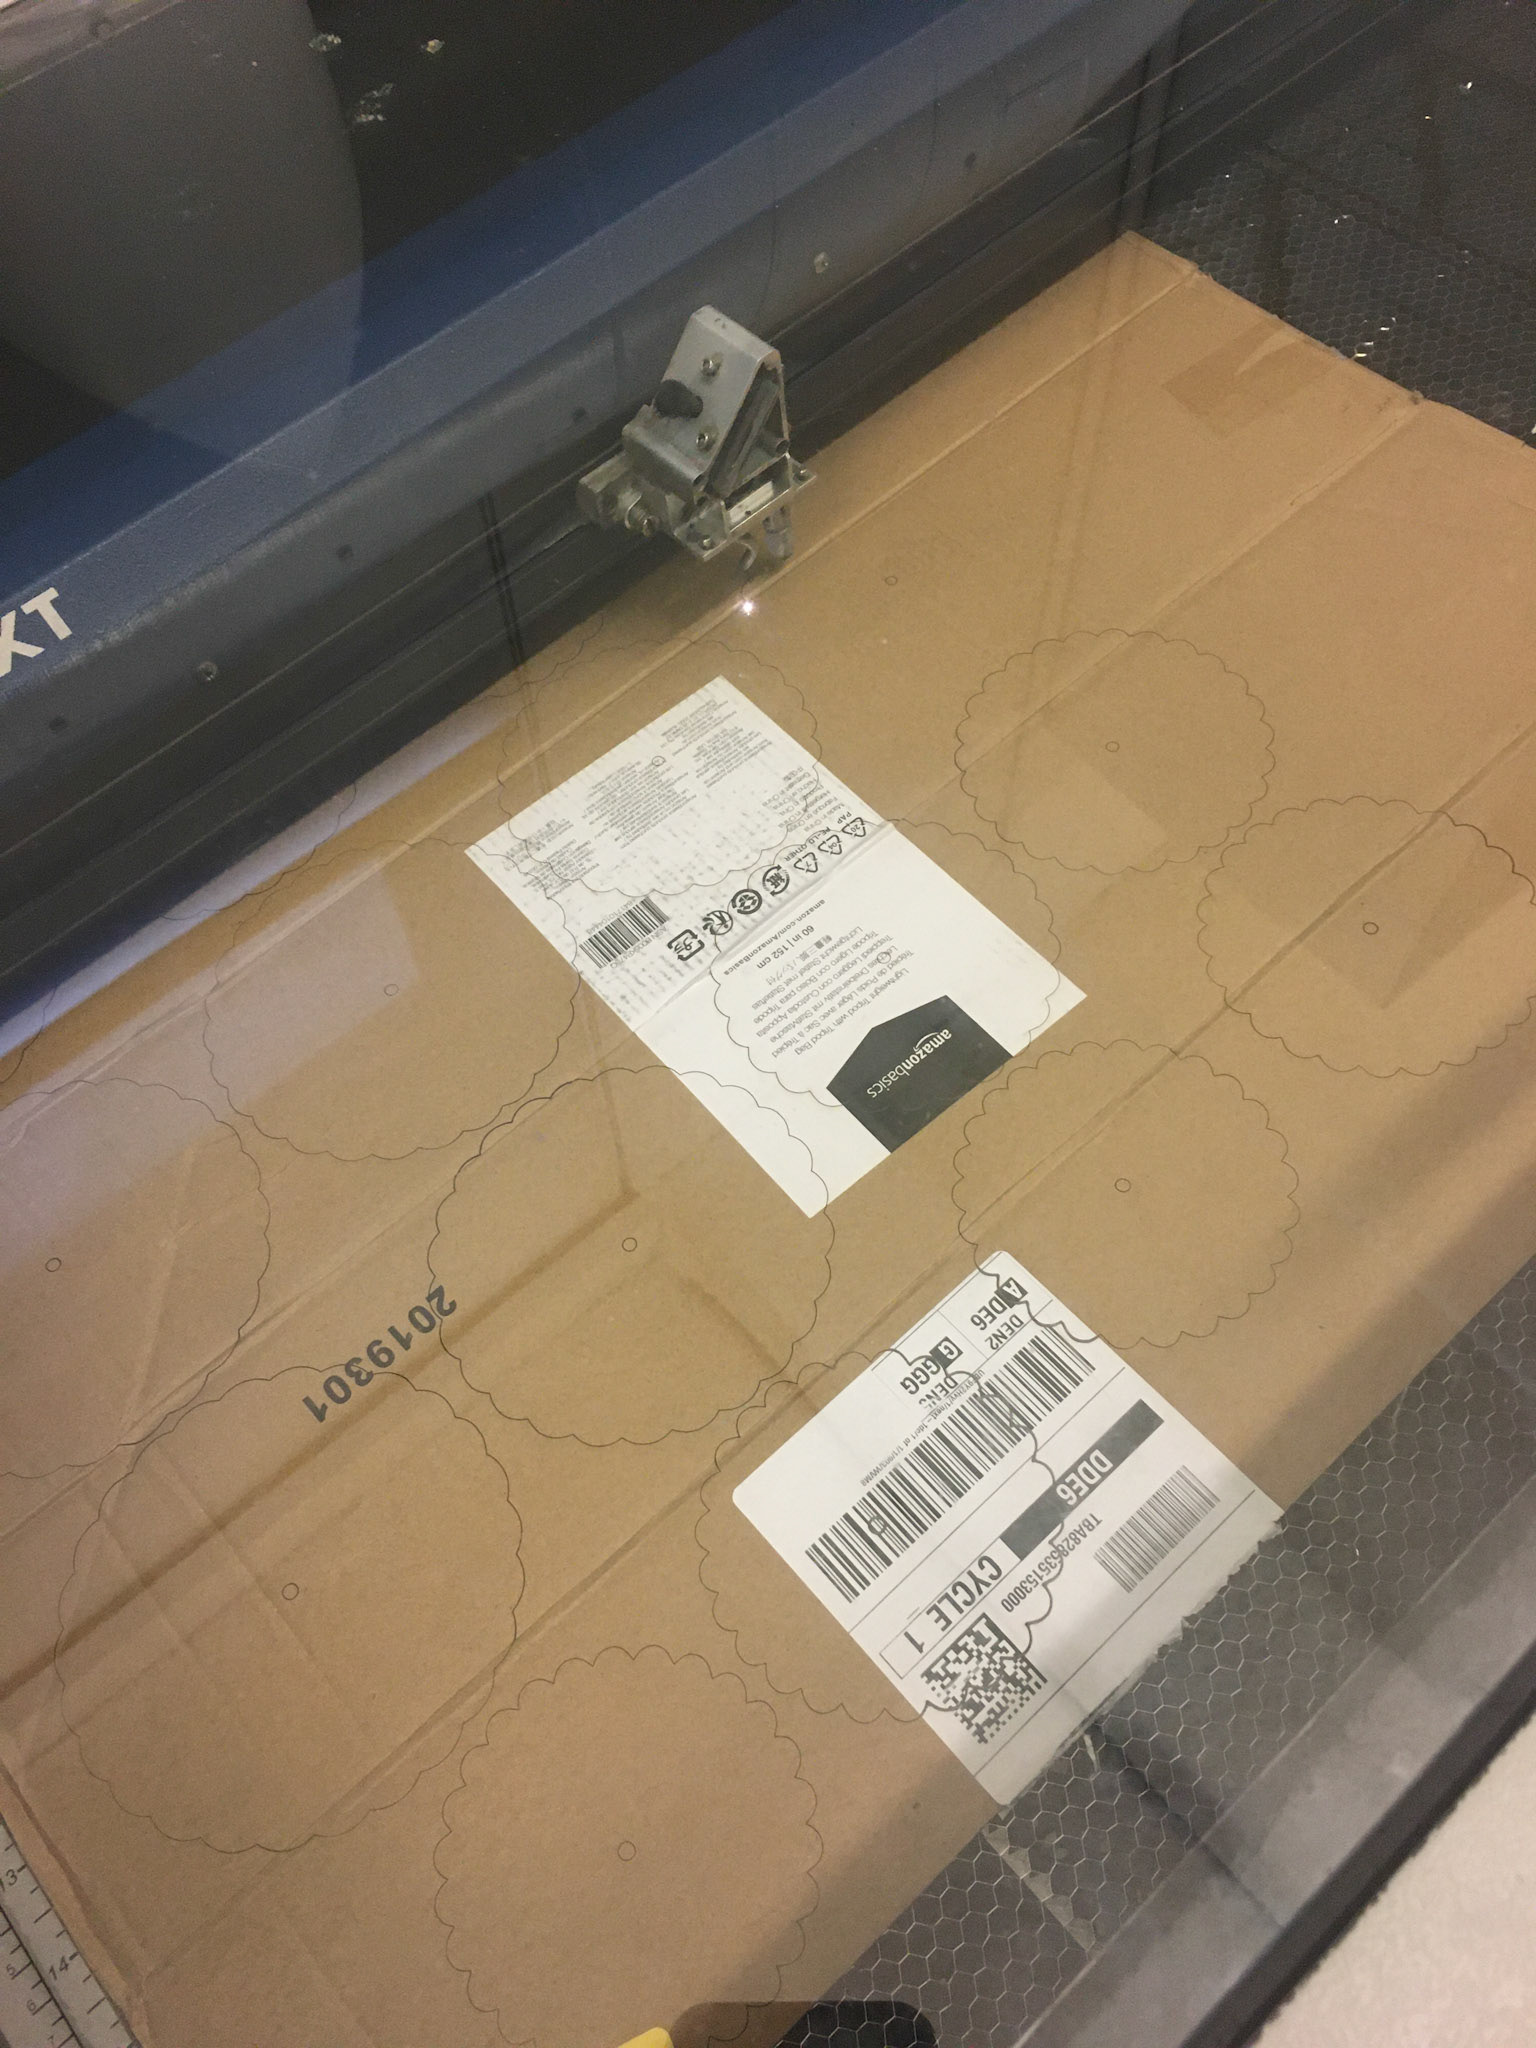
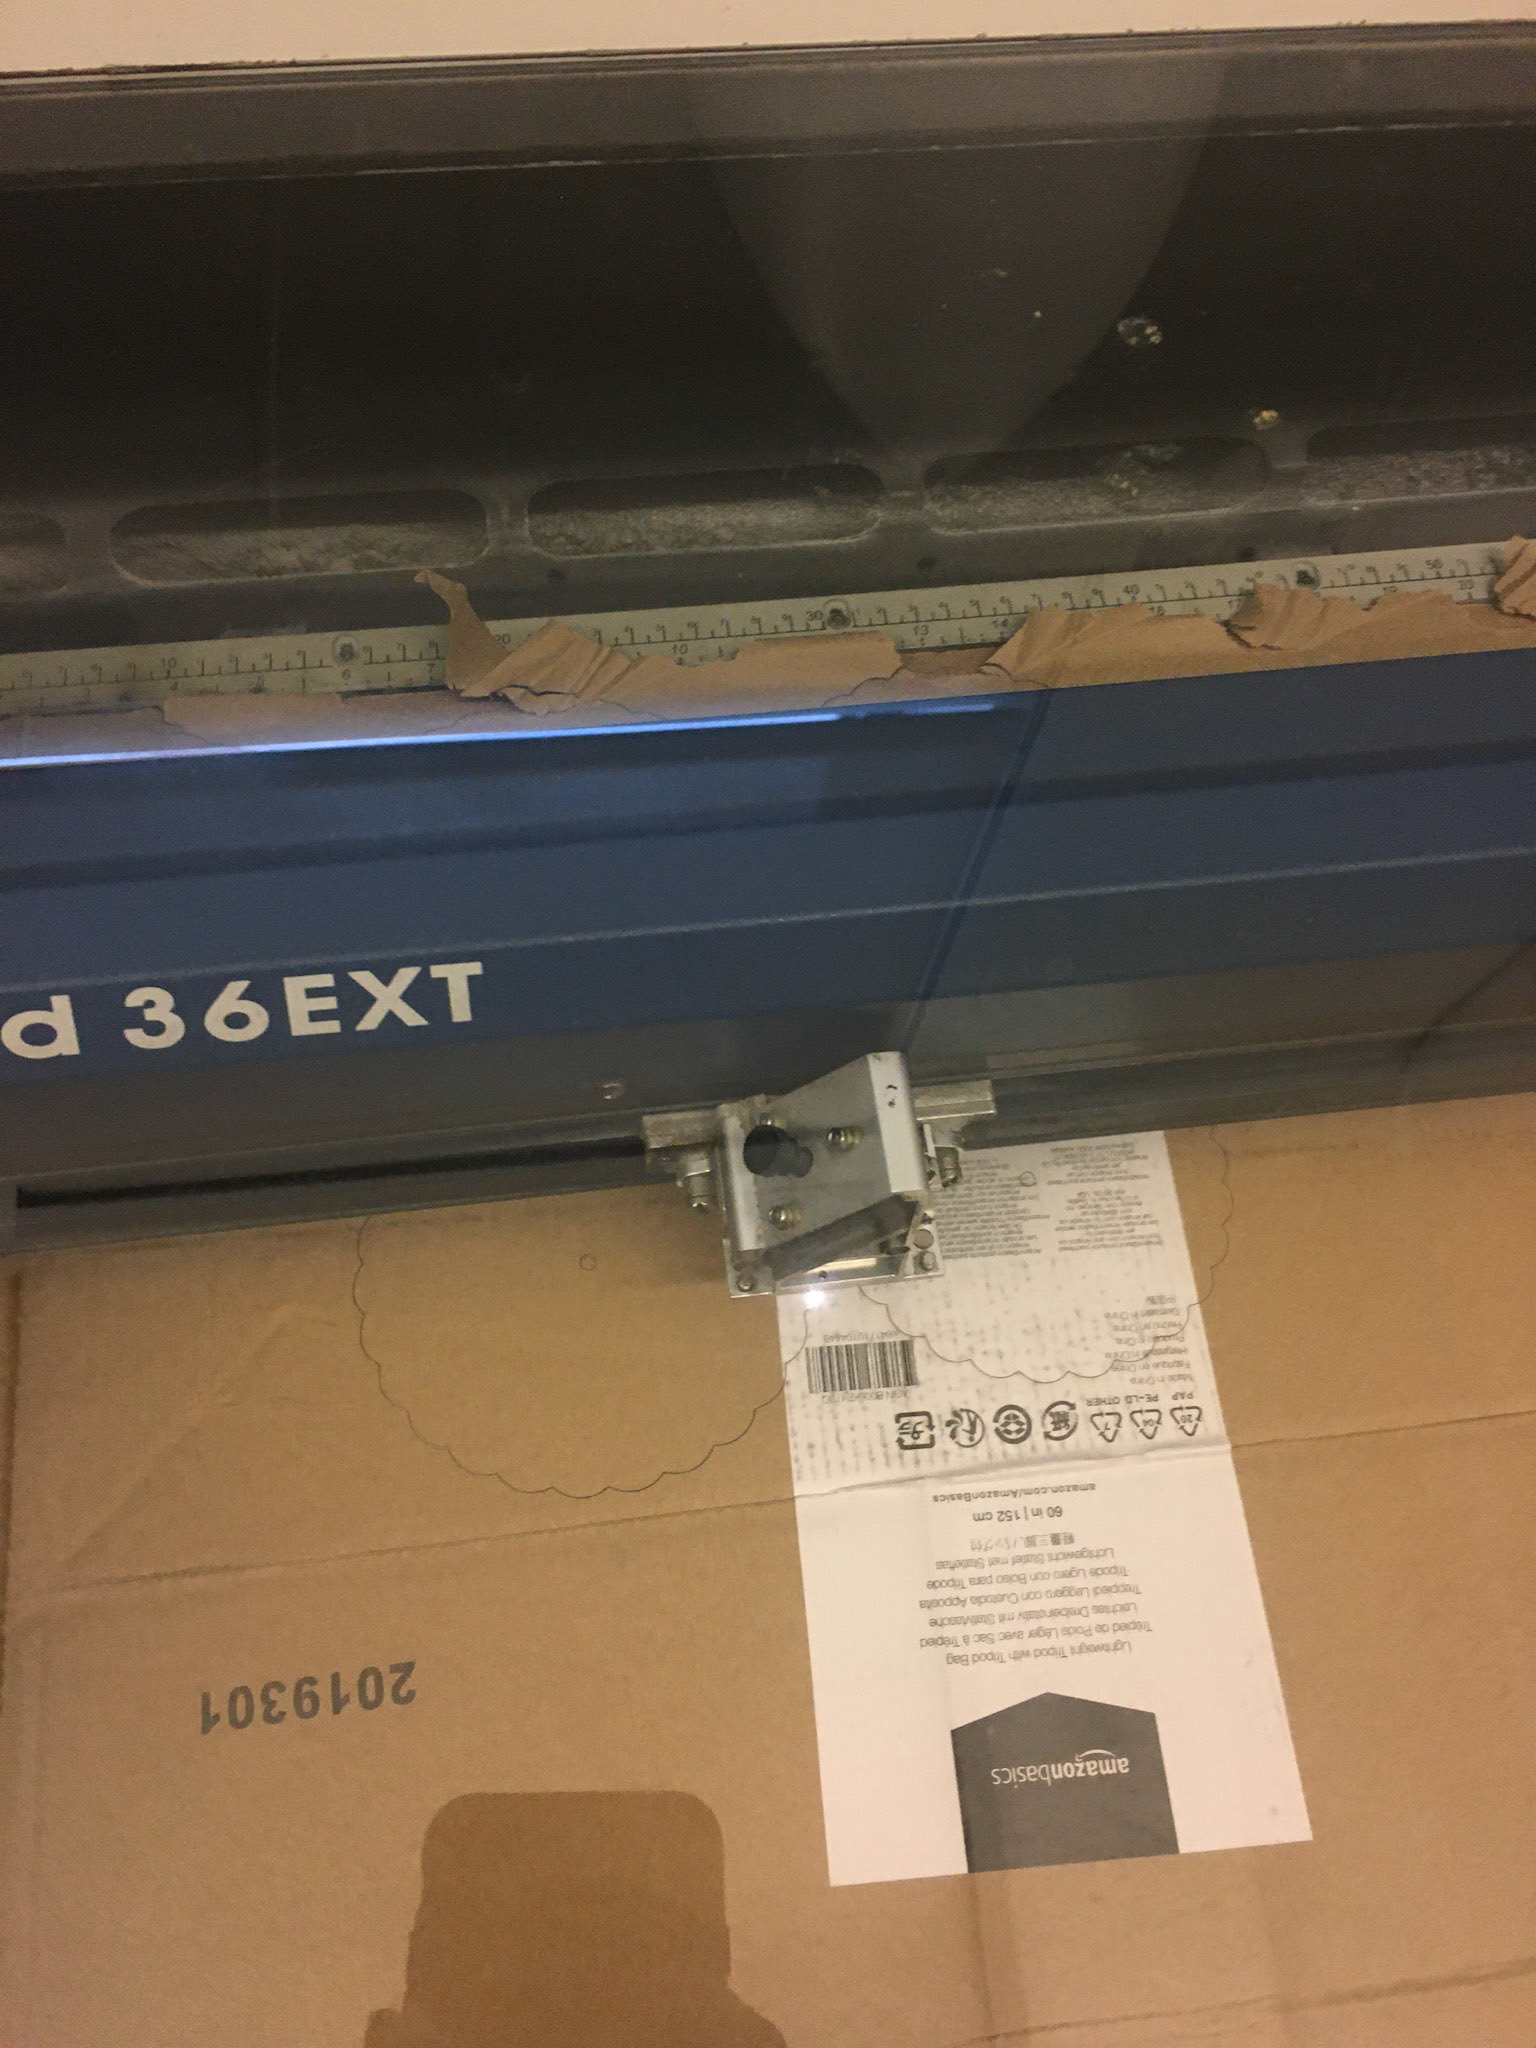
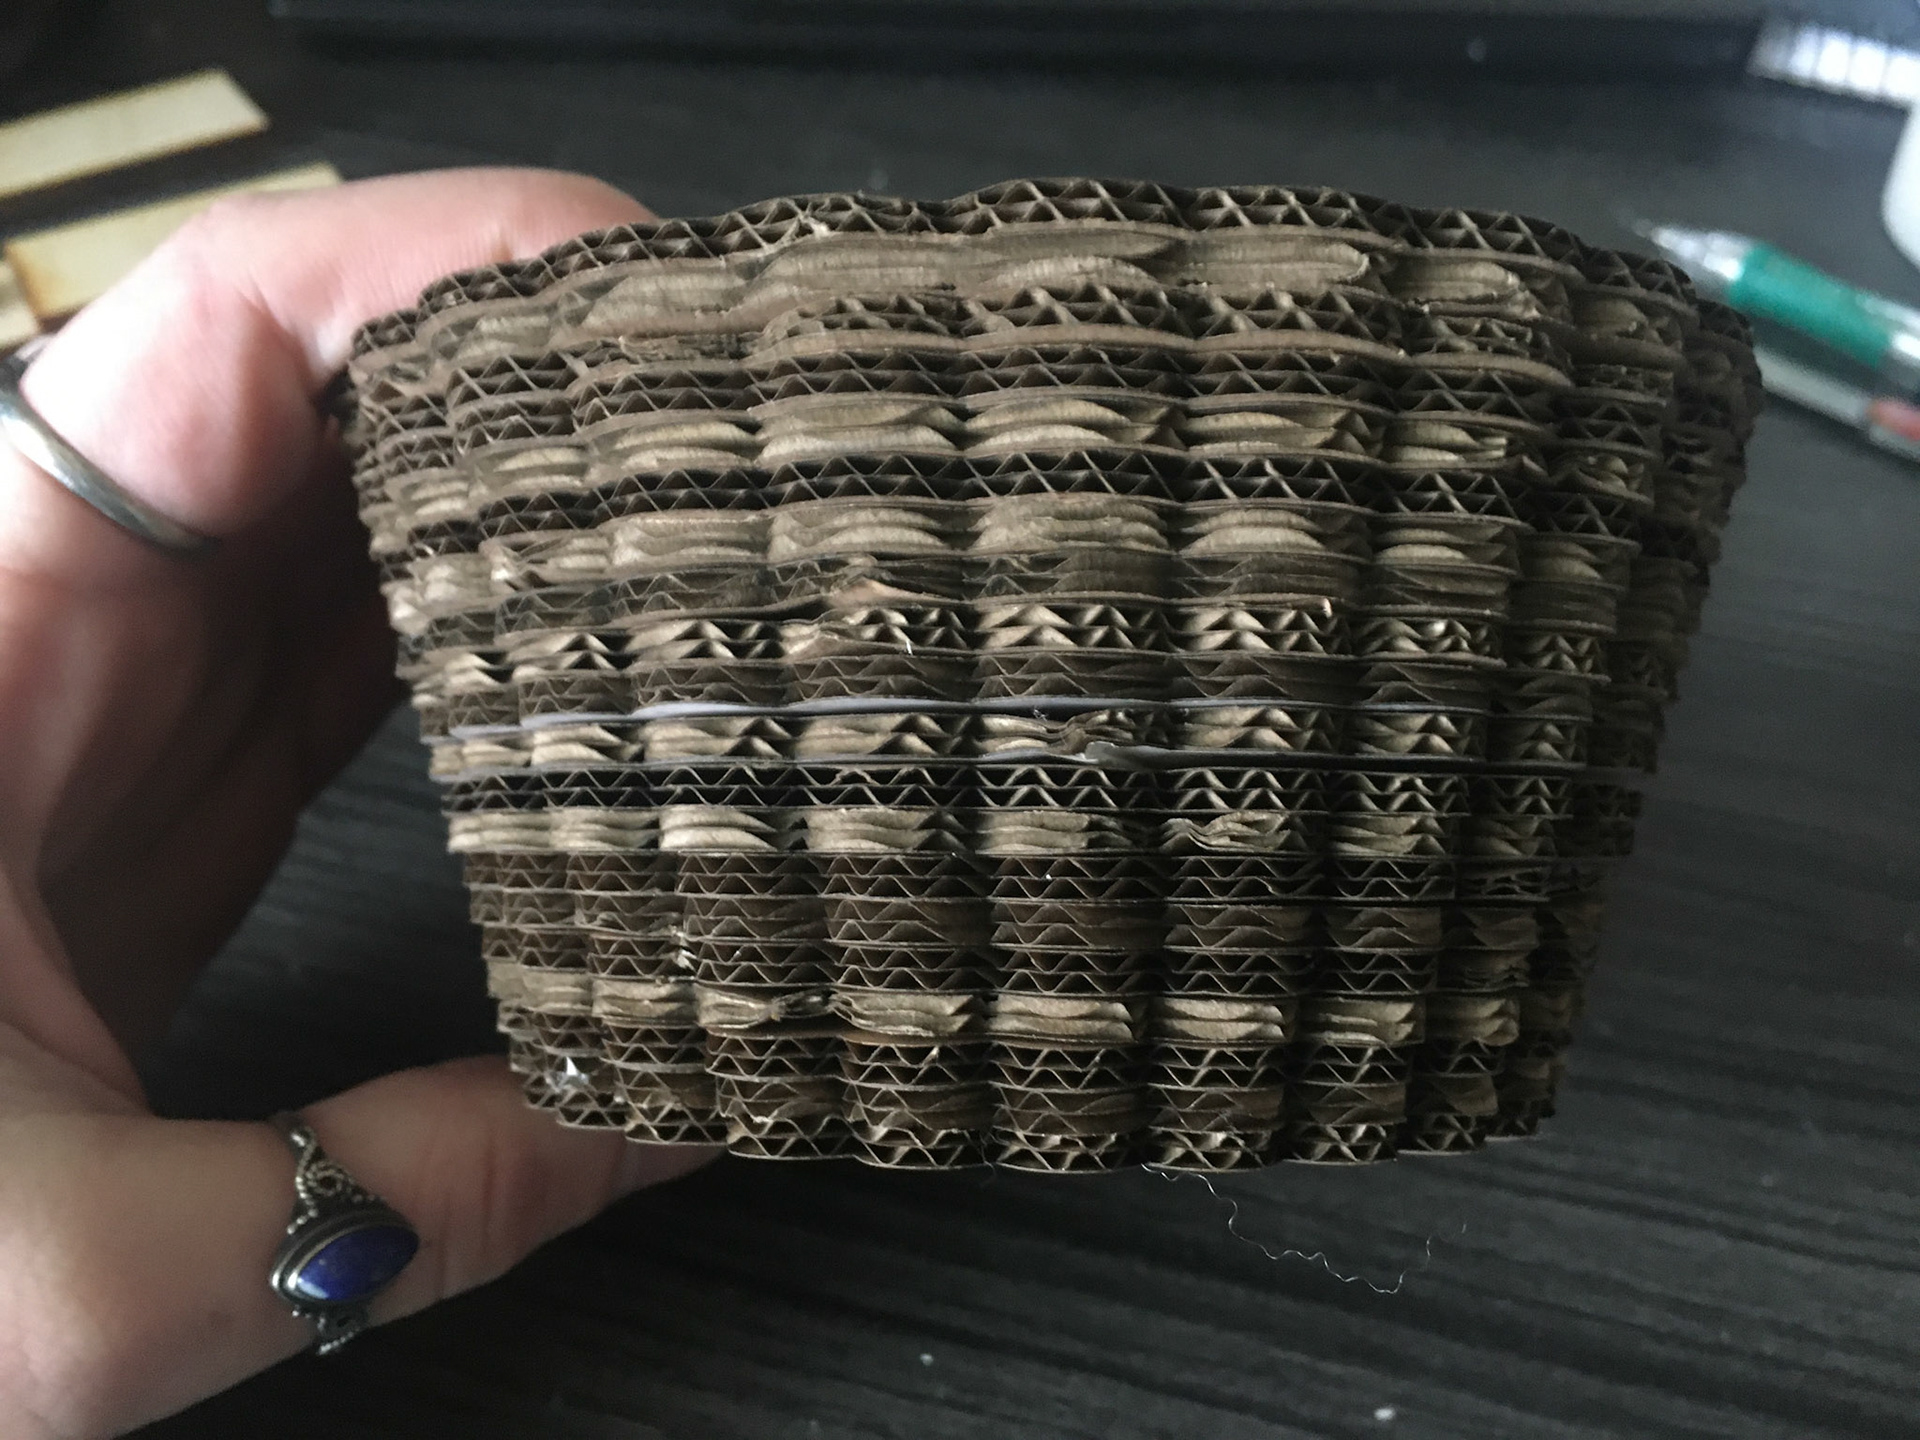
I used my Reese's model from part A to be sliced, because I thought it would stack nicely and the ridges would create an interesting shape. I brought the STL shape into slicer to create the slices for the object. Then, I brought the sliced file in to illustrator to clean it up and format it for the laser cutter.
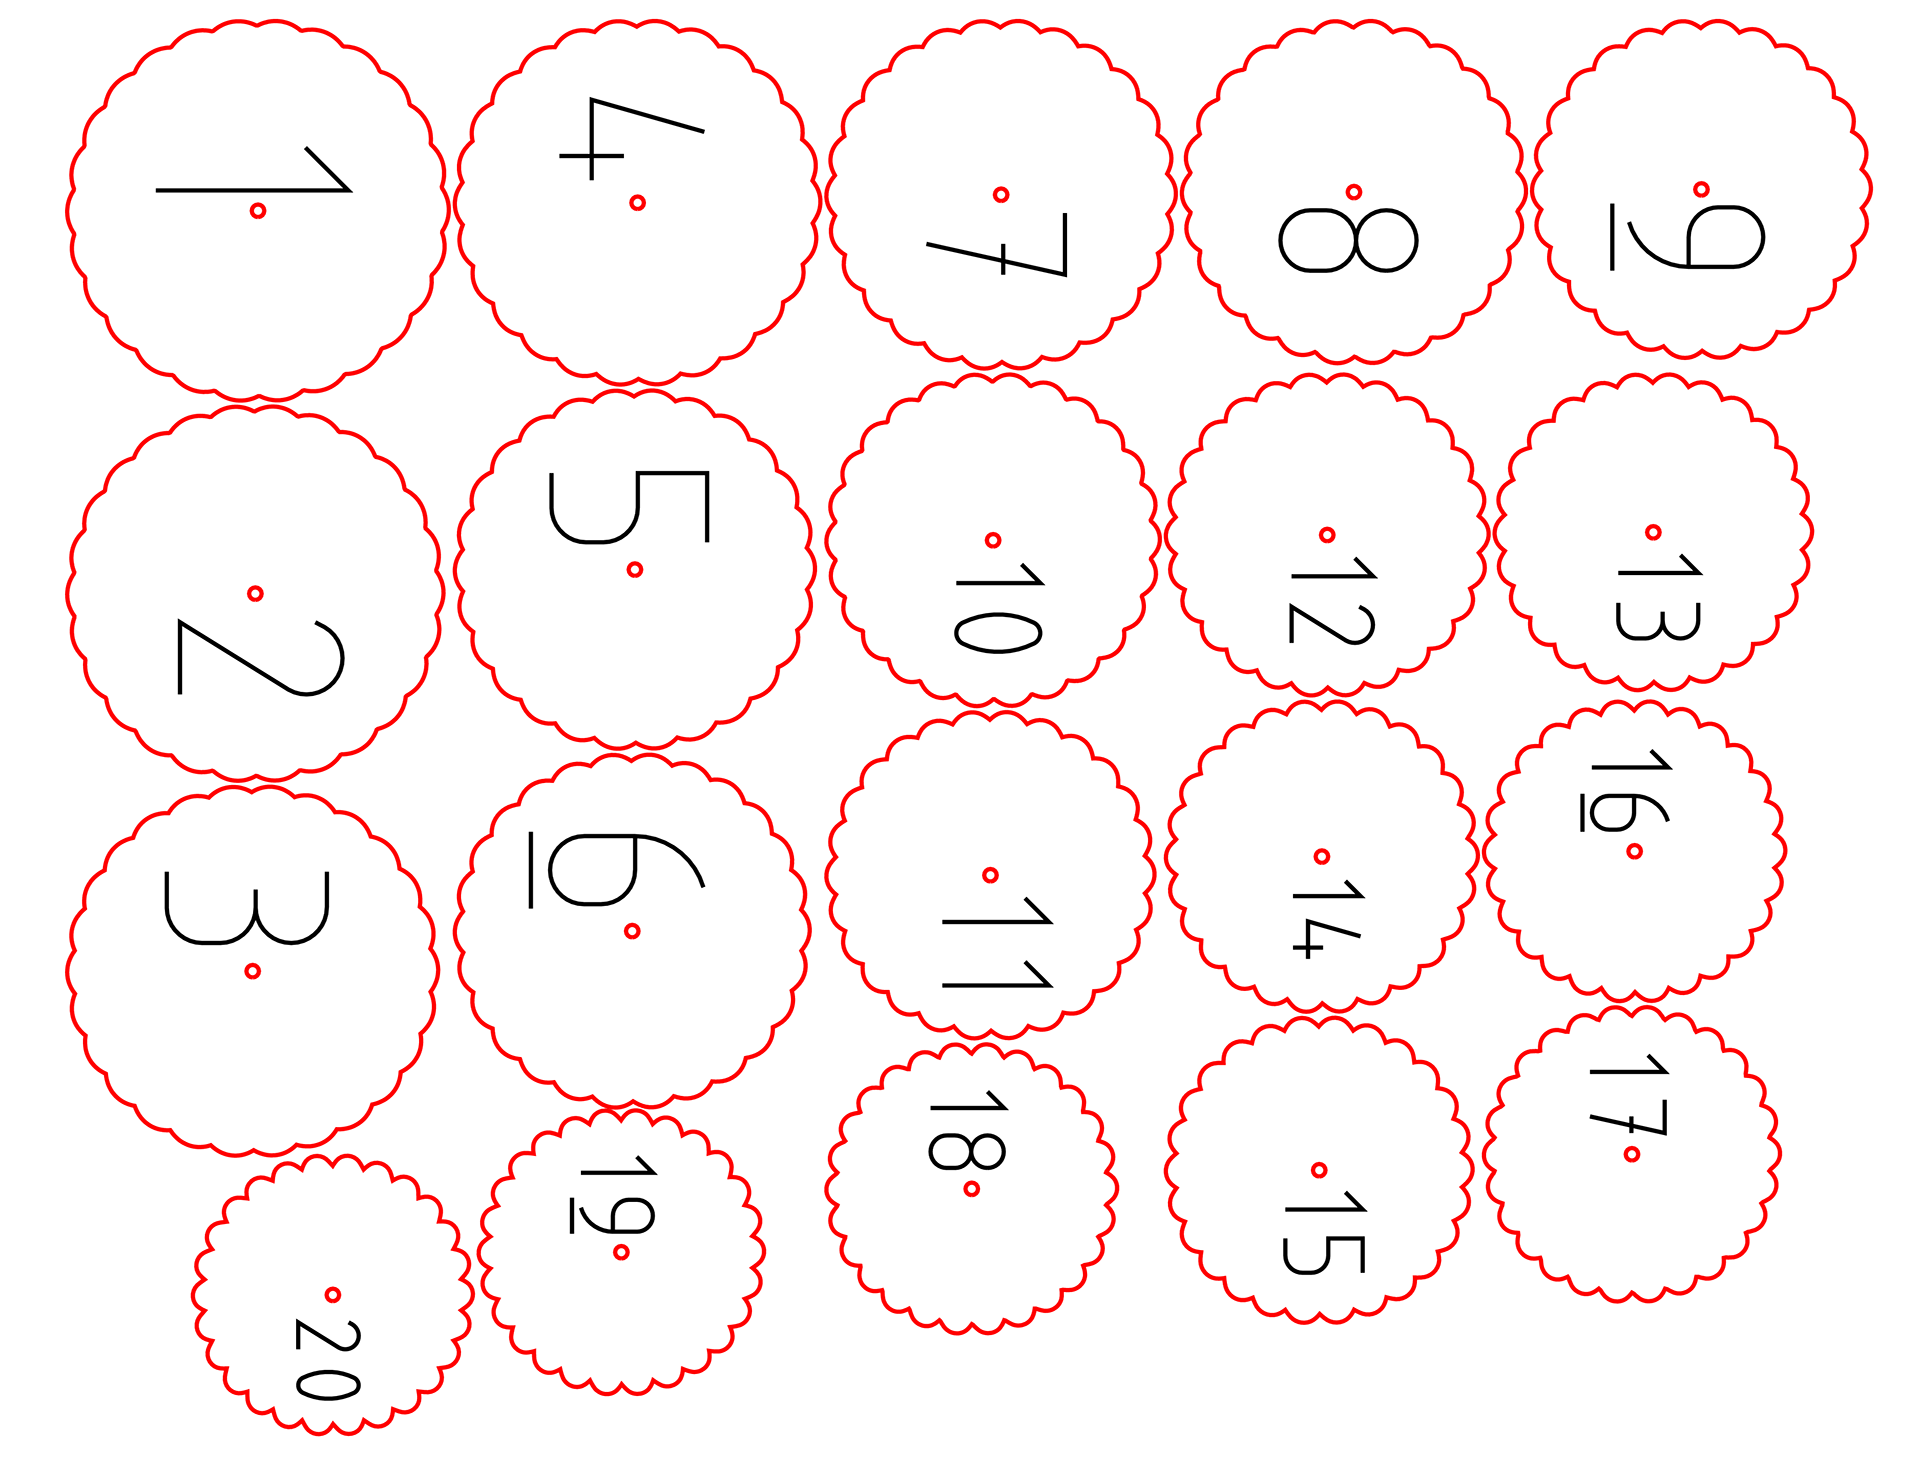
I laser cut the curves shown in red. I used corrugated cardboard because I already had a lot of it.
Then, I used a paintbrush as my dowel and stacked all of the slices on top of each other, in size order (this took a while).
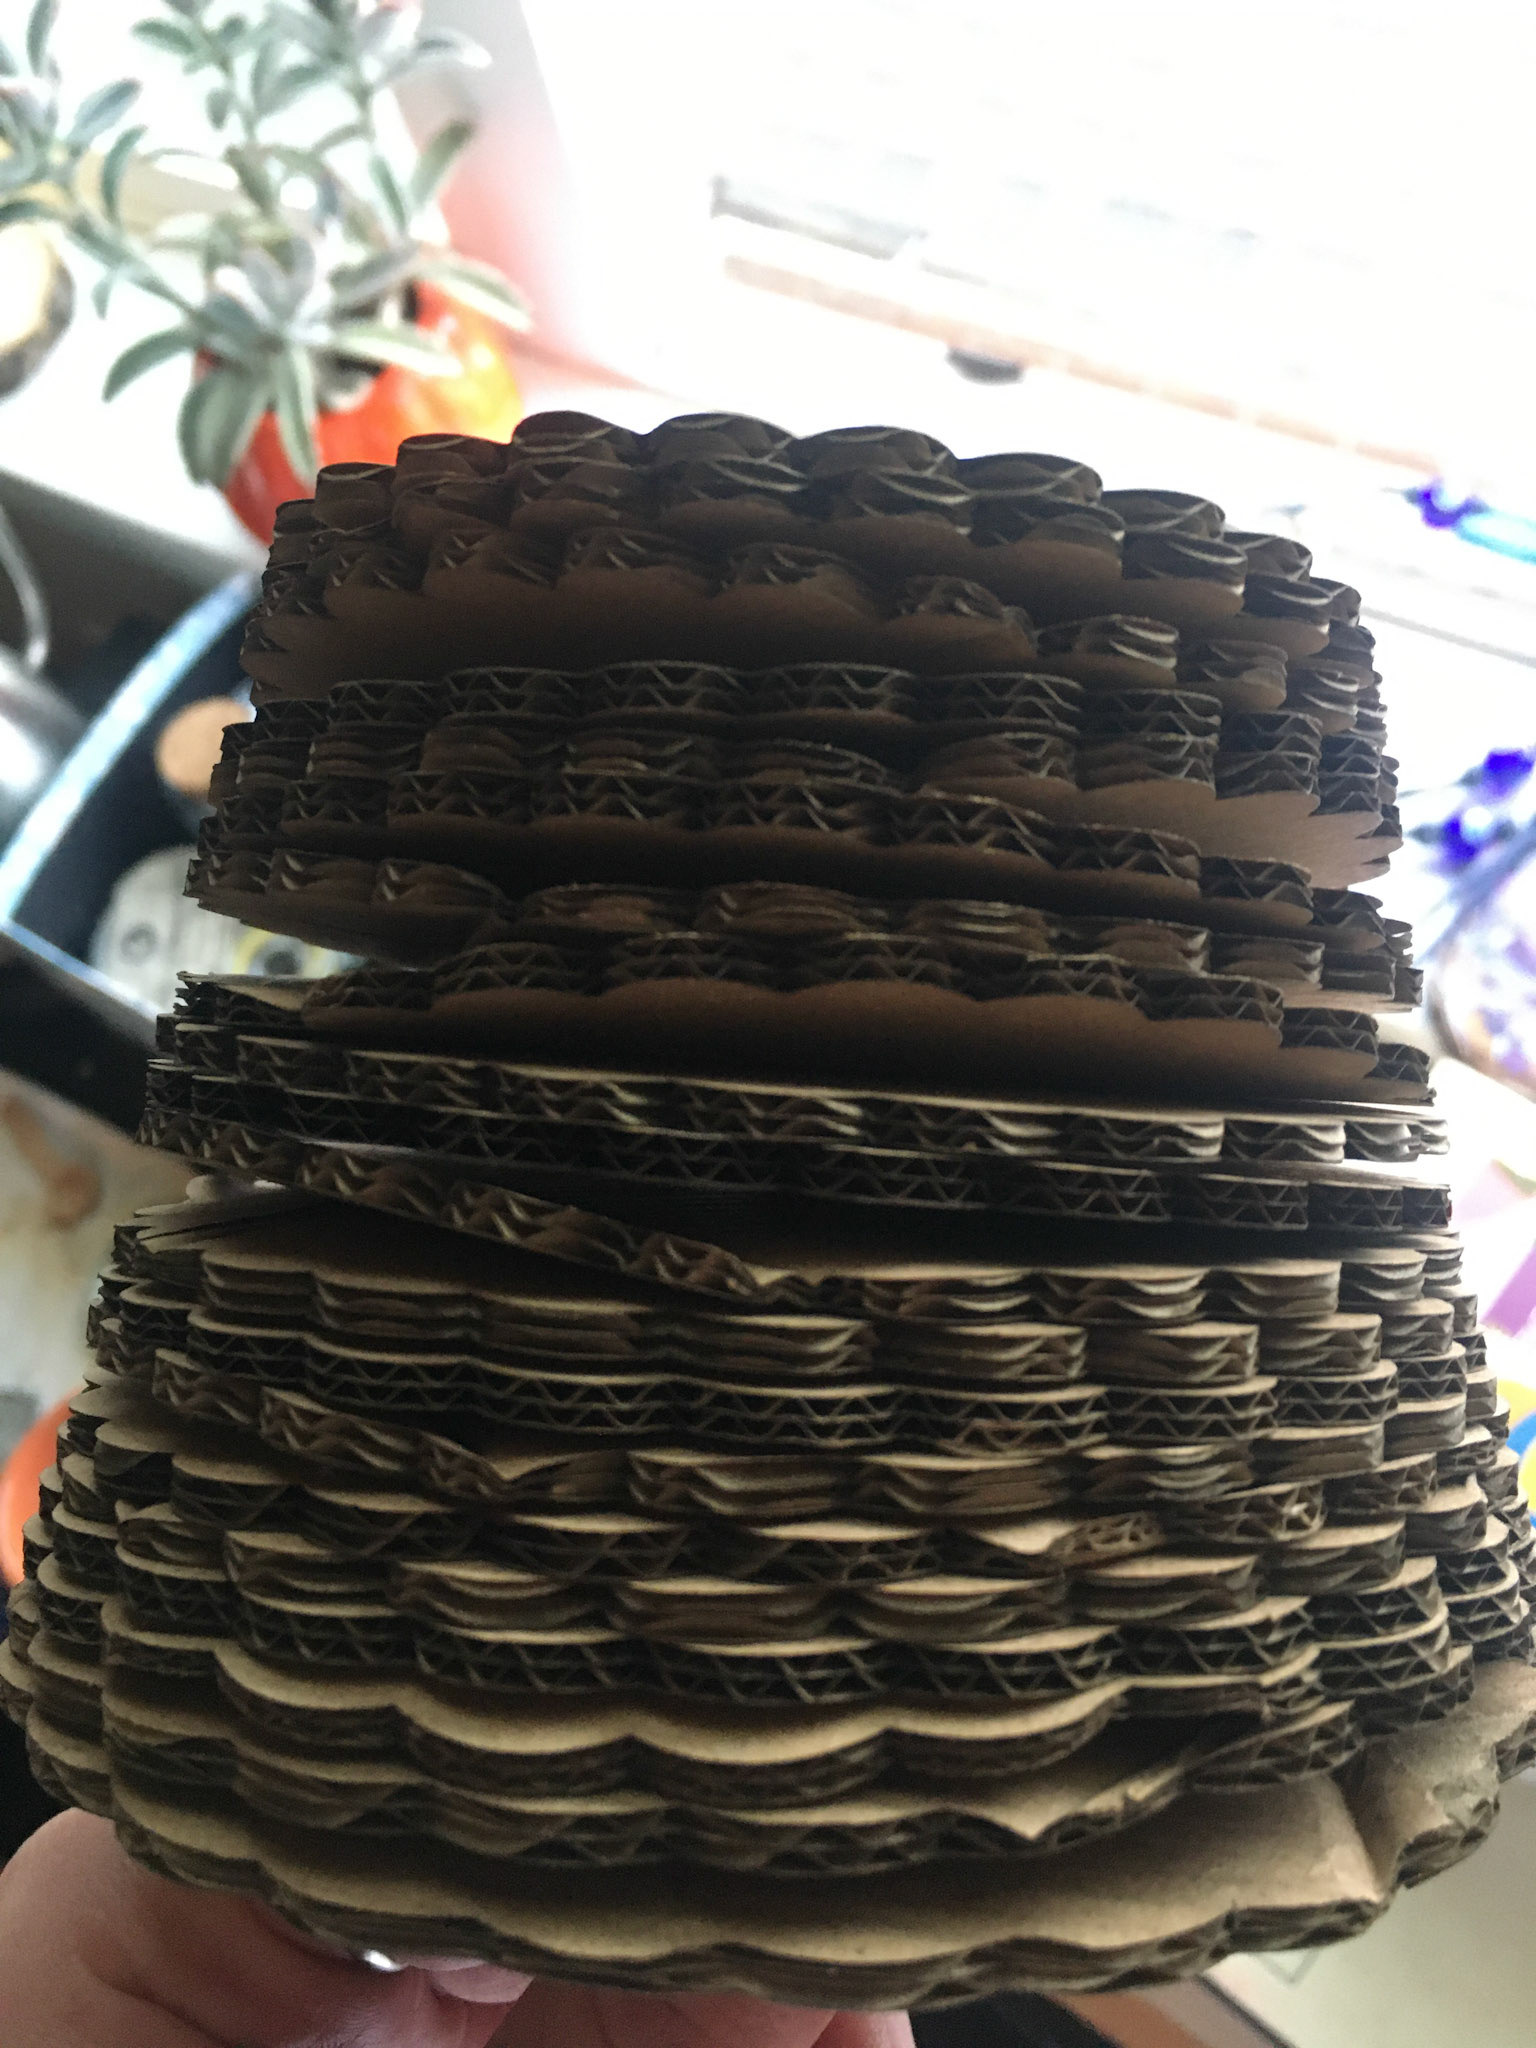
I glued all of the slices together, making sure to line up the ridges with each other. In the future, I would use a second, off-center dowel to keep the slices from rotating individually. Overall, I think the variation in corrugated cardboard along with the ridges of the shape made for an interesting form.

PART C
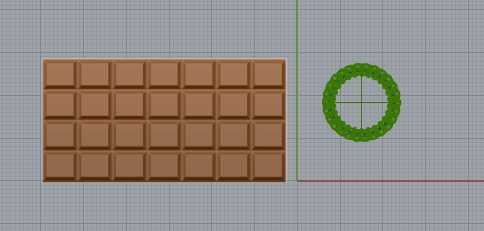
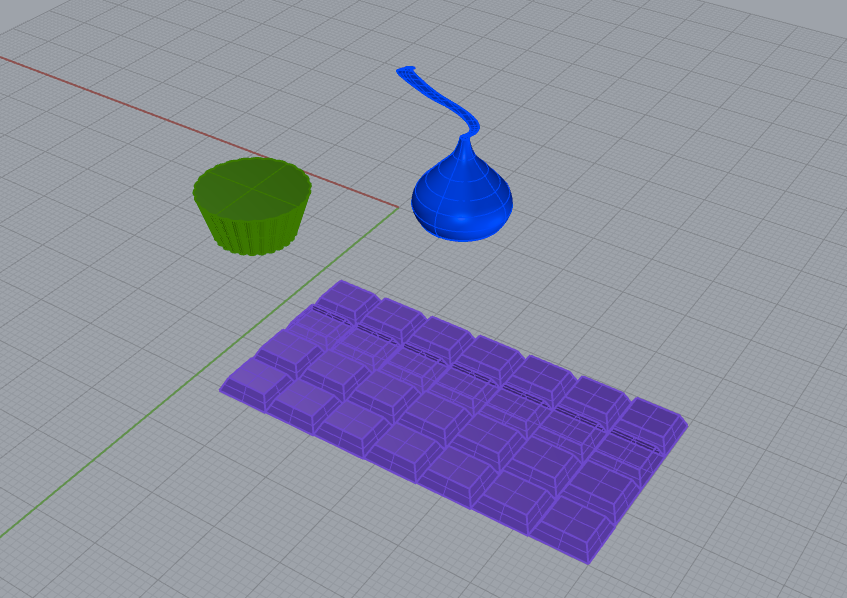
I decided to model two other chocolate shapes to add to the little world I had created. I went with a Hershey's kiss and a chocolate bar. I used Picture to bring in photos for each into Rhino.

For the kiss, I traced a curve along the edge according to my picture. I used Revolve to create the curved surface of the kiss. I then capped the surface to create a solid. I traced the little flag our using Interp Curve, and then made that into a surface. I used Cage Edit to give the surface a little more flag-like dimension.
For the bar, I traced two rectangles, outer and inner, around a single section of the chocolate. I used the gumball to separate those a little bit on the z-axis to give the height of the bar. I lofted the two rectangles to create a surface, and then arrayed that surface to create the rest of the bar. I joined all the surfaces together, and capped them to make a solid bar.
PART D
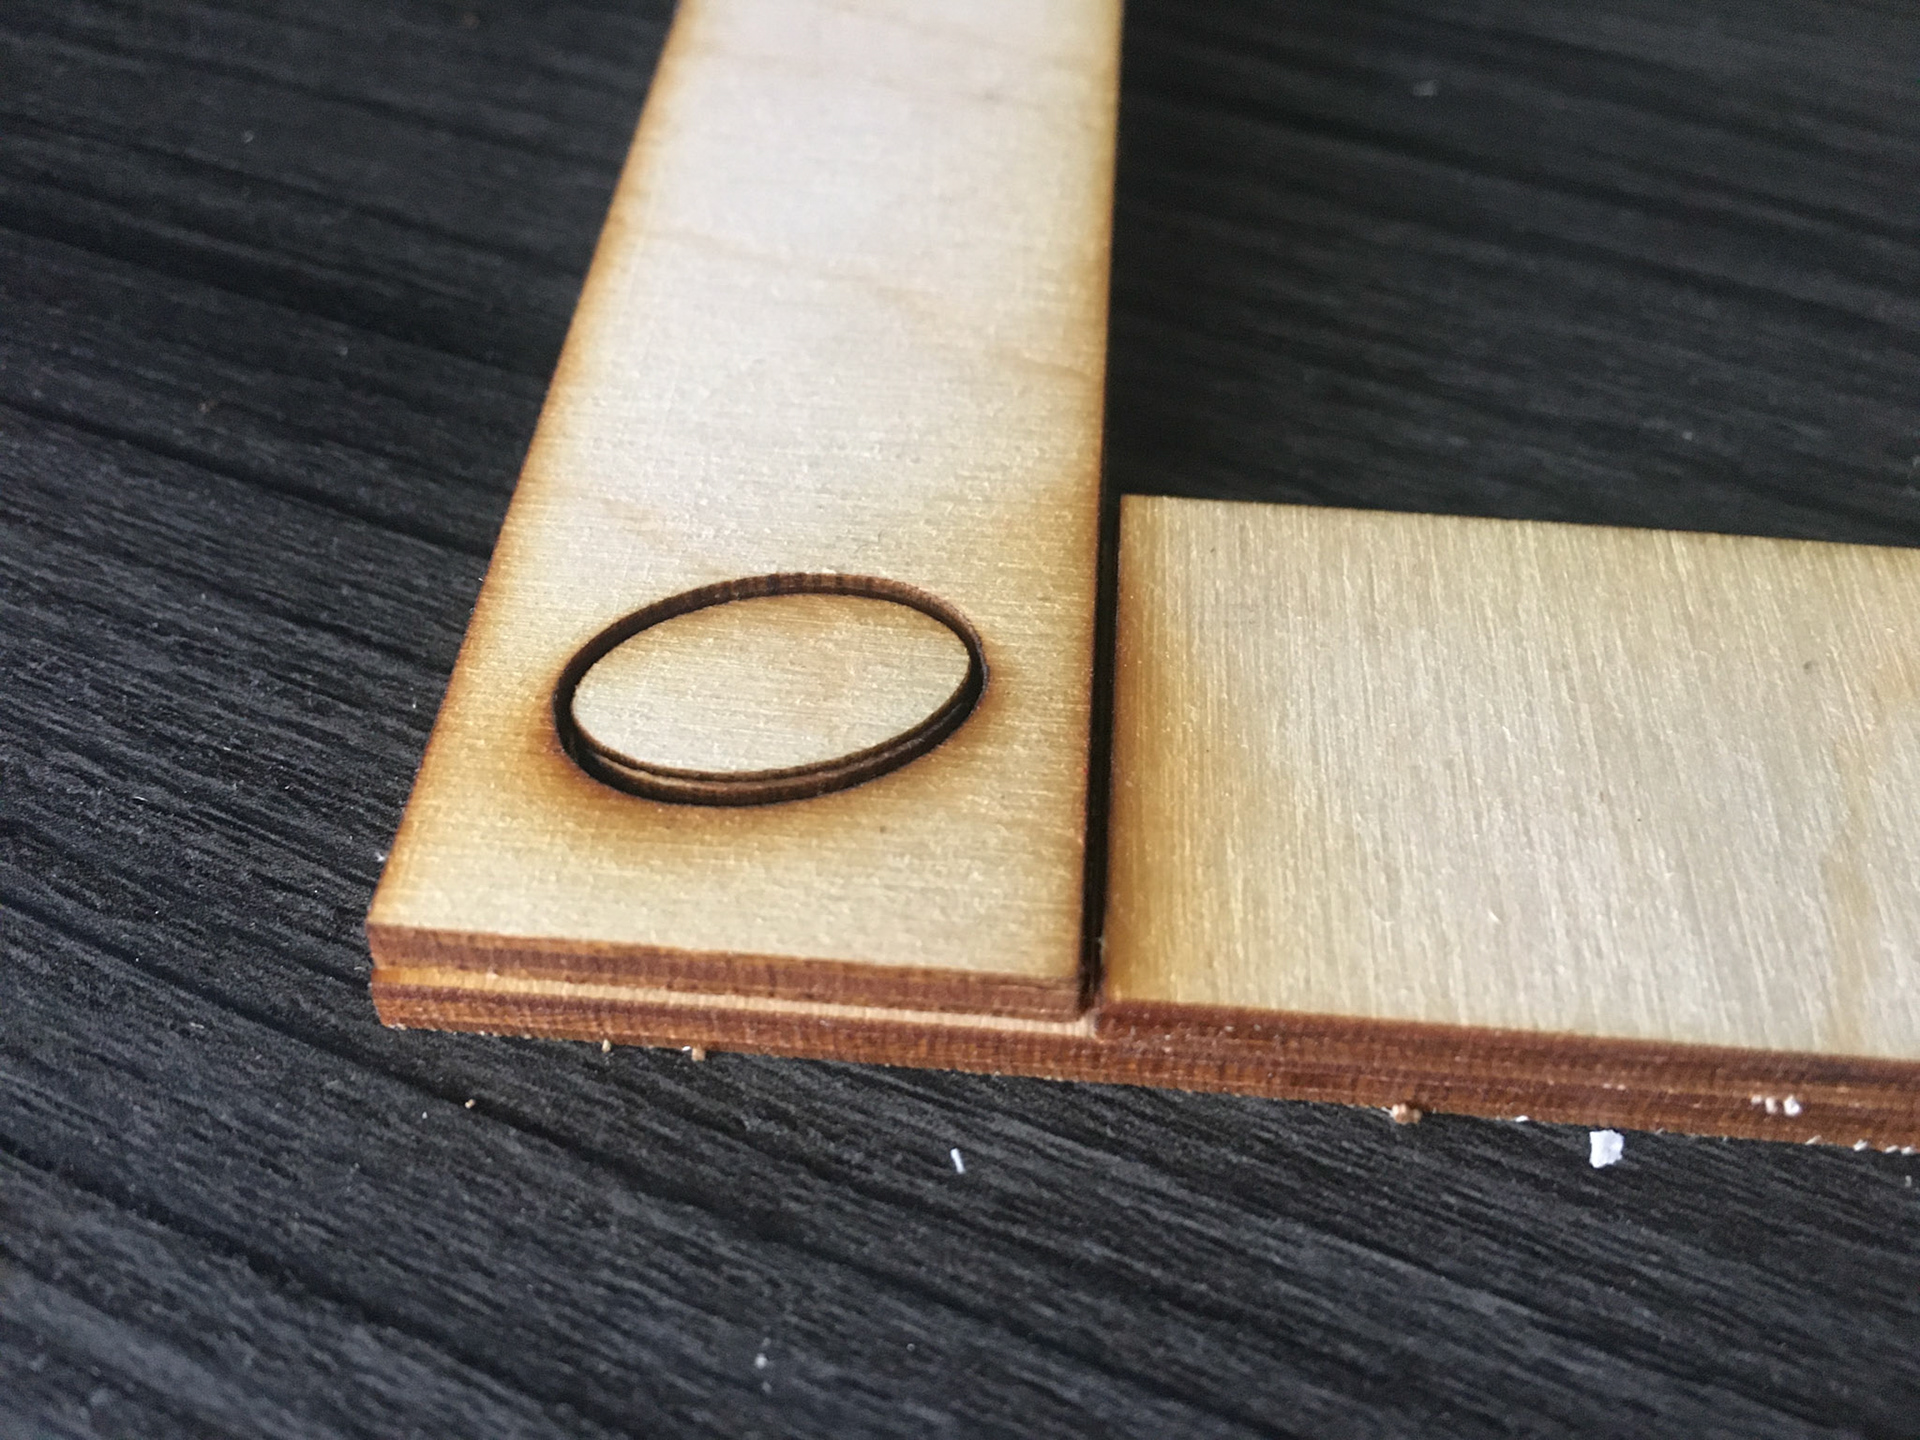
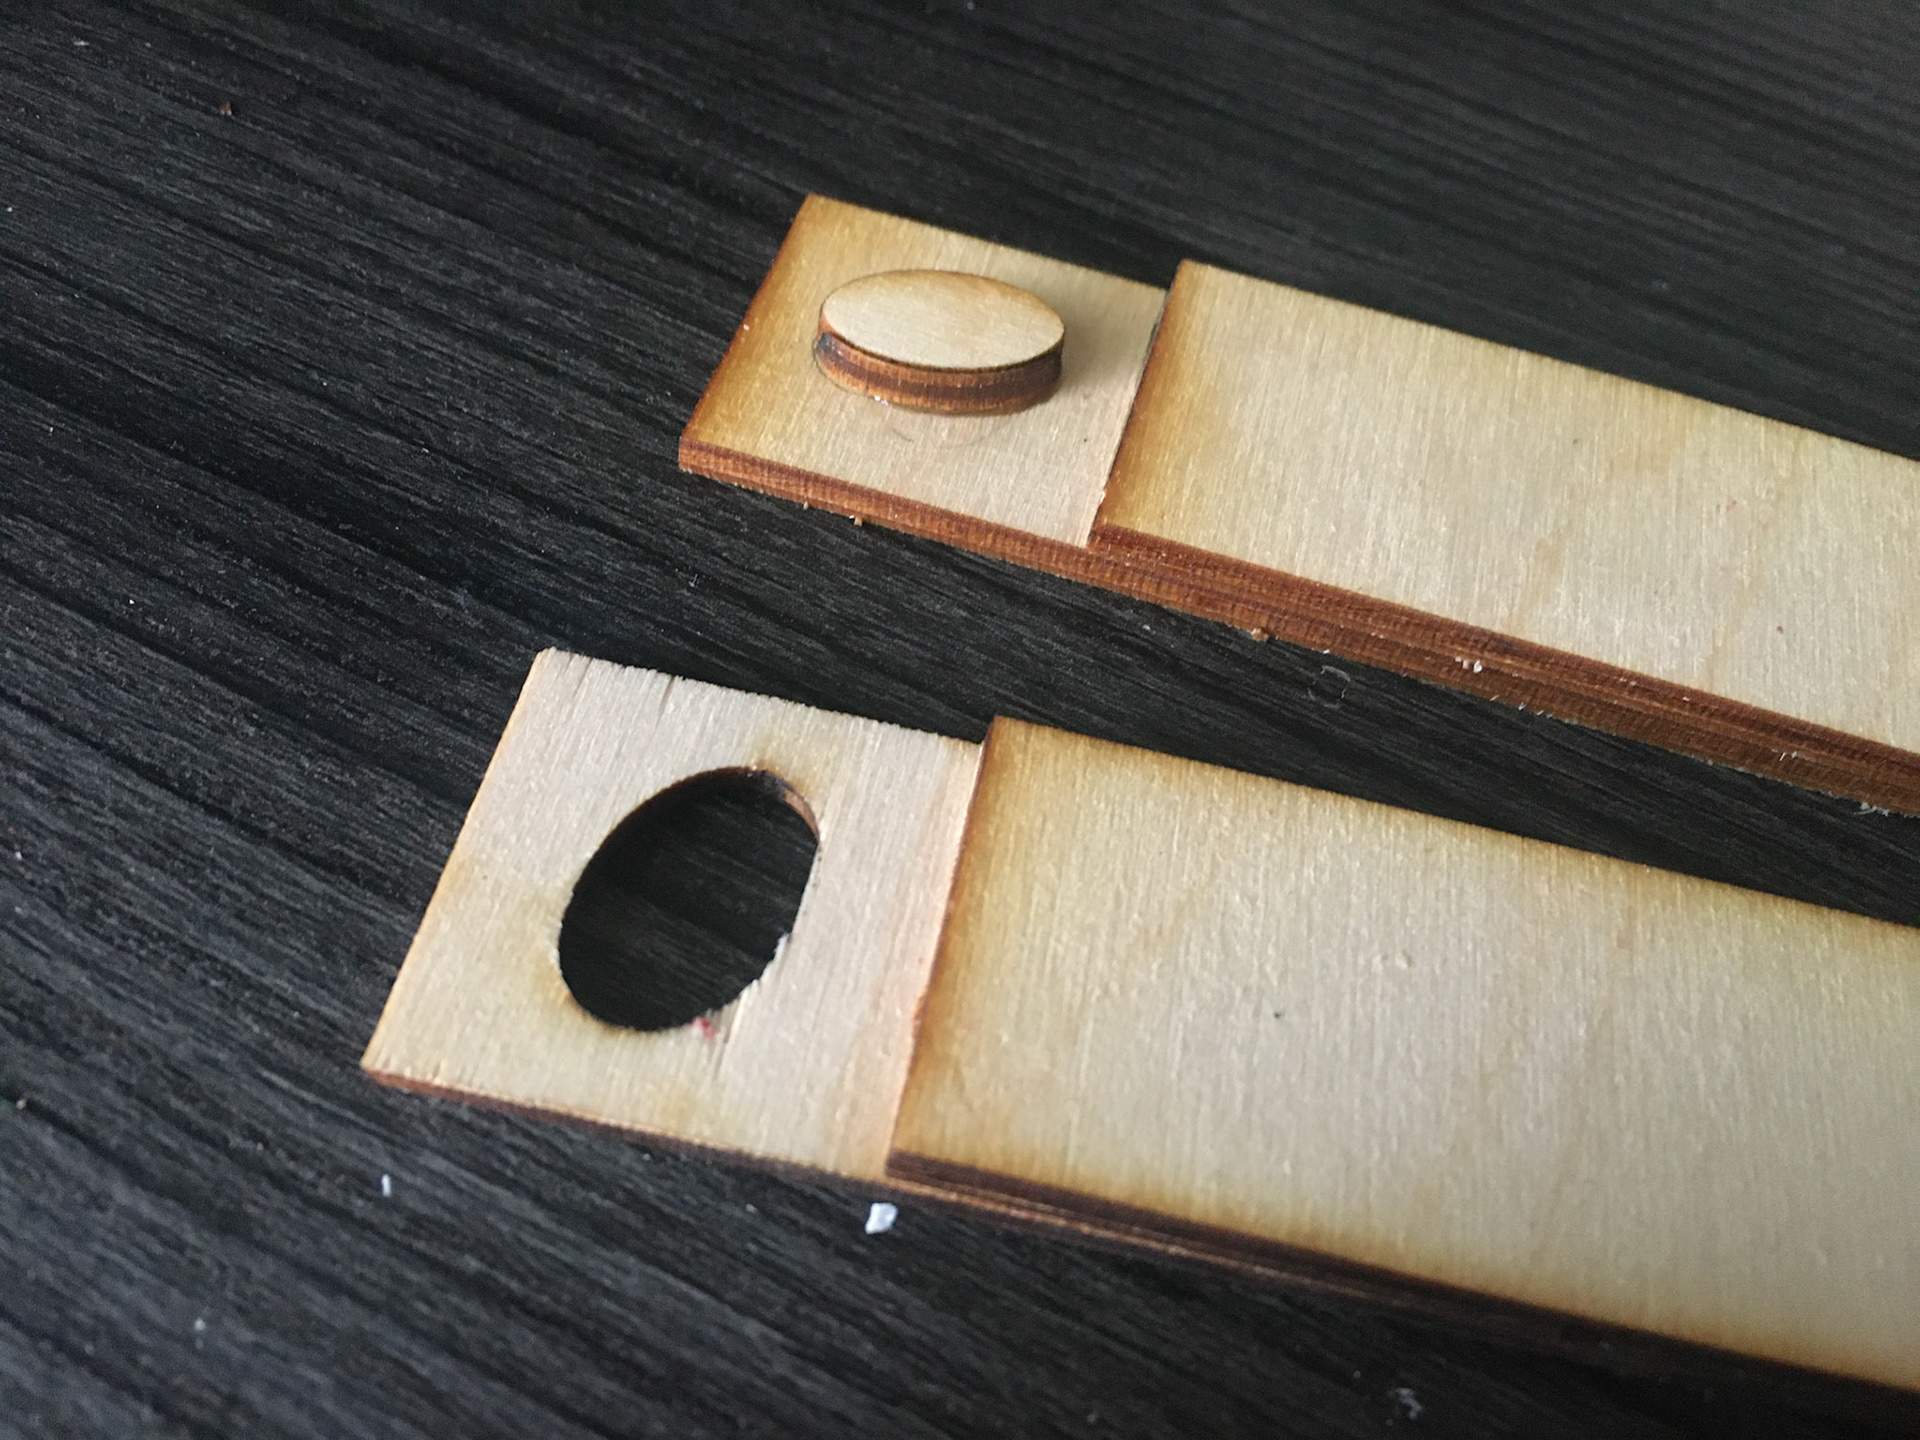
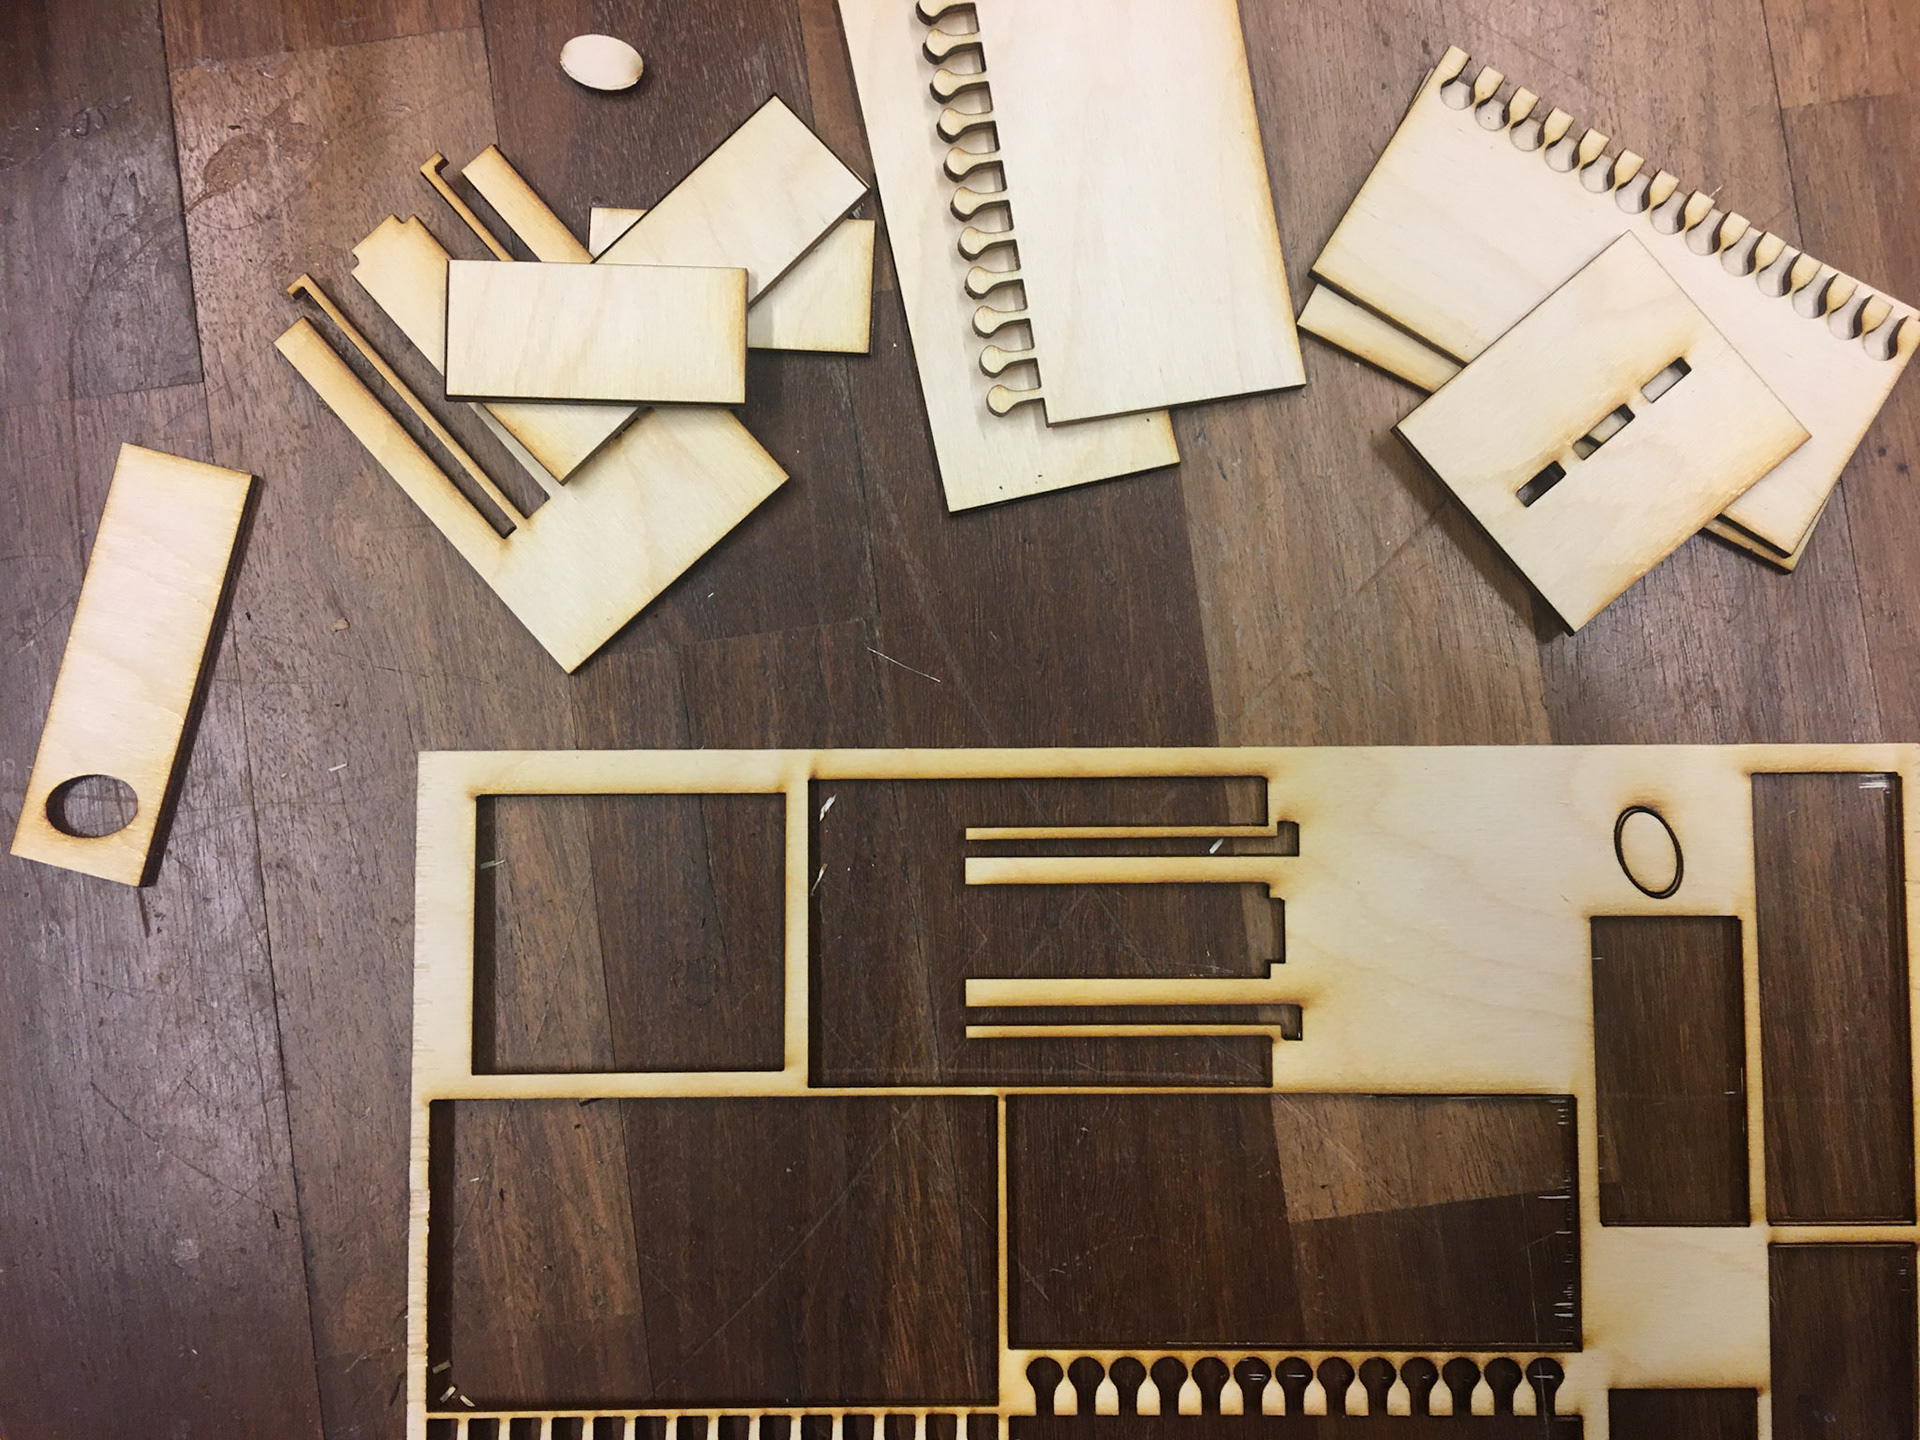
For my three joints, I chose to manufacture the lapped dovetail joint, the clip tenons joint, and the halving with elliptical tenons joint. I used rhino to model all of my joints with a 0.25 extrusion to resemble the 0.25 in wood I would be using to make these.
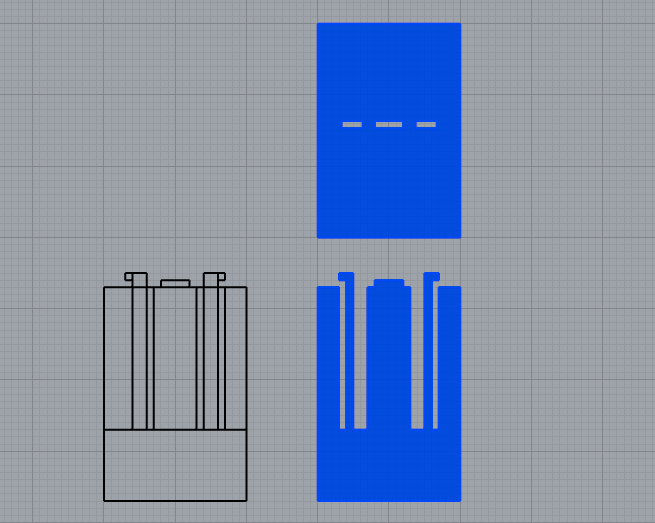
I used illustrator to organize my curves into a single file and format them for the laser cutter.
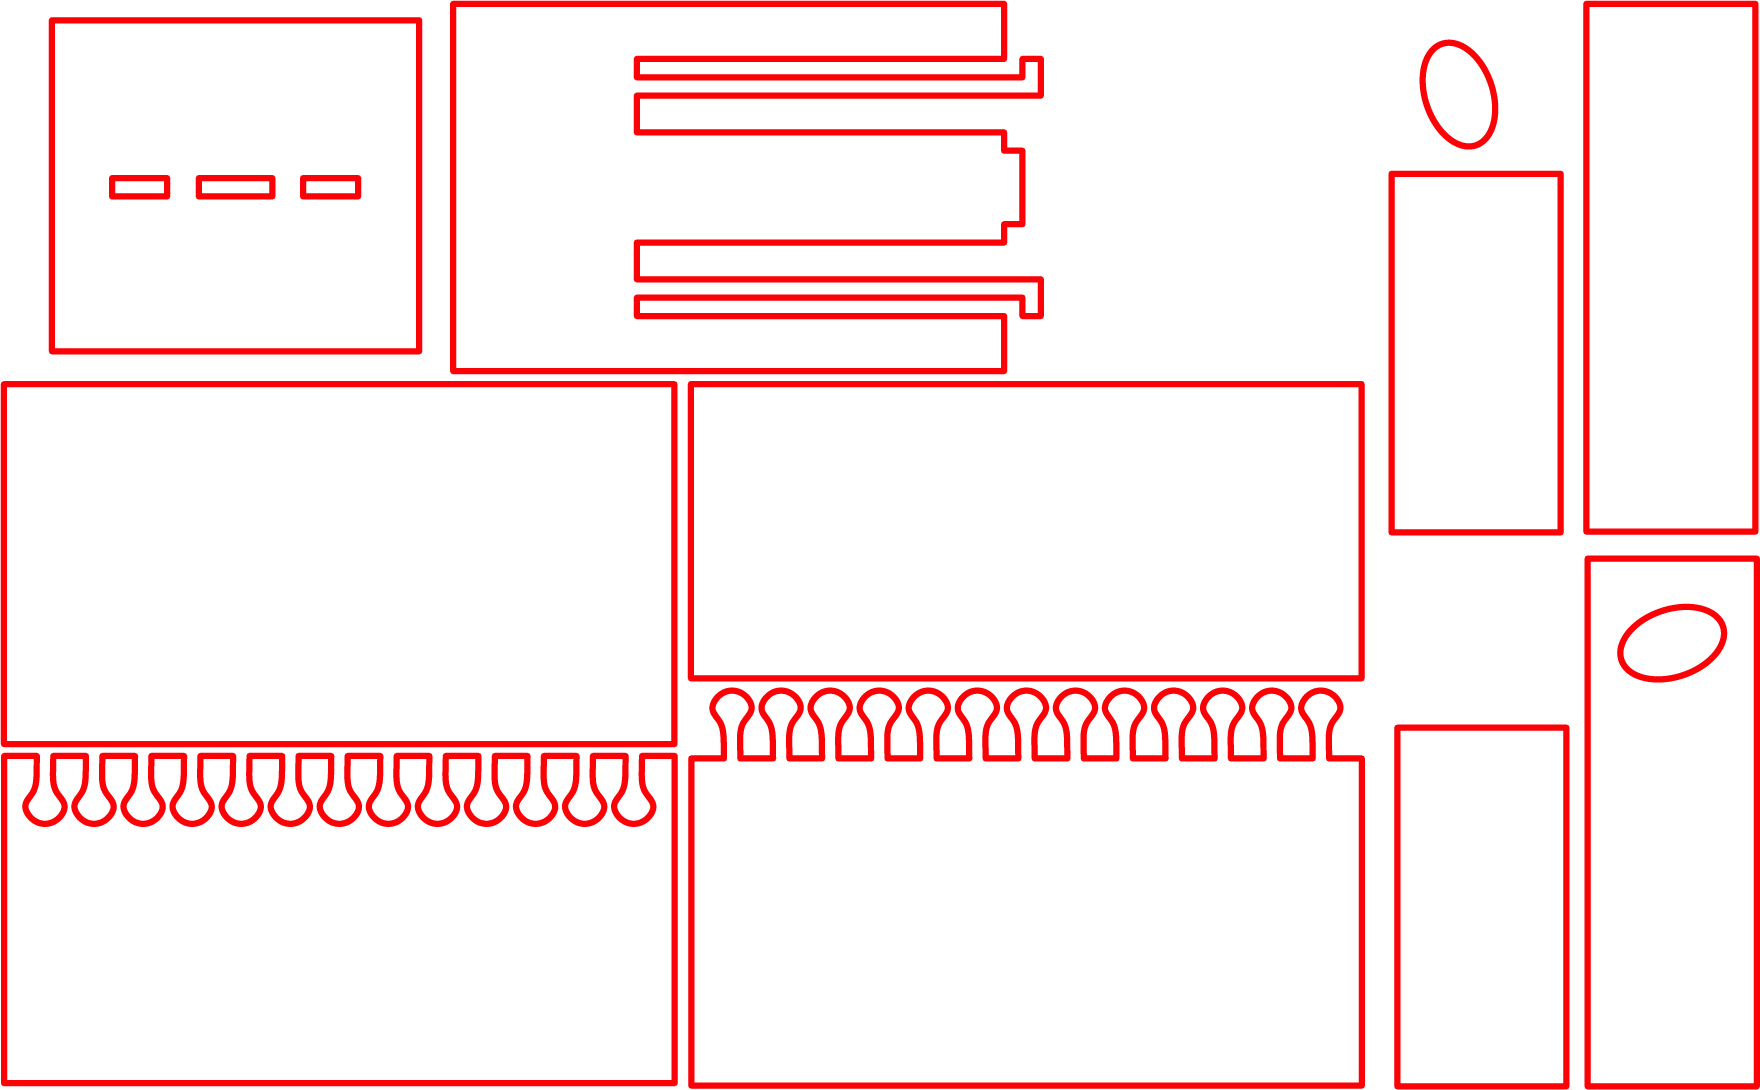
I laser cut all the pieces on one sheet on 1/8" balsa wood.
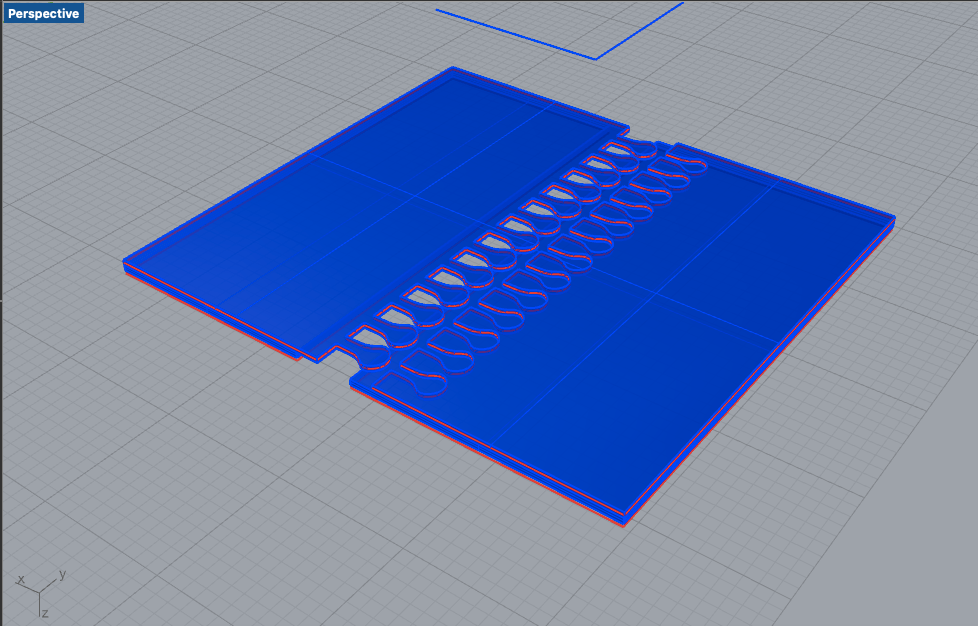
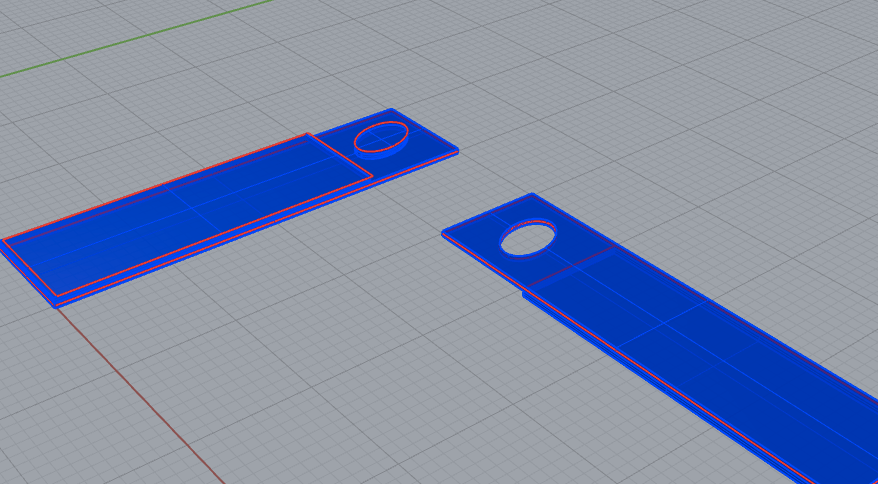
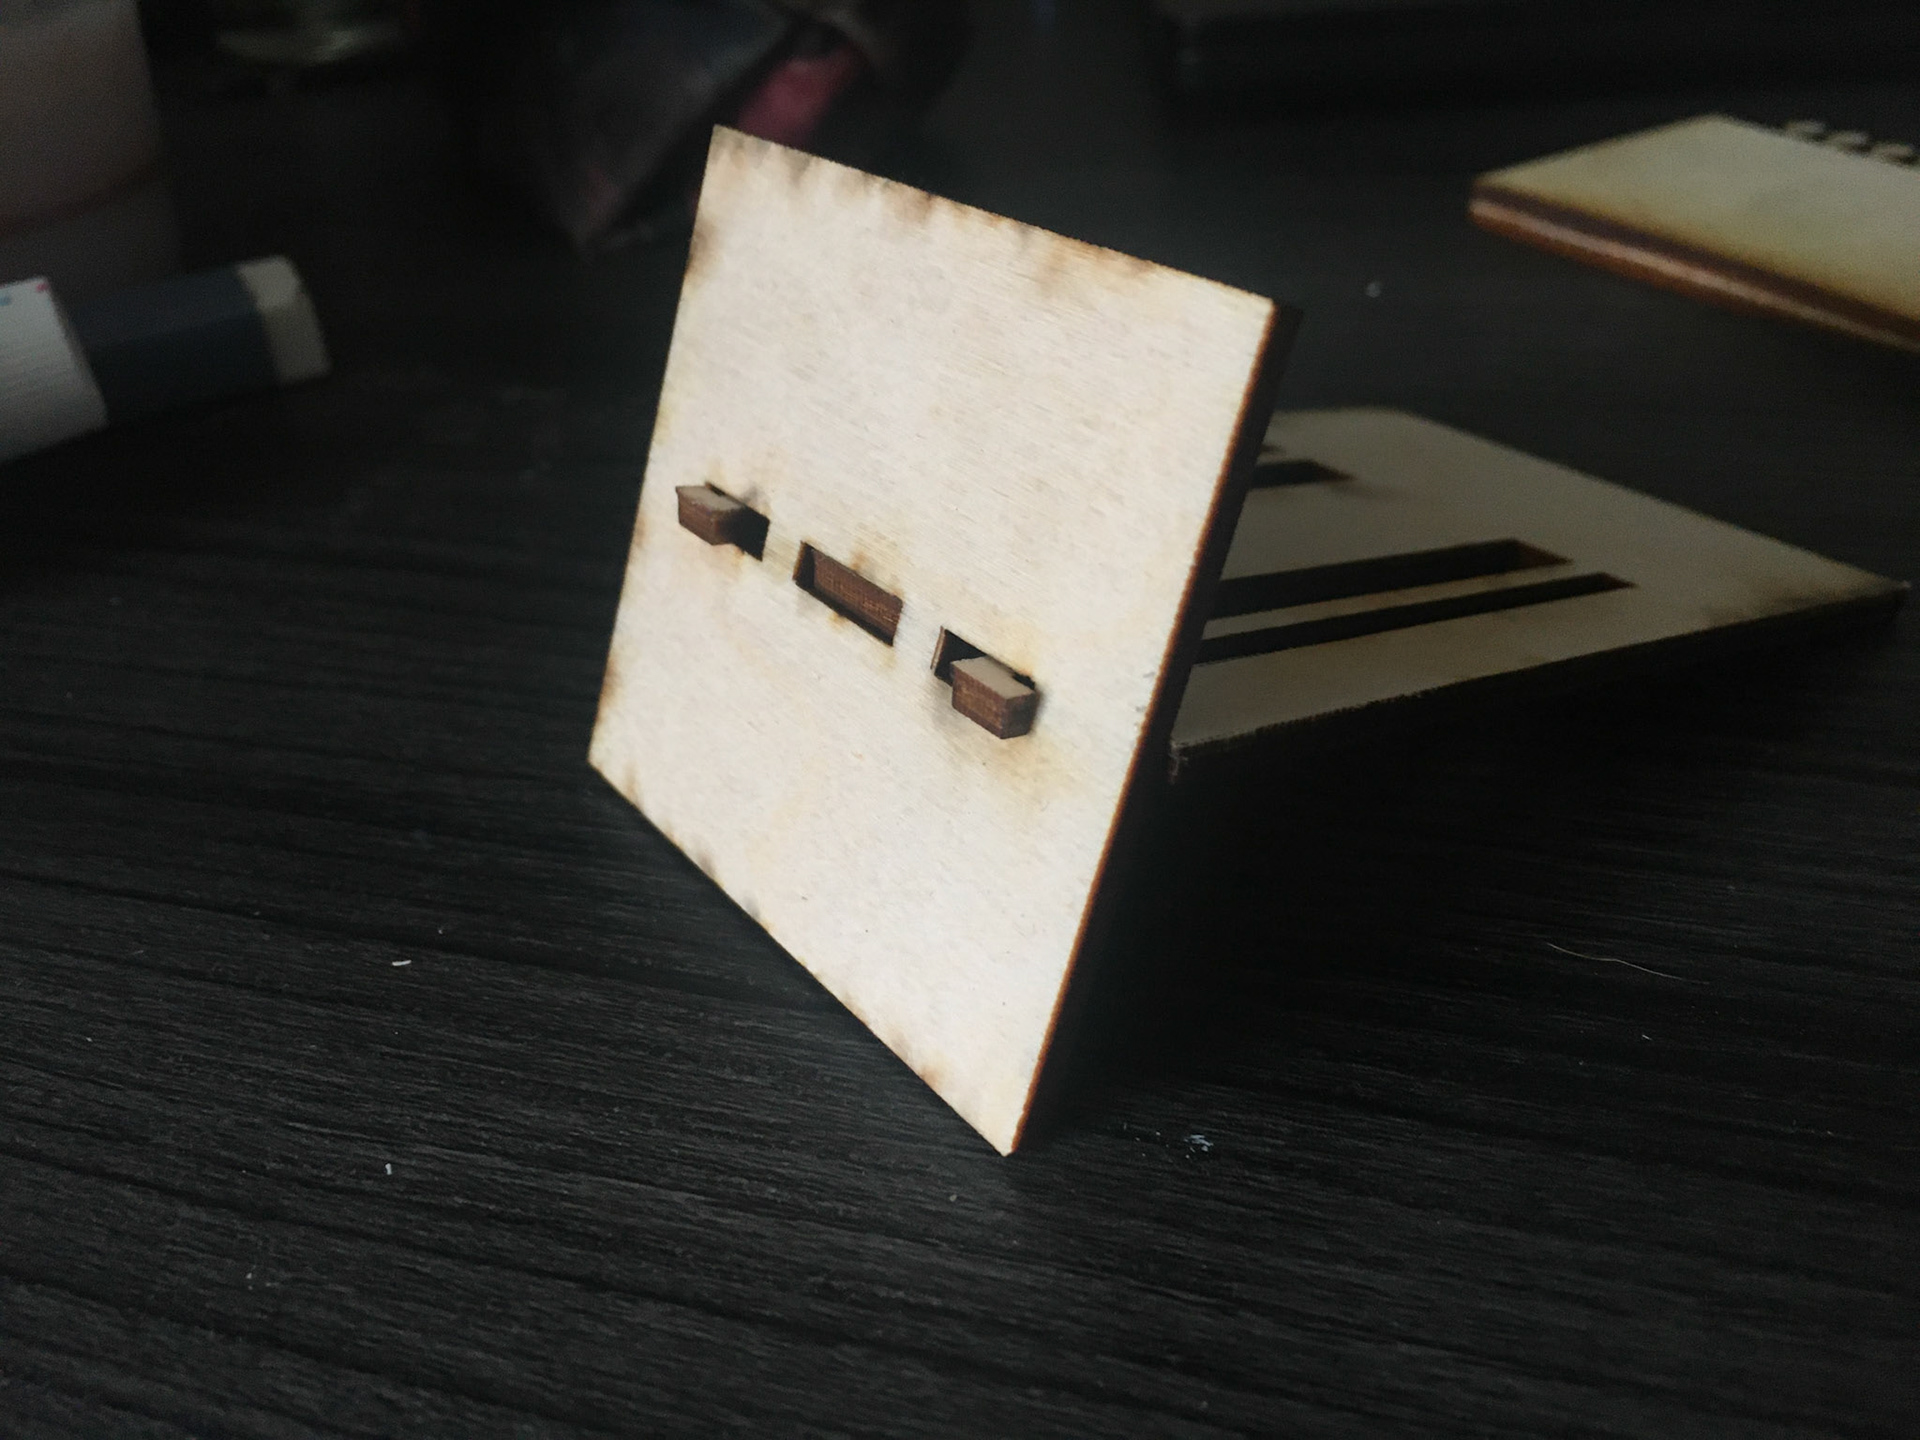
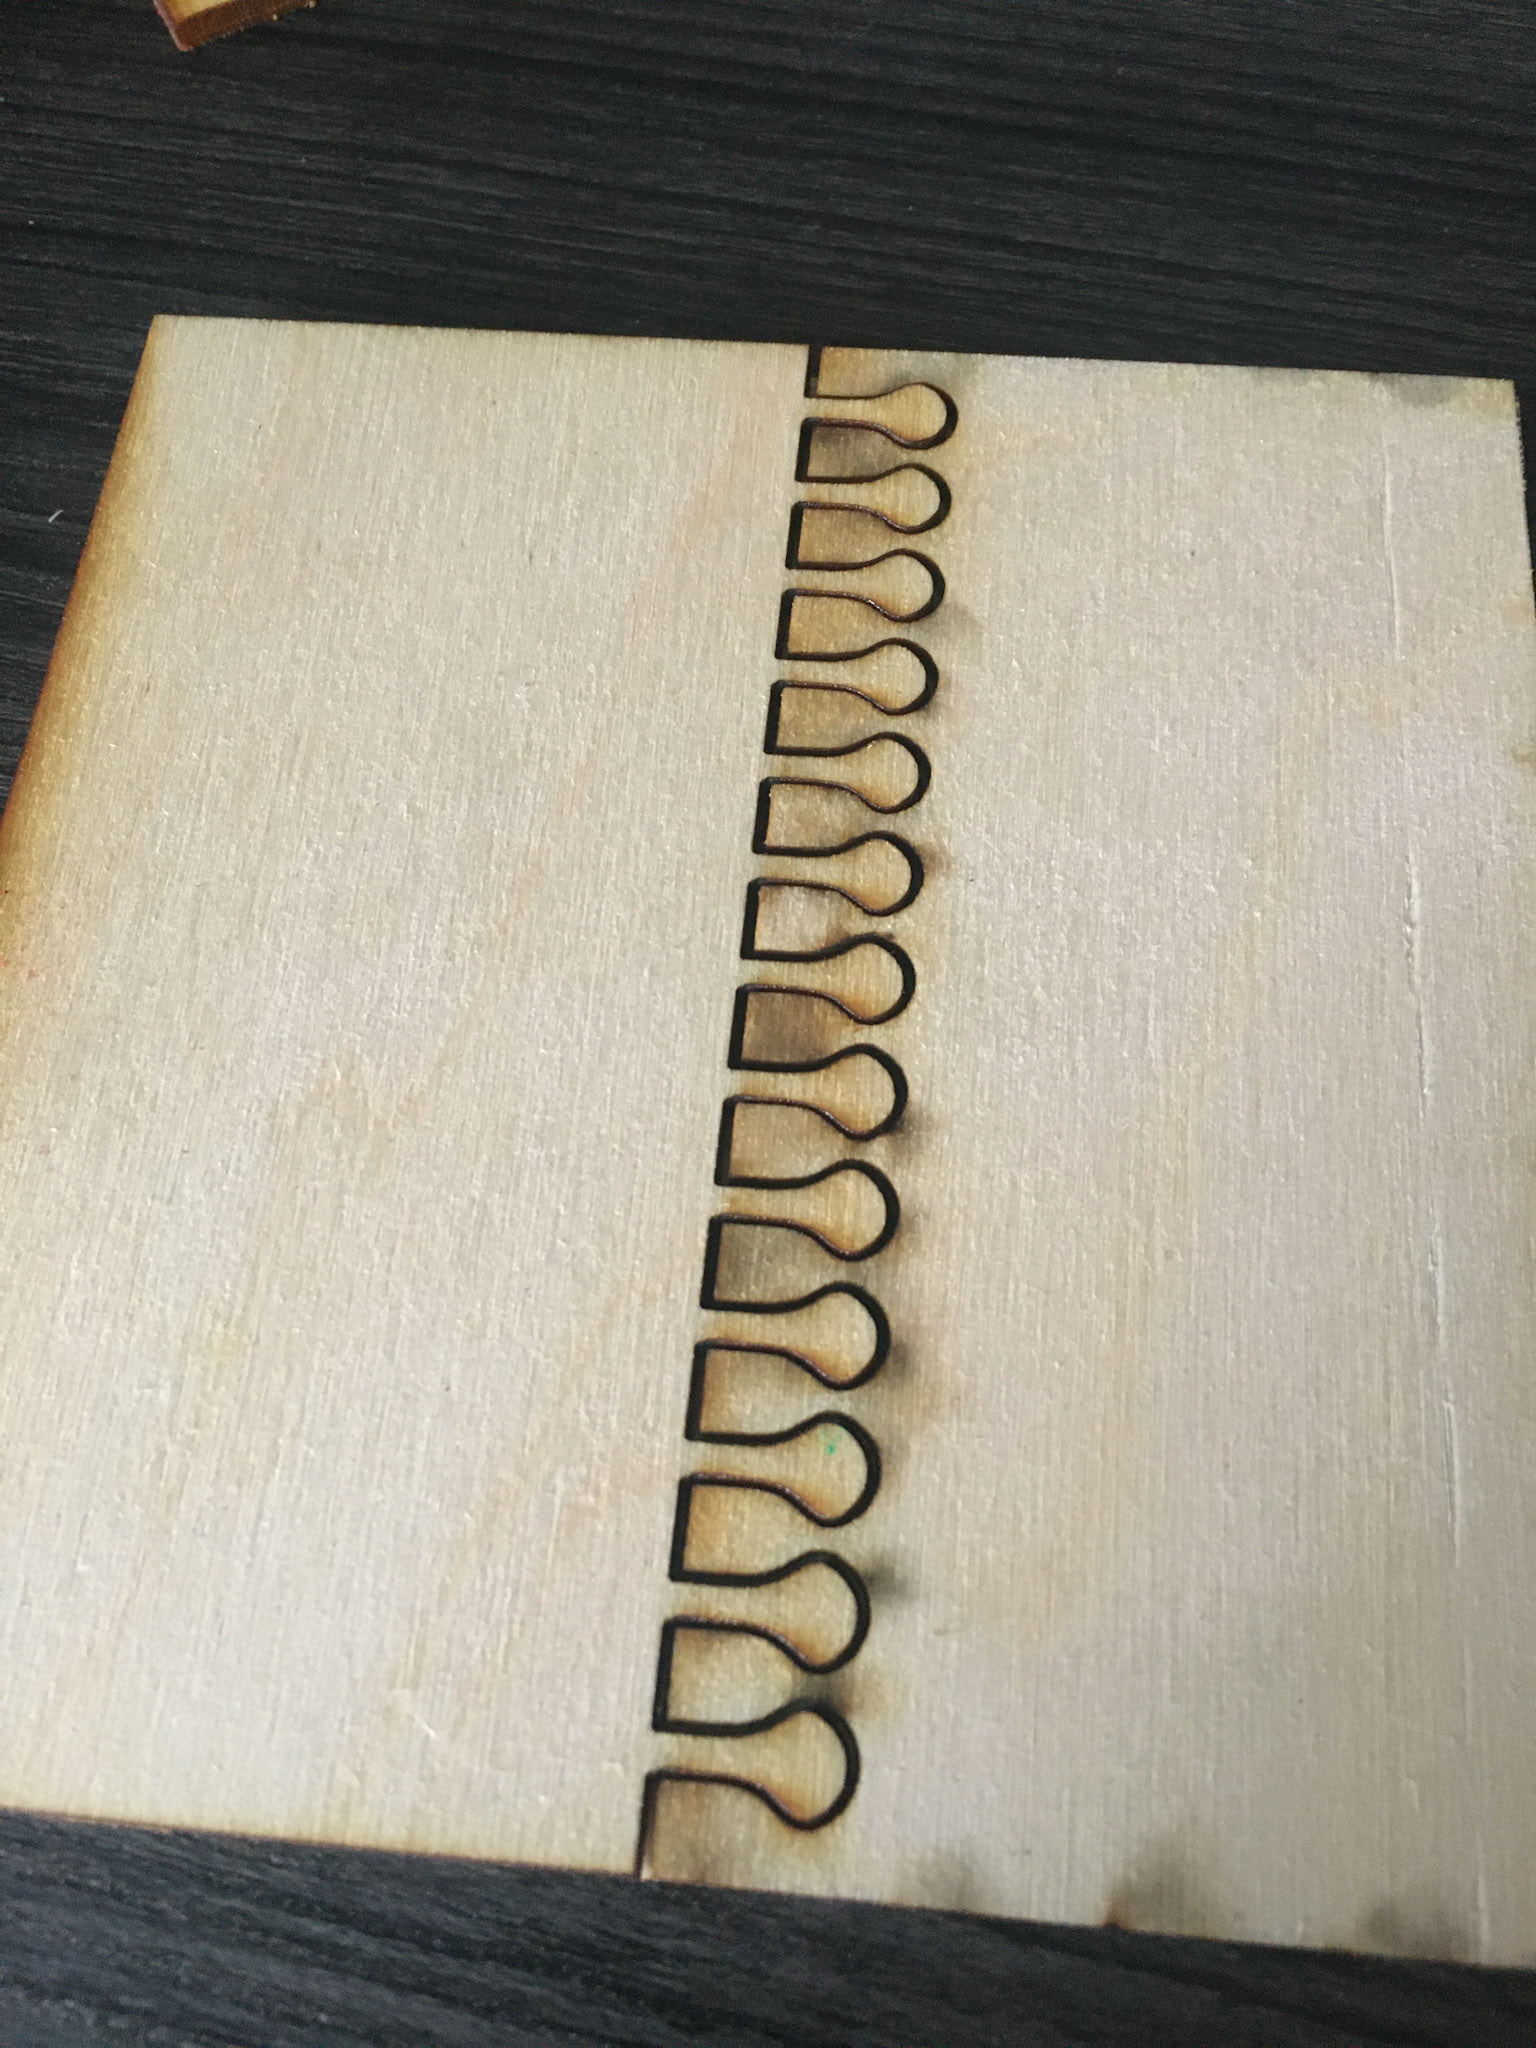
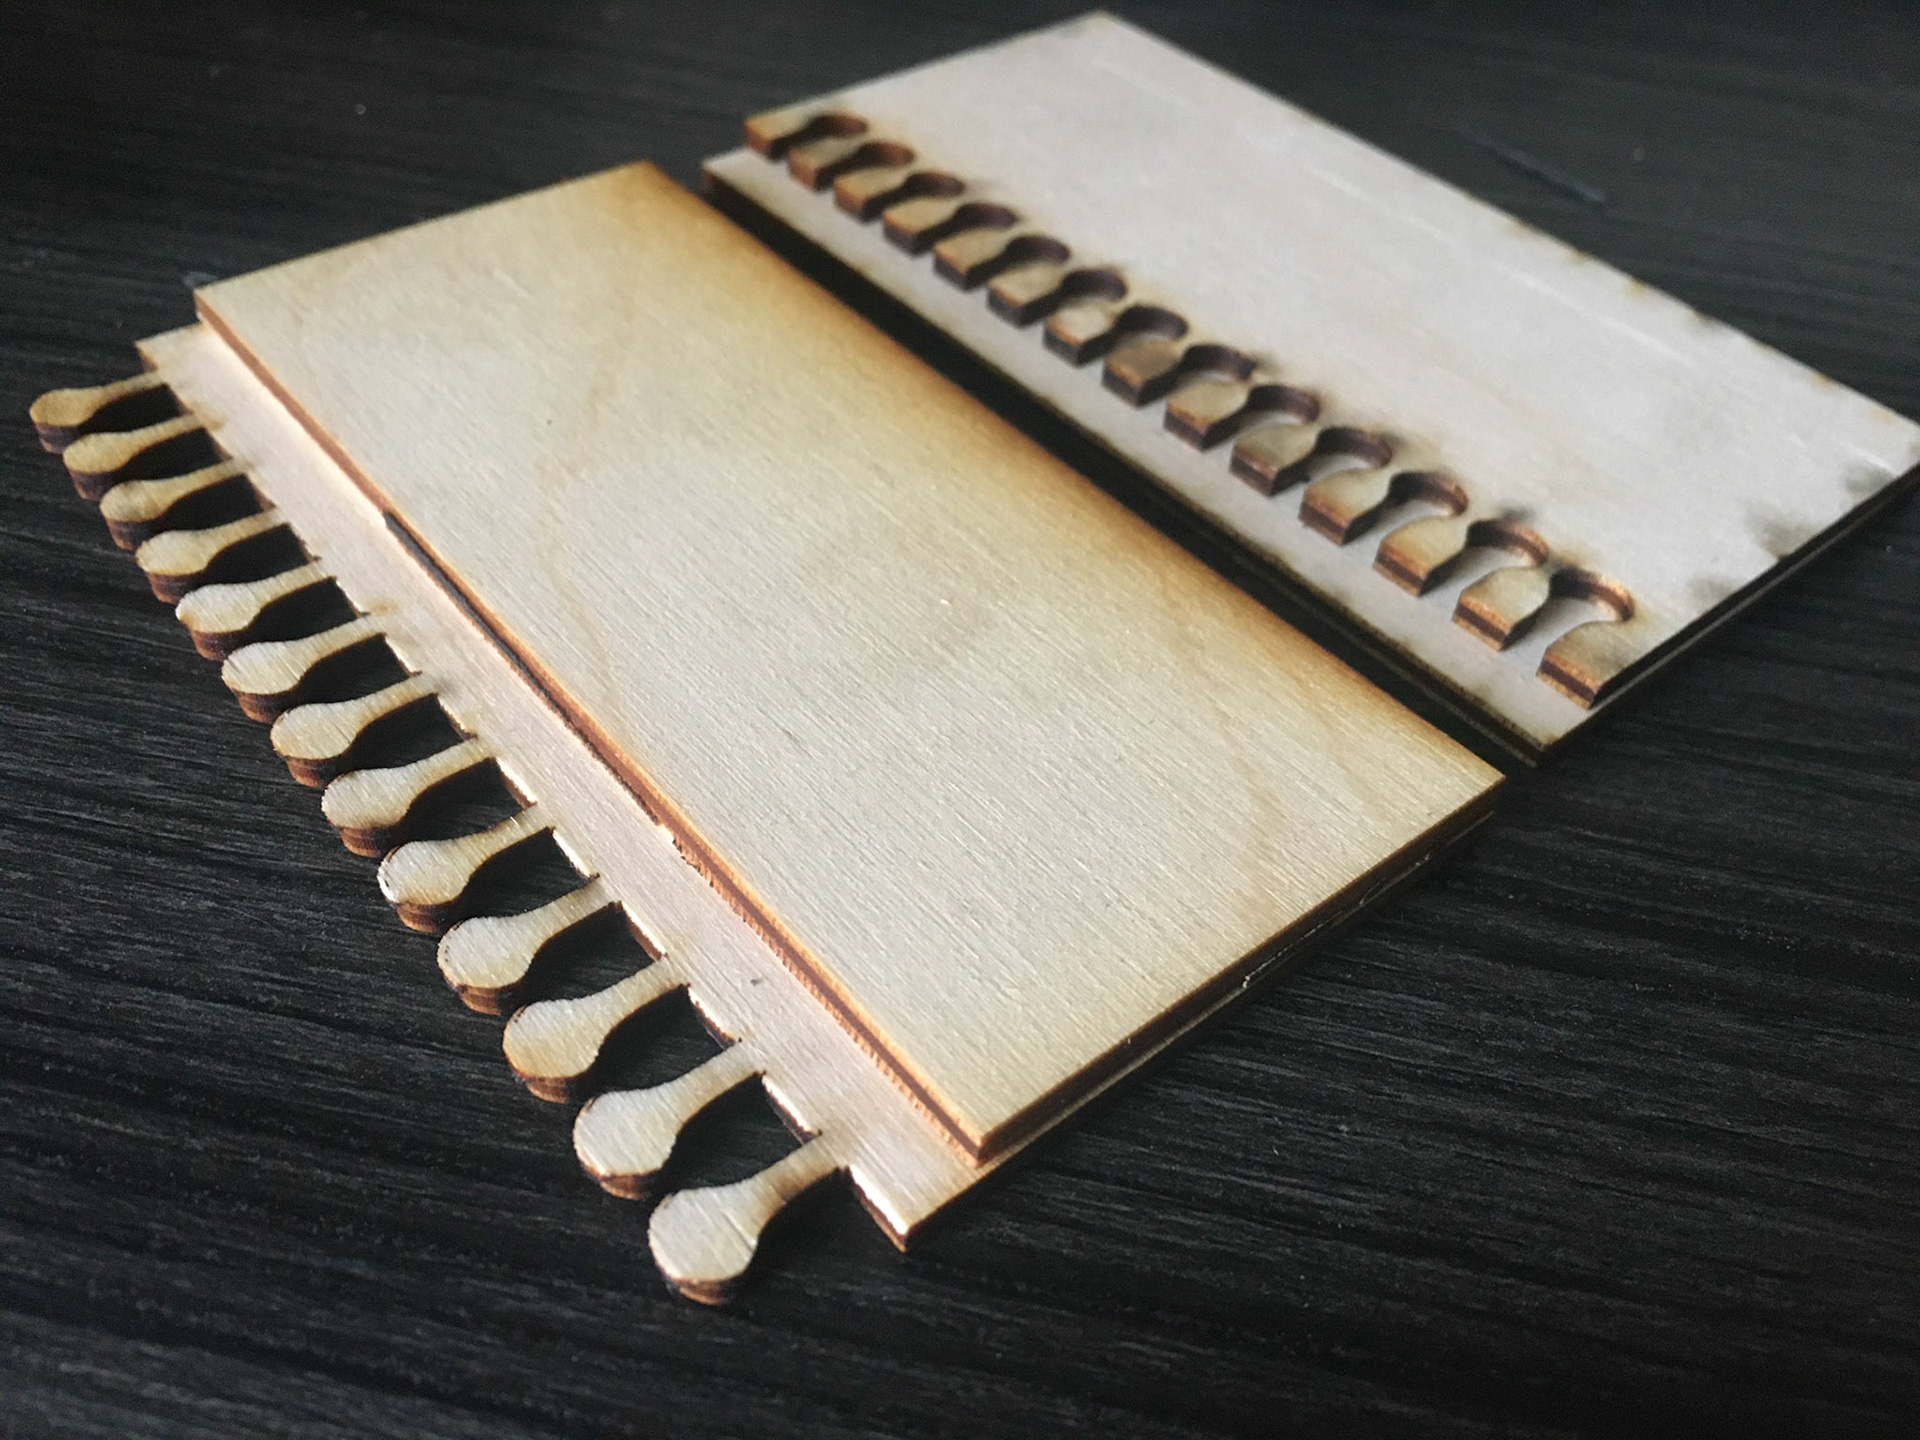
The clip tendons joint is single-layer, and just clips together as shown. The join works, but the tenons are very fragile. In the future, I would make the outside clip-in spots a little smaller to make it more stable.
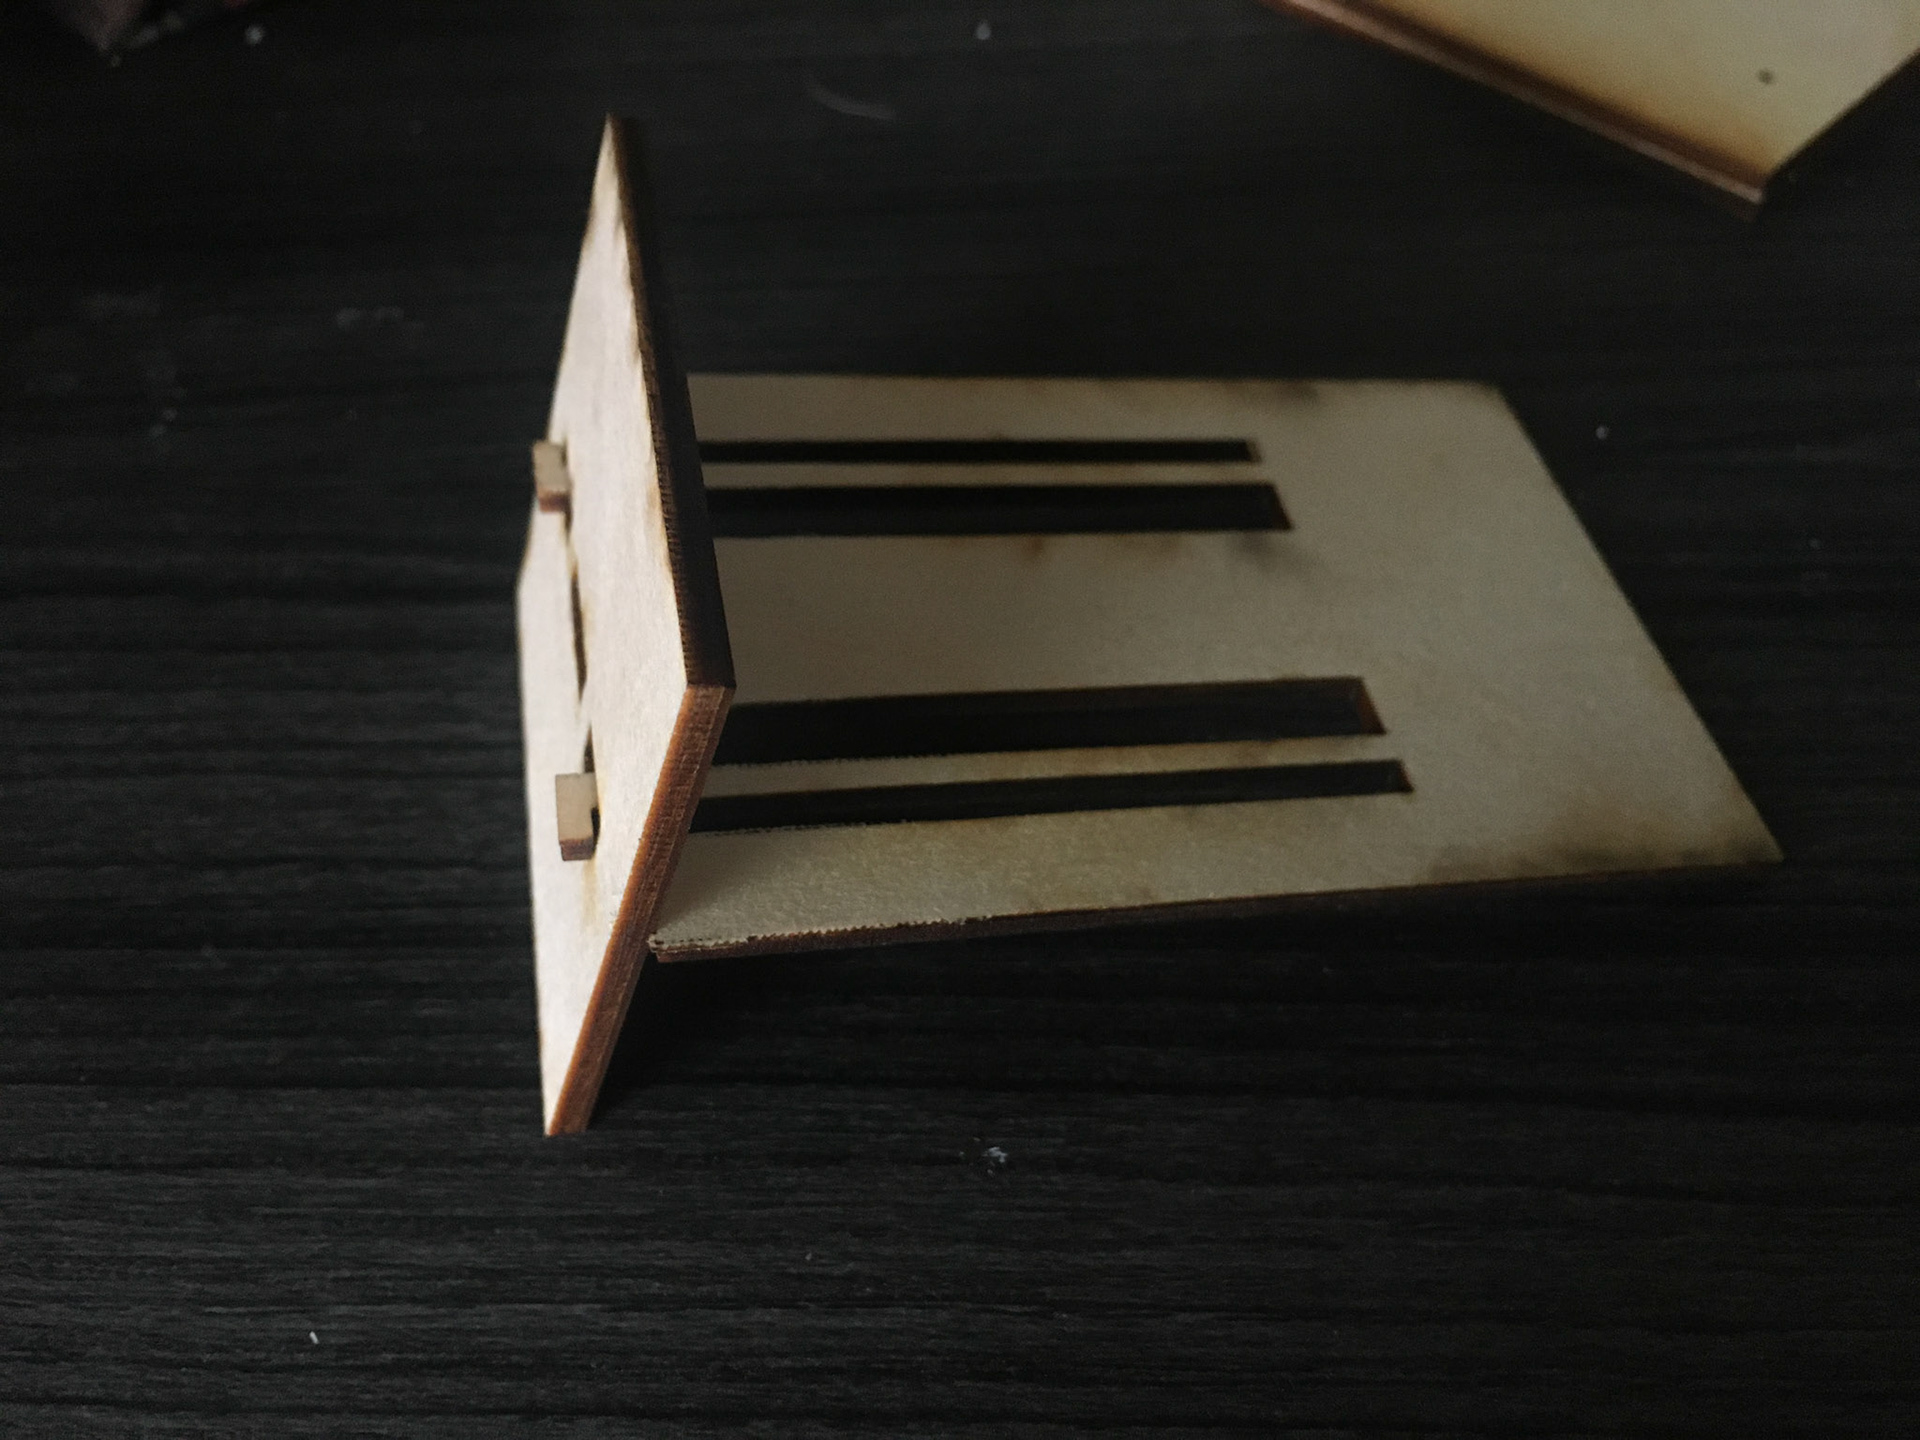
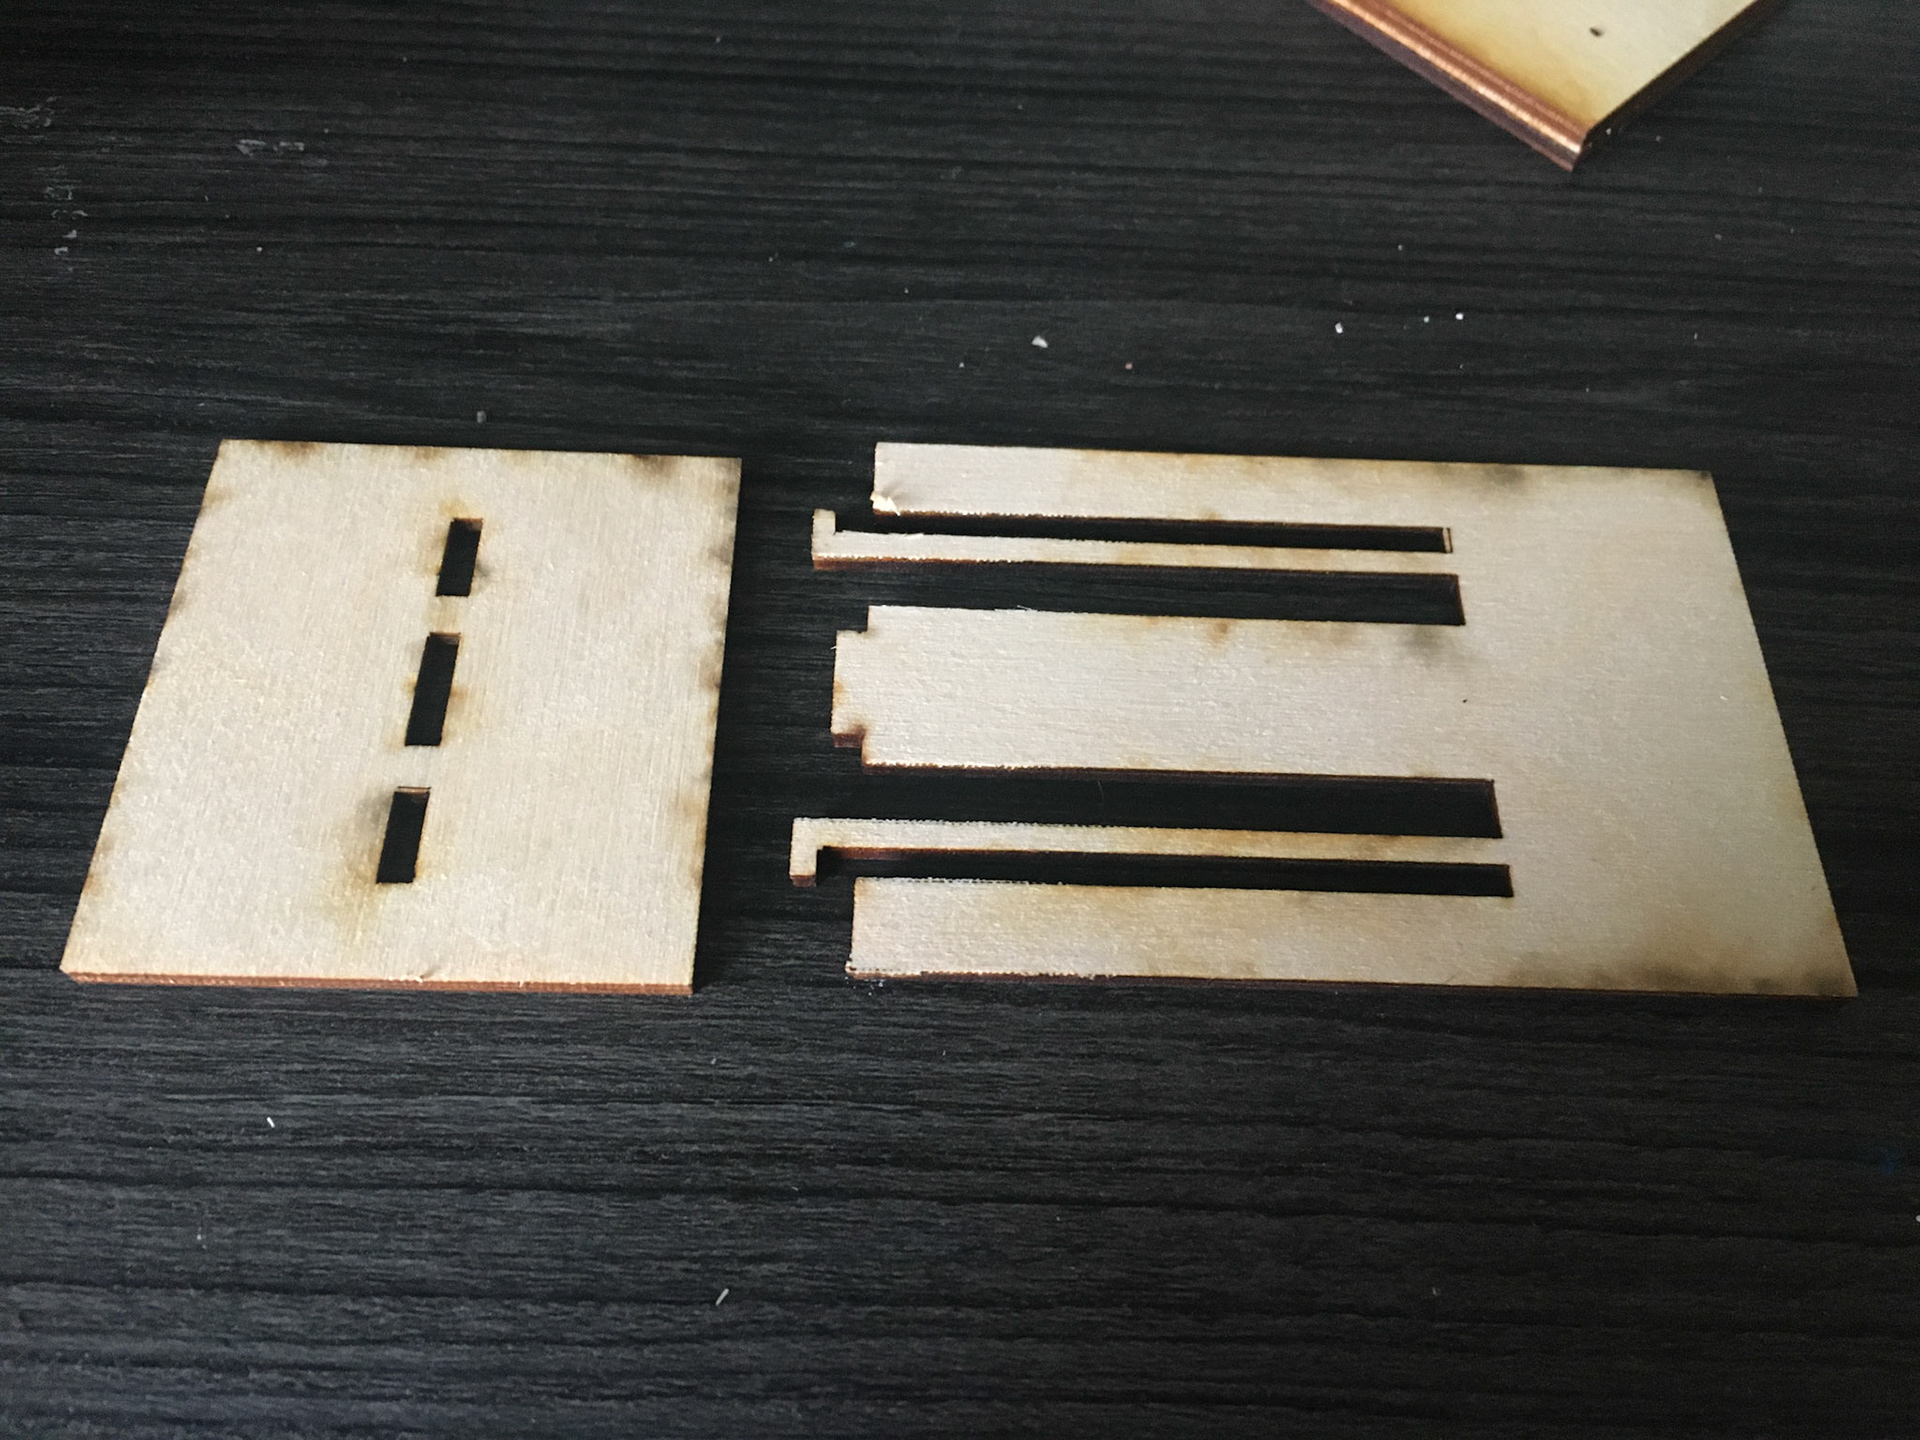
The other two joints are multi-layered joints, so I had to glue them together. The lapped-dovetail joint came out very well, the extra wood made the joint much more solid.
For the halving with elliptical tenons joint, I used the top piece to trace out the spot of the elliptical hold on the bottom piece before I glued it. This is an interesting angle joint